
![]() I’m of two minds about audio editing inside Final Cut Pro X. I like its ability to place and edit audio. But it comes up short when I need to clean-up poor audio or do some complex mixing. For this reason, I use Final Cut to mix audio for simple projects, but Adobe Audition when I need to get serious about my audio. (I don’t use ProTools because I’ve had such poor luck using iLoks.)
I’m of two minds about audio editing inside Final Cut Pro X. I like its ability to place and edit audio. But it comes up short when I need to clean-up poor audio or do some complex mixing. For this reason, I use Final Cut to mix audio for simple projects, but Adobe Audition when I need to get serious about my audio. (I don’t use ProTools because I’ve had such poor luck using iLoks.)
The problem is: how do you move projects from Final Cut Pro X into Adobe Audition, then get the final mix back when you are done? Explaining this process is what this article is about.
NOTE: I define a “simple audio mix” as containing, say, one layer of sync sound with a music bed that doesn’t require any special audio clean-up. For me, a complex mix contains dialog, narration, sound effects, and music which may, or may not, require special processing to clean-up bad audio.
EXECUTIVE SUMMARY
The key to this process is XML (eXtensible Markup Language). This is a special list of all the elements in your project which links to, but doesn’t include, media. This makes the XML file very small and portable, but also means that you need to include media if you send the XML file to any other computer except the one on which you created the XML file.
We start by exporting the project as an XML file, convert it to a format that Audition can read, then import that file into Audition.
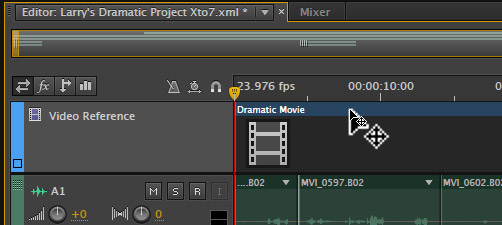
Because Audition, like almost all audio applications, only supports one video track containing one video clip, we then need to create a single movie file in Final Cut that we can import into Audition to allow us to watch the picture while mixing the audio.
After the mix is complete, we export the mix as a stereo file and import that back into Final Cut for final assembly.
NOTE: I have an entire training series dedicated to Adobe Audition CC. Learn more here.
SETUP
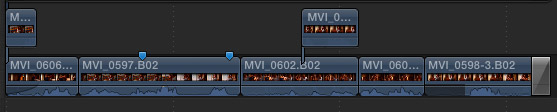
Here’s a simple dramatic scene for which I want to create an audio mix. (Footage courtesy of John Putch and his film “Route 30, Too!” – www.route30too.com)
NOTE: Normally, I would also spot in sound effects and, perhaps, music. But, for the purpose of showing how to move files between these two applications, the process is the same.
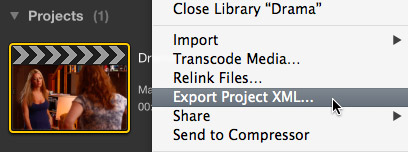
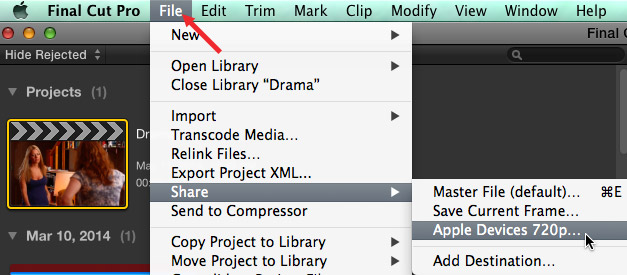
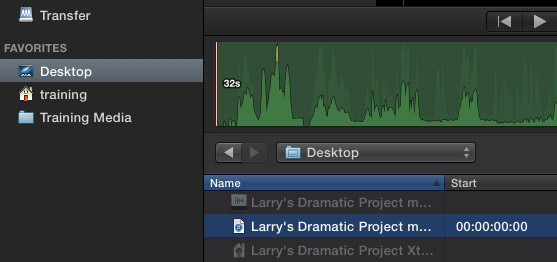
Select the project in the Browser and choose File > Export Project XML.
NOTE: If you don’t select the project, this menu option will say “Export Event XML,” which exports a list of all the media in your Event, which is not what we want for an audio mix. We would use the Event option when moving media to Media Asset Management software.
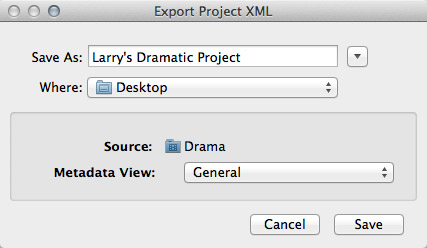
Give the exported file a name and location. Because the file is small and I often need to move it, I generally save the file to my desktop then figure out where I want to put it. Moving an XML file to different hard drives or folders on your system does not break the links it contains.
NOTE: The metadata options are very useful when exporting Events or Projects to be imported into Media Asset systems like Axle or Cantemo Portal. However, since metadata is not used in audio mixing, we can leave the metadata settings at their default of “General.”
SIDE NOTE

An XML file uses language similar to an HTML file with similar formatting. The screen shot above is a sample from this project. The good news is that, with experience, you can read the contents of an XML file. The even better news is that you don’t have to. The software we use handles all the details.
Whew!
CONVERTING THE FILE

An FCP X XML file can not be read by Adobe Audition unless it is converted into FCP 7 format. There is an excellent conversion utility, published by Intelligent Assistance, that handles this for us called “Xto7.” It’s available in the App Store and here’s a link for more information.
NOTE: While not everything in a Final Cut Pro X XML file converts into a different XML format, virtually all audio files, transitions and levels convert properly. Most effects do not, but, in general, we would add audio effects in Audition, not Final Cut.
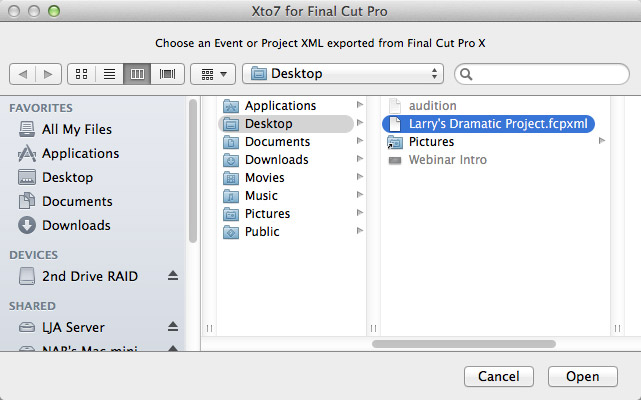
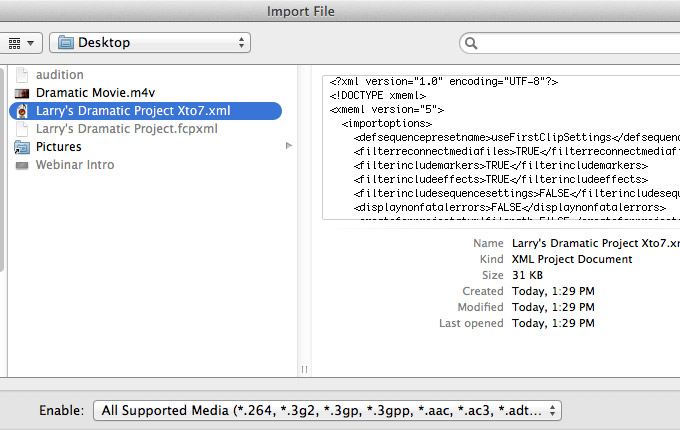
Start Xto7 and, in the file dialog, pick the XML file you want to convert. Here, I selected the XML file we exported from Final Cut.
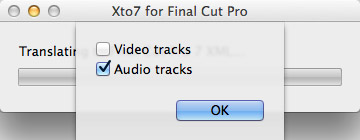
Next, we uncheck the Video Tracks option, because Audition only supports displaying one video clip per Timeline sequence. We’ll go back to Final Cut in a minute to create the video we need for our audio mix.
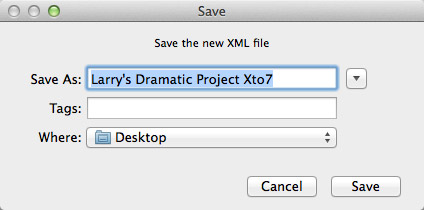
Finally, we need to name the converted file and pick a location. Again, this file can be named anything and stored anywhere. At this point, the conversion process is done.
CREATE A VIDEO FILE
Because Audition has a limit of one video track containing one video clip, we need to create a movie of our project in Final Cut to import into Audition. (Final Cut, by comparison, supports an unlimited number of video clips spread across an unlimited number of layers.)
Our goal here is not to create the perfect file, but to create a file which can be played easily from within Audition. This is because Audition is simply using that file as a visual reference. The actual video output will be done after the mix is complete using Final Cut Pro X.
For simplicity, I start with the default setting of Apple Devices 720p. This creates an H.264 QuickTime movie which can be played by most modern hardware. However, I customize it.
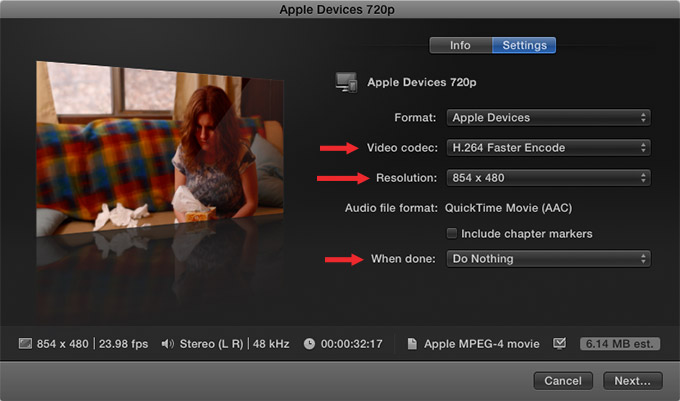
Because this is a reference movie, it doesn’t need a big image size, nor a tiny file size. For this reason, I select the easiest encode/decode – H.264 Faster Encode – and the smallest image size – 854 x 480 – that Final Cut allows.
NOTE: For mixes on older ProTools systems, I will often create 16:9 SD movies using the DV codec, which is even more efficient than H.264.
After a bit, depending upon how big and complex your project is, FCP X will export an .m4v file with the name and location you specify during the export process. You are now ready for Audition.
IMPORT INTO AUDITION
Open Adobe Audition CS6 or CC; the process is the same. Select File > Import > File. (You don’t need to specify that you are importing an XML file.)
Select the XML file you want to import (you’ll see a portion of the XML text on the right) and click Open.
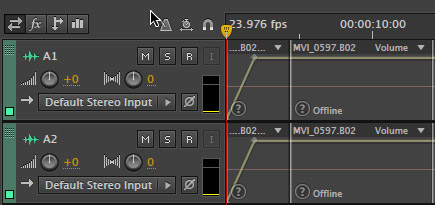
After a few seconds, all your files will be placed into an Audition Multitrack timeline. However, all sync audio will be offline, while all stand-alone audio clips will be online and ready to edit. This is because the sync audio is contained inside a synced media clip, which we need to relink to Audition.
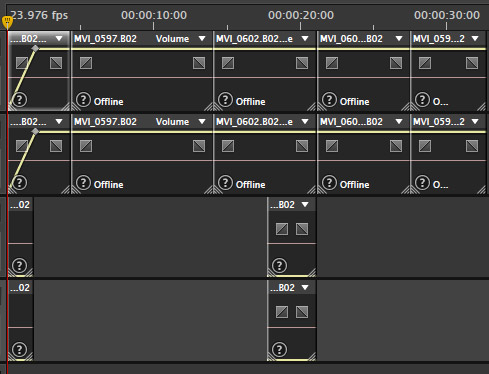
Select just the media in Audition that needs to be relinked.
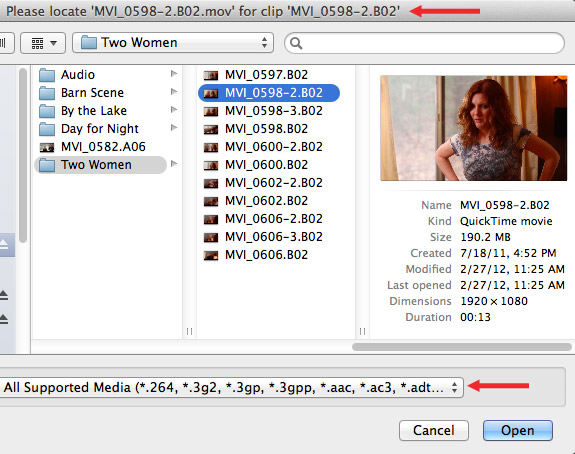
Choose Clip > Link All Media. Audition displays a dialog box with the name of the missing clip as the name of the dialog.
Navigate to where the media clip containing the missing audio is located, select it and click Open.
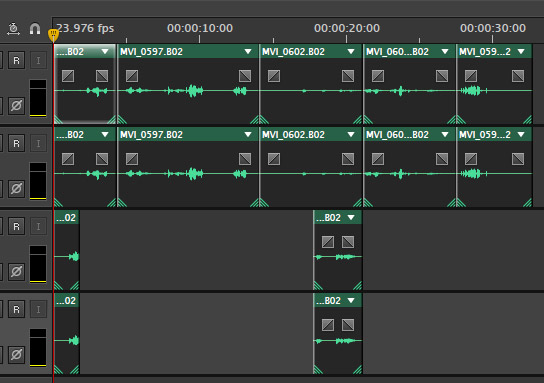
All missing media should now relink, not just that one clip. However, if not, select the missing media and repeat this process to relink the selected media.
SPECIAL TIP
There is a hidden menu option that makes working with synced audio less worrisome. I am always concerned that, by accident, I’ll bump my sync audio out of sync. And there is no warning in Audition if that happens, because almost all audio files don’t contain timecode to alert us to an out-of-sync situation.
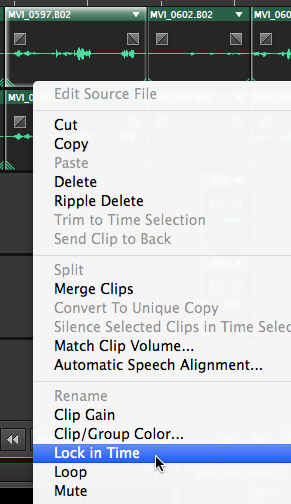
So, to prevent this shift, select all synced audio clips, but NOT any wild sound, and right-click on one of the selected clips. Choose Lock in Time. This allows you to trim clips and add effects, but prevents a clip from shifting left or right, which would cause it to get out of sync.
I recommend locking all synced clips as soon as you import them into an Audition project.
ADD VIDEO
To add the video clip, choose File > Import > File, navigate to the video file and click Open.
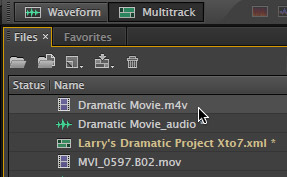
The movie file now appears in the Files panel.
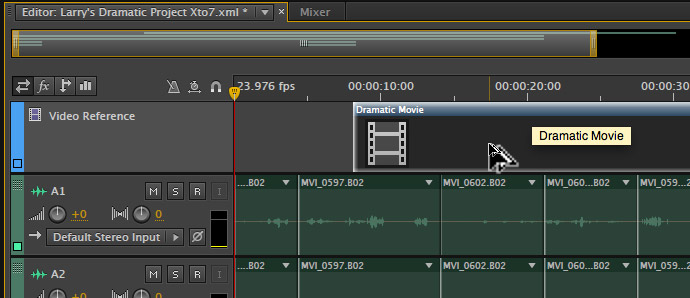
Drag the movie file and drop it anywhere in the middle of the Timeline. Audition will automatically create a new track for it at the top of the Timeline and insert the clip into that video track. (Audition only supports one video track containing one video clip per multitrack sequence.)
Drag the blue header bar of the video file all the way to the left in the Timeline so that it syncs with all the imported audio.
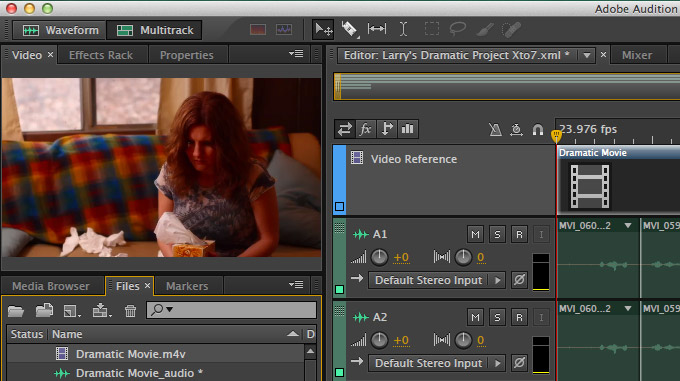
Finally, select Window > Workspace > Edit Audio to Video to see both the video and audio files. Audition will automatically play the video in sync with the audio whether you are dragging the playhead or simply playing the sequence.
At this point you are ready to start cleaning up and mixing your audio.
EXPORTING THE FINAL MIX
When all your clean-up and mixing is complete, we need to create a stereo pair to import back into FCP X.
NOTE: Audition also allows you to create stems, mono files, and surround mixes from the same sequence. The process is the same, you just need to change a checkbox during the export process.
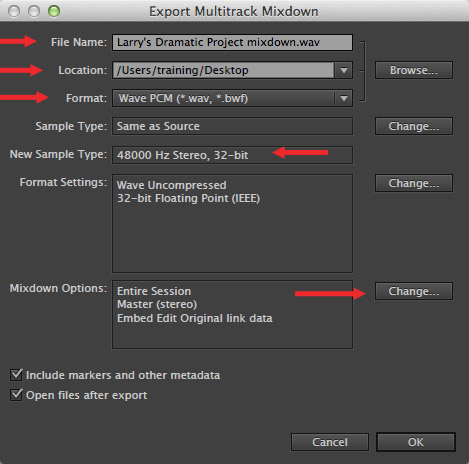
Open the sequence you want to export into the Timeline, if it isn’t already open, and select File > Export > Multitrack Mixdown > Entire Session.
In the Mixdown Settings window, give the new file a name and location. I then use the following technical settings:
The key dialog we need to set is a bit farther down: Mixdown Options. Click the Change button on the right.
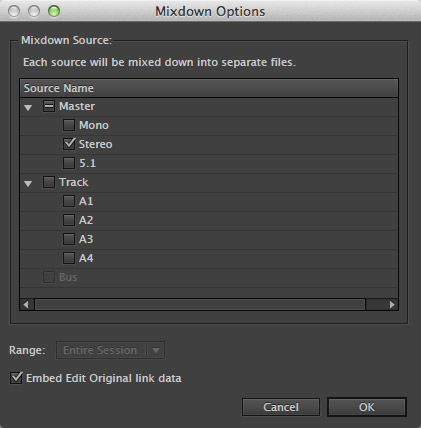
Then, check everything you want to export. In this example, I’m only exporting a master stereo file. However, you can also export mono, 5.1 surround and stems, if you have created busses as part of your mix. All files are exported at the same time.
Click the OK button to accept your settings.
Then, click the OK button in the “Export Multitrack Mixdown” window to begin exporting. Audition will create separate files for each mixdown option you check.
IMPORTING FILES INTO FINAL CUT
The last step is to import the finished mix into Final Cut and get it ready to export.
Open your project in Final Cut Pro X. Choose File > Import > Media and select the audio file you exported from Audition.
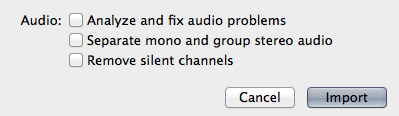
In the Import preference options, uncheck all the Audio checkboxes and click Import.
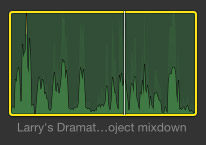
In Final Cut, select the entire audio clip in the Browser (type “X“) and…

drag it to the Timeline. Be sure the clip fits tightly against the left side of the Timeline window so that it syncs up with the video.
The last step is to mute all existing audio. The easiest way to do this is using Roles.
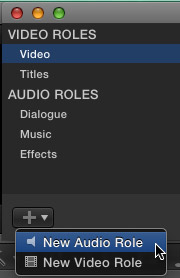
Choose Modify > Edit Roles and create a new Audio Role.

Name it “Final Mix.” (You can name this Role anything, but I like picking the obvious.) Then, click OK.
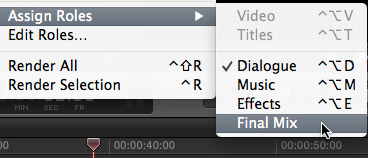
Select the Final Mix audio clip in the Timeline and choose Modify > Assign Roles > Final Mix.
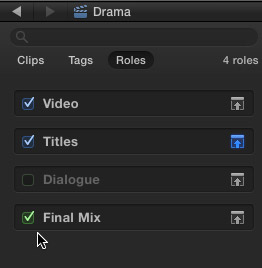
Finally, go to the Timeline Index and turn off all audio roles EXCEPT for Final Mix. Here, for example, Video and Titles are visible, while Dialog is inaudible and the Final Mix is Audible.
You are now ready to export your final project. Here’s a link that explains how.
SUMMARY
This sounds like a lot of work, and it is a lot of steps, but once you’ve done it a time or two, the entire transfer process takes less than a minutes, if you exclude the time necessary to export the video file. For simple projects I don’t use Audition. But for anything complex, the power and flexibility of Audition far exceeds anything we can do in Final Cut itself.
For that reason, Audition is an essential part of my video editing toolkit.
EXTRA CREDIT
To convert a Final Cut Pro X project to mix in Avid ProTools, export an XML and movie file as described above, then use X2Pro from Marquis Software to convert the XML file into AAF for ProTools. Do the mix in ProTools and export the final mix as a stereo pair. At which point, follow the steps above to import the file into FCP, and use Roles to enable the final mix.

2,000 Video Training Titles
Edit smarter with Larry Jordan. Available in our store.
Access over 2,000 on-demand video editing courses. Become a member of our Video Training Library today!
Subscribe to Larry's FREE weekly newsletter and
save 10%
on your first purchase.
7 Responses to FCP X: Move Projects To Audition
Thanks Larry for this nice article. Still, it’s much work before you can start audio editing. I don’t understand why Apple is waiting for so long to get that important chapter, audio mixing, straight. I think, when FCPx, will be recognized again by every professional editor, they need to enroll a major upgrade with all audio editing facilities like it was in the older SoundtrackPro. If that happens, FCPx will surpass PremierePro and even Avid (if it still exists by that time or perhaps bought by Blackmagic…).
I can’t imagine that the FCPx-production unit of Apple isn’t aware of this issue. Or perhaps they have to co-operate with Adobe (what I doubt) so there is one fluently workflow between FCPx and Adobe Audition. Or better: making “LogicPro X plus” dedicated to video/audio editing and with an option to work in progress with dedicated in-house music compositing using the main software LogicPro X.
As a huge fan and believer in Mac hard- and software, sometimes, I wonder why something is so obvious like this one (a real audio editing software package for videomakers for FCPx), the boys and girls from Cupertino are a little bit “too” confident that their is a shortage on software development that makes the real difference… 😉 I just started ‘thinking different’ hoping Apple will hear me too like so many other editors in the world complaining this same issue.
This article was a great help. Thanks.
I do have one question/problem though. After importing the audio into Audition some of the audio tracks have crackles that weren’t present in Final Cut. (The audio that gets the crackles are from video clips, but not all audio from video clips have this problem.) Did I do something wrong in the transfer process?
Brian:
This sounds like a sample rate problem. Make sure the sample rate of your Audition project matches the sample rate of your FCP clips. And, with Audition, you can’t change the sample rate after the multitrack project is created.
Larry
Dear Larry,
I had huge problems with my audio tracks in Audition post
exporting from a timeline in Audition.
The audio for some of my interviews was out if sync with the video by just a little.
… but not for all the interviews.
I wonder whether I needed to remove all the transitions
from my FCPX timeline and then exporting the FCPX XML file … Etc.
Basically this gave me so much of a problem that I have to think
twice before editing a film in FCPX.
Coming from a FCP6/7 background and being used to
Soundtrack Pro, the riddle of being unable to export audio in sync
to video when the Audition file was opened was just too much to take.
Do all video transitions need to be taken off the FCPX timeline prior to export to XML?
Thanks
Manish:
VERY strange. You should not need to remove dissolves, and I would expect wipes to work, as well.
Did you follow the workflow in this article: Export as XML from FCP X, convert using Xto7, then import into Audition?
And how did you get the file out of Audition? As a stereo pair or something else?
Larry
Manish:
I spoke with the folks that created Xto7 and they tell me that it is possible for transitions to cause a problem. If you’re goal is to do the final mix in Audition, you are best off not adding transitions in FCP.
Just a thought.
Larry
Dear Larry,
Thanks. Yes, problem was left unresolved… I edited the mix in
FCPX and just left it like that in the end… very frustrating as I could not get the mix out of FCPX.
The thing is it would have been a real issue to remove and
then put back transitions in a 42 min documentary with probably
a 1000 transitions.
I would say that its a serious flaw within both FCPX and the Xto7 software.
Would be great if I could somehow get it to Soundtrack Pro
or Audition without having to do this sort of thing in the future…
Thanks for the advice though Larry.