
![]()
Ratings are a fast way to organize your media in Final Cut. While not as flexible or powerful as keywords, ratings are fast, simple and effect.
NOTE: I’ve covered Ratings extensively in my Final Cut Pro X video training. However, I discovered this week that I’ve never written about them.
BACKGROUND
Ratings are new with Final Cut Pro X. Ratings allow you to quickly sort your clips into those you like, those you don’t and those you aren’t sure about.There are three possible ratings:
Ratings can be applied to entire clips or just portions of a clip. As well, ratings can be changed or removed at any time.
CREATE A FAVORITE RATING
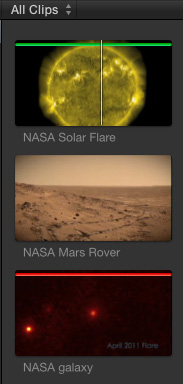
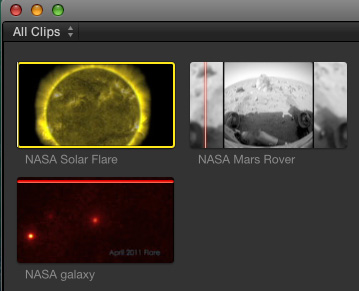
Here are three clips – each with a different rating, as indicated by the color bar (or lack thereof) at the top of each clip:
To create a Favorite clip, select the clip, or portion of a clip, that you want to mark in the Browser.
NOTE: Ratings can only be created in the Browser. They can’t be added to clips in the Timeline.
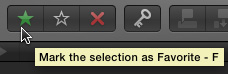
Then, click the green star in the Toolbar (shortcut: F).

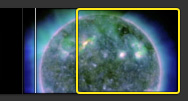
This displays a green bar over that portion of the clip that was selected. The green bar indicates a Favorite.
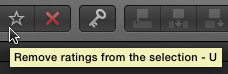
To remove a favorite rating, select the portion of the clip containing the rating you want to remove and click the white star, also in the Toolbar (shortcut: U).
CREATE A REJECTED CLIP
The process of rejecting a clip is very similar, but with different results. As before select the clip, or portion of a clip, that you no longer need.
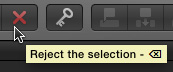
Then, click the red “X” in the Toolbar (shortcut: Delete). This does two things:
The clip isn’t deleted from your hard disk. In fact, it isn’t even deleted from the Event. But it is no longer visible. Why? Because of what you’ll learn in the next section.
TO VIEW, OR NOT VIEW, CLIPS
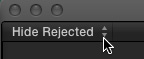
By default, the Browser has a menu choice that hides all rejected clips. See it at the top left of the Browser? Hide Rejected. When that menu is active (visible), all rejected clips are hidden and not displayed in the Browser.
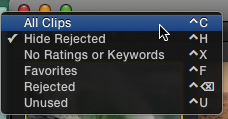
To see all the clips in your Event, change this menu to All Clips.
When All Clips is active (visible) all clips, even those you rejected, are displayed in the Viewer.
Other choices in this menu allow you to:
THE REAL POWER OF RATINGS
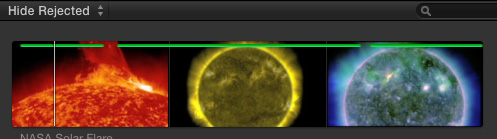
The real power of ratings is that you can apply them to multiple clips, or multiple portions of the same clip or clips. Here, for example, I’ve selected three different portions of the same clip. See the three different green lines at the top?
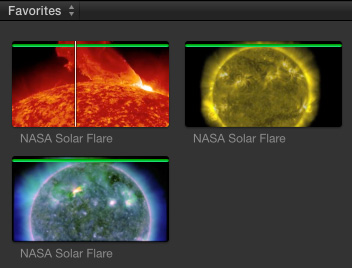
However, when I change the menu at the top to Favorites, only those sections of all clips marked as Favorite are displayed. Notice, here, I have three difference sections from the clip; but they act like three separate clips. (This is very similar to subclips in Final Cut Pro 7.)
NOTE: Favorites allow you to use a portion of a clip in the drop zone of a title or an effect.
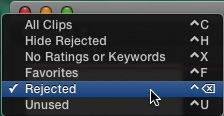
To see all the clips you’ve rejected, change the top menu to Rejected (shortcut: Control+Delete). If you want to un-Reject a clip, select the clip, or portion of a clip that you want to change and click the white star (shortcut: U).
You can set ratings for multiple clips, or multiple sections within a clip, by selecting what you want to rate and clicking the appropriate Rating icon; green star, white star, or red X.
SUMMARY
Using Rejected ratings allows you quickly remove clips from the Browser, without actually removing them. Using Favorites allows you to quickly display all the clips you like, without digging through all the clips you don’t care about.
Fast and easy. I like that.
EXTRA CREDIT
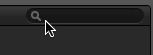
You can also search for Ratings, as well as keywords, using the Search box in the top right corner of the Browser (click the magnifying glass icon). Here’s an article that describes keywords and searching in more detail.
Here’s an article that describes using keywords to create subclips.

2,000 Video Training Titles
Edit smarter with Larry Jordan. Available in our store.
Access over 2,000 on-demand video editing courses. Become a member of our Video Training Library today!
Subscribe to Larry's FREE weekly newsletter and
save 10%
on your first purchase.
4 Responses to FCP X: Manage Media Using Ratings
You “label ratings or indicate what the clip contains”? Sure you can! Just rename the favorite in List view. Now it’s labeled and searchable.
Mark:
This is a GREAT tip and one that I didn’t know.
Thanks,
Larry
Is there a way to delete the rejected clips…as in out of the event and ultimately off the hard drive. When I’m done with a project I’d love to only archive the used clips. Any thoughts on this?
Nathan:
Right click on the clip(s) you don’t want, and select “Move to Trash.”
Then, quit FCP X and empty the Trash.
Larry