
![]() In an ideal world, all your green-screen source files are perfectly lit, with smooth flat backgrounds, well saturated with no gear visible.
In an ideal world, all your green-screen source files are perfectly lit, with smooth flat backgrounds, well saturated with no gear visible.
Sigh…. I would like to live in your world.
In my world, I’m lucky if I can even see the green in the background.
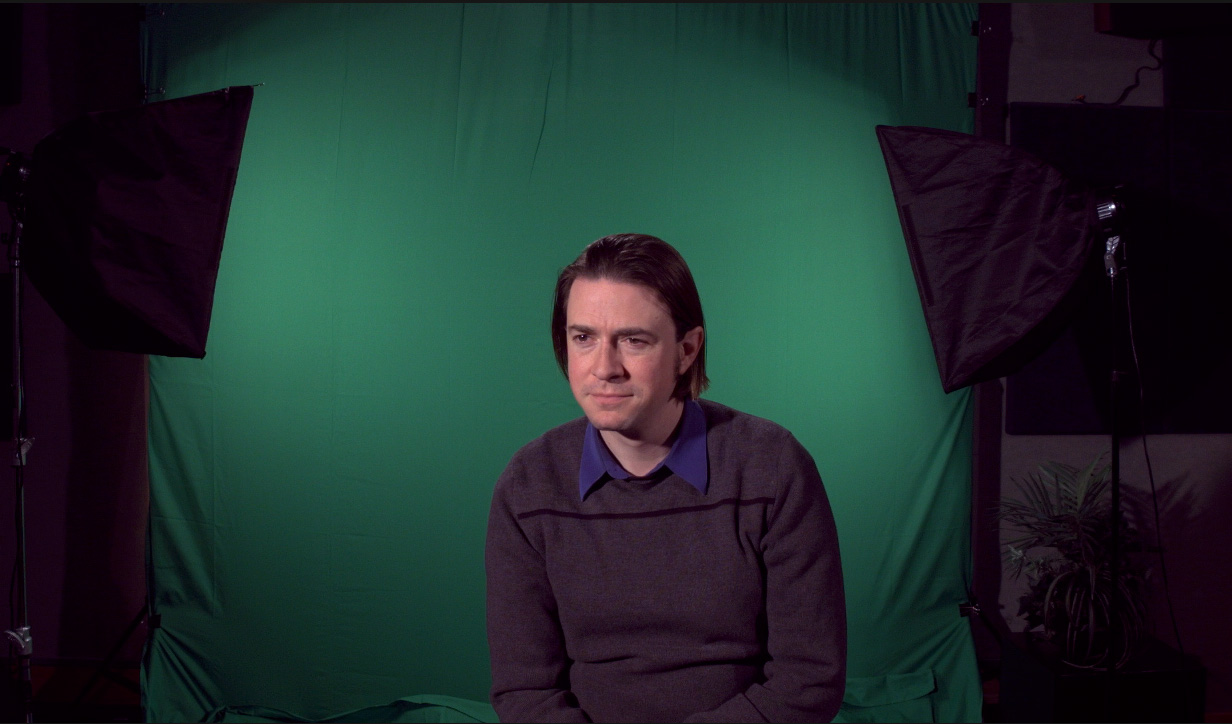
Here’s an example. Let me count the ways this shot is screwed up:
Oh! And did I mention that the lighting is awful?
NOTE: Just for the record, I lit this. And my story is that I did this as an example of what not to do. Personally, I think I was wildly successful.
CREATE THE INITIAL KEY
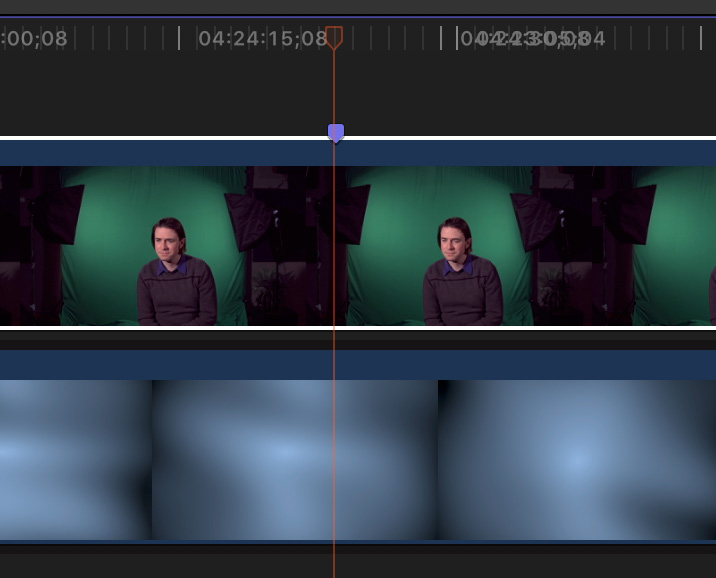
When editing clips for a chroma-key into the timeline, put the background into the Primary Storyline, with the foreground clip on a layer above it. Then, select the background clip and type V to make it invisible. I’ve found hiding the background helps during the initial setup.
Before we can clean this up, we first need to create the initial key.
The results are “better,” only in comparison to the original shot.
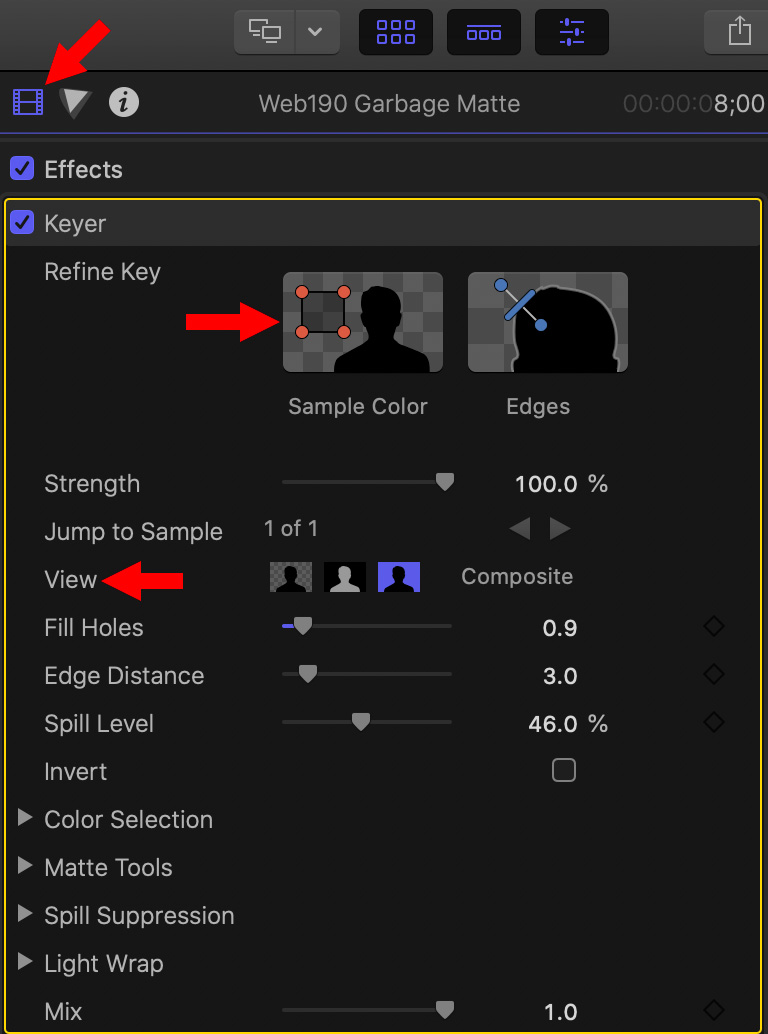
Open the Video Inspector > Keyer, then click the right (blue) View icon to display the original image (lower red arrow). Then, click the Sample Color icon at the top.
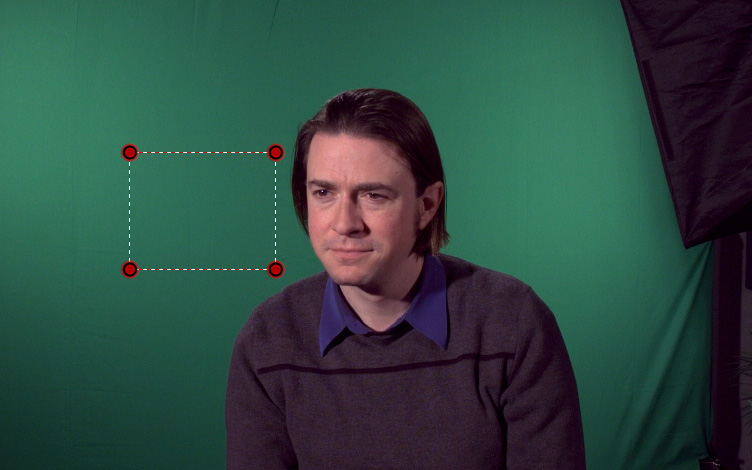
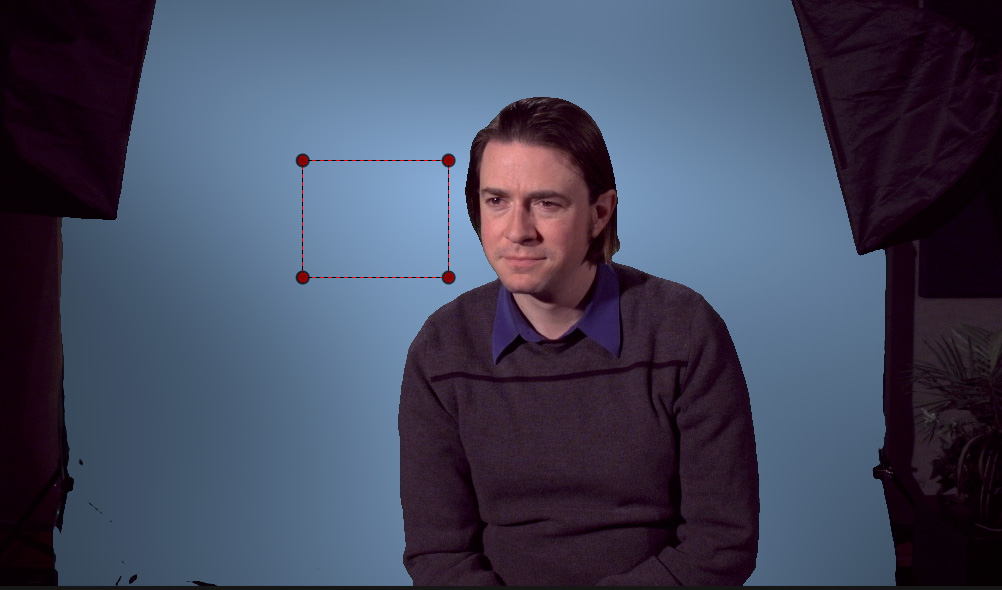
In the Viewer, drag a rectangle around a range of the background near the talent’s face to fine-tune the colors we want FCP X to remove.
NOTE: Be careful to only select colors in the background, avoid selecting any hair, skin or other objects. The reason for using an area near the face is that if the key around the face looks good, audiences will forgive problem areas elsewhere.
Finally, click the middle View icon to display a matte of the key.
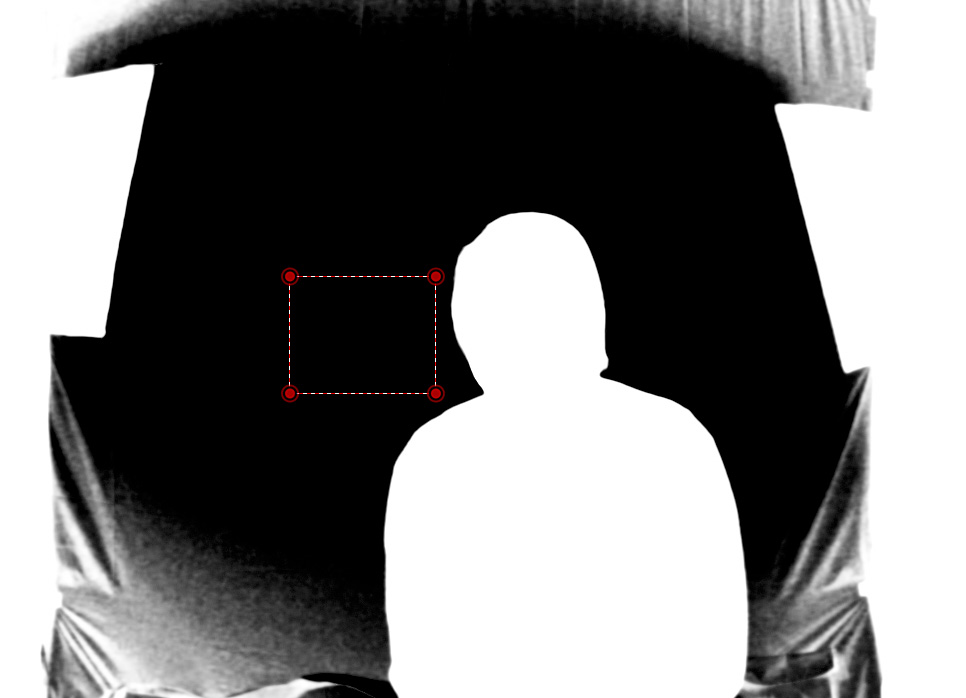
Tweaking a key while viewing the matte is a very helpful technique. Areas that are pure white are opaque. Areas that are pure black are transparent. Areas that are gray are translucent and need to be tweaked until they are either opaque or transparent. In other words, gray areas are the problem that you need to fix.
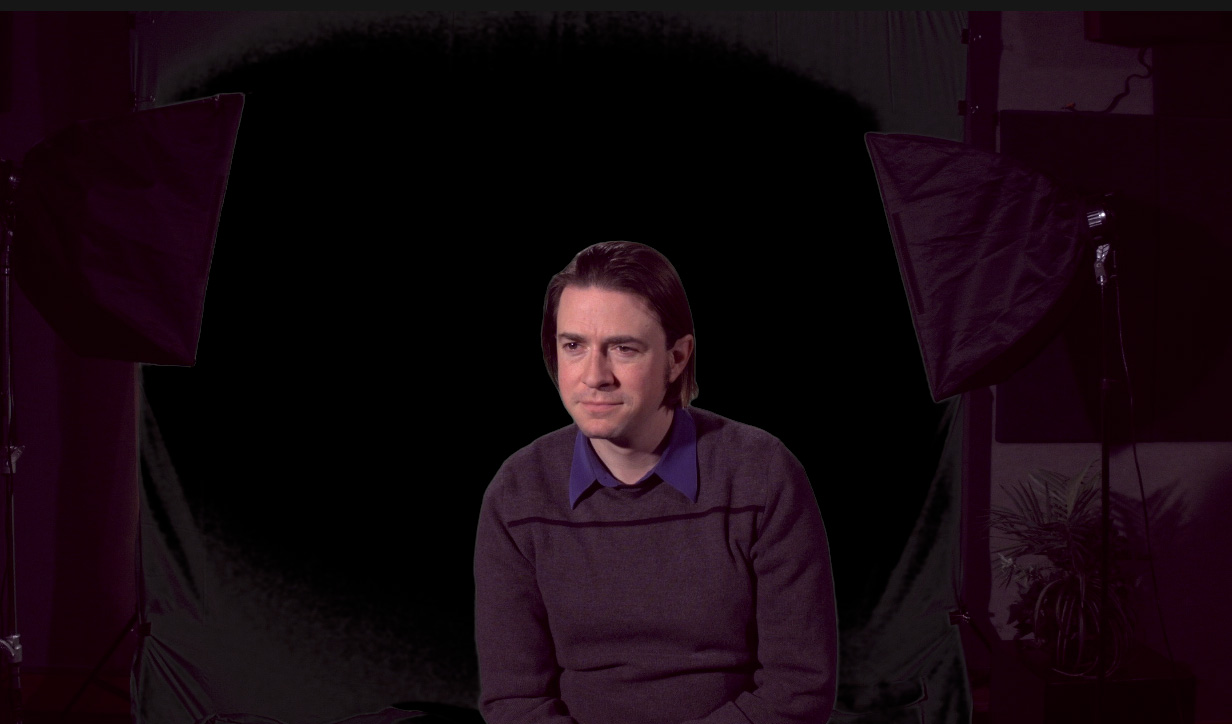
CLEANING UP THE KEY
Normally, the default settings of the Keyer are good enough to pull a clean key from a well-lit shot every time. But, the default settings were not designed for this shot.
Our goal is to get an area of solid black around the talent so that so we can use a mask to get rid of the garbage around the edges.
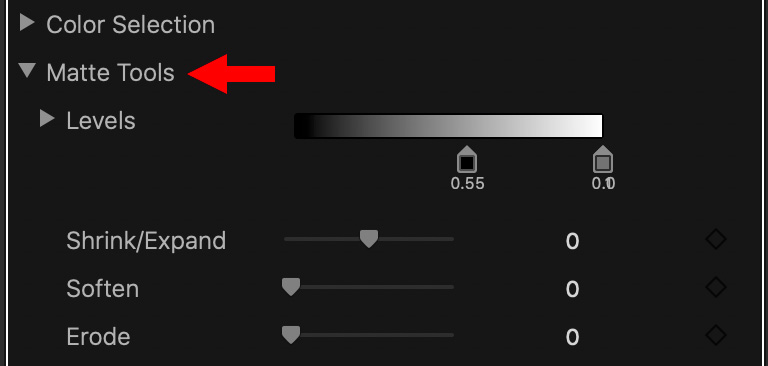
This image is SO dark that we need more powerful tools to separate the talent from the background. Matte Tools are designed to compensate for lighting problems. Twirl down Matte Tools and drag the shadows Level slider to the right – a lot.
Then, drag the midtones Levels slider to the right a lot as well. Watch the image, stop dragging when you have a solid black boundary around the edges of your talent.
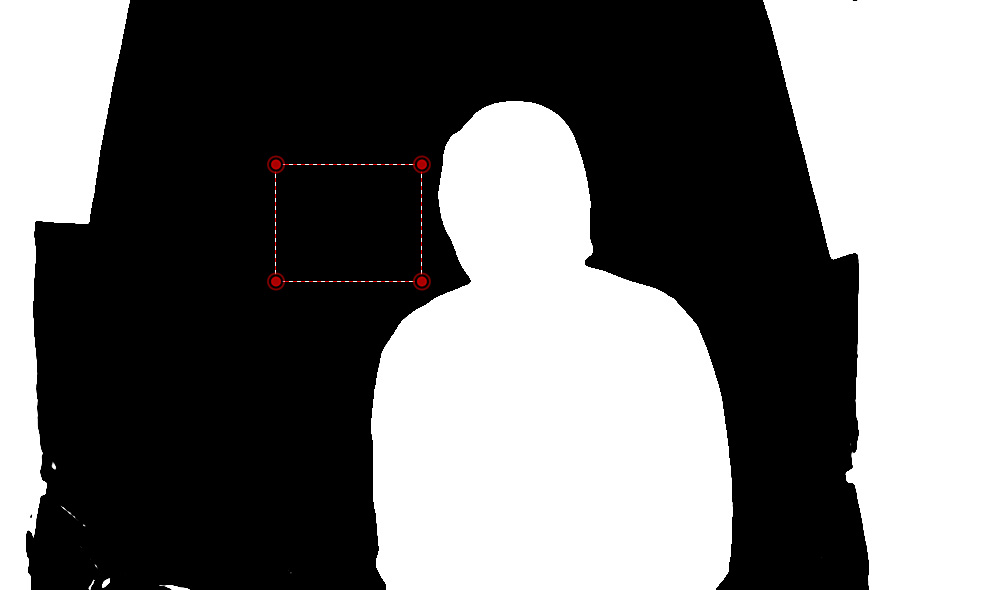
What we are doing is separating the edges of the talent from the background. Edges need to be sharp, with no gray. While every key is different, when you are dealing with poor lighting, the Levels settings are the first place to try.
NOTE: Fill Holes should be used when the body of the talent has holes or gray areas in it. Edge Distance should be used to better separate hair from the background. And Spill Level is used to reduce spill – that is, light from the background spilling onto the talent and giving them green edges.
Here, there isn’t enough light to cover the background, much less spill on the talent.
Here’s where are now – a nice clean key with garbage around the edges.
GET RID OF THE GARBAGE
Go to Effects > Masks and drop the Draw Mask effect on top of the foreground clip; that’s the one with the talent.
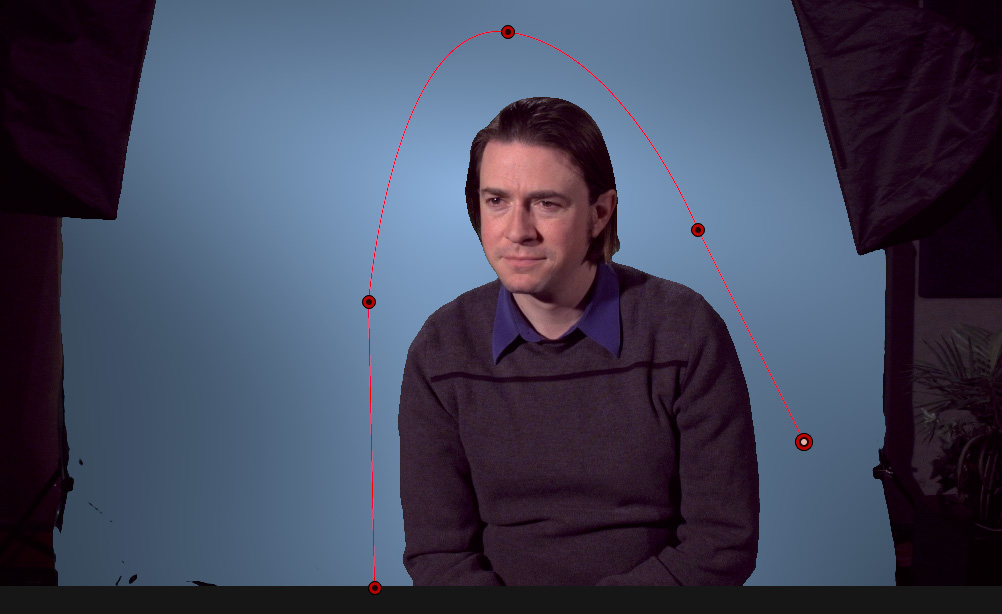
Using the Pen tool, which is automatically selected, draw a mask loosely around the talent. To create a curve, click and drag the Pen tool.
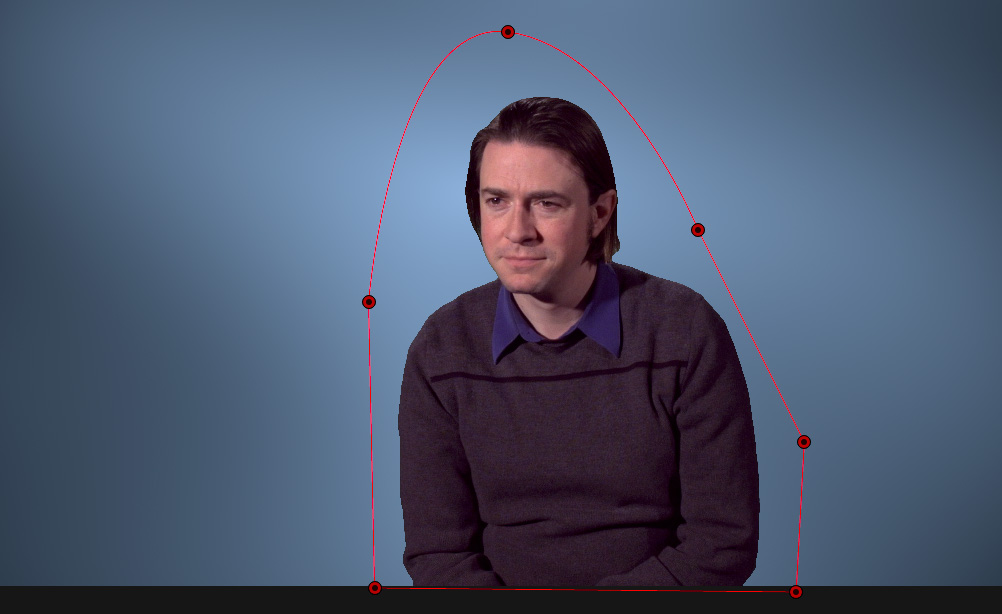
When you complete the mask everything outside the mask is removed!
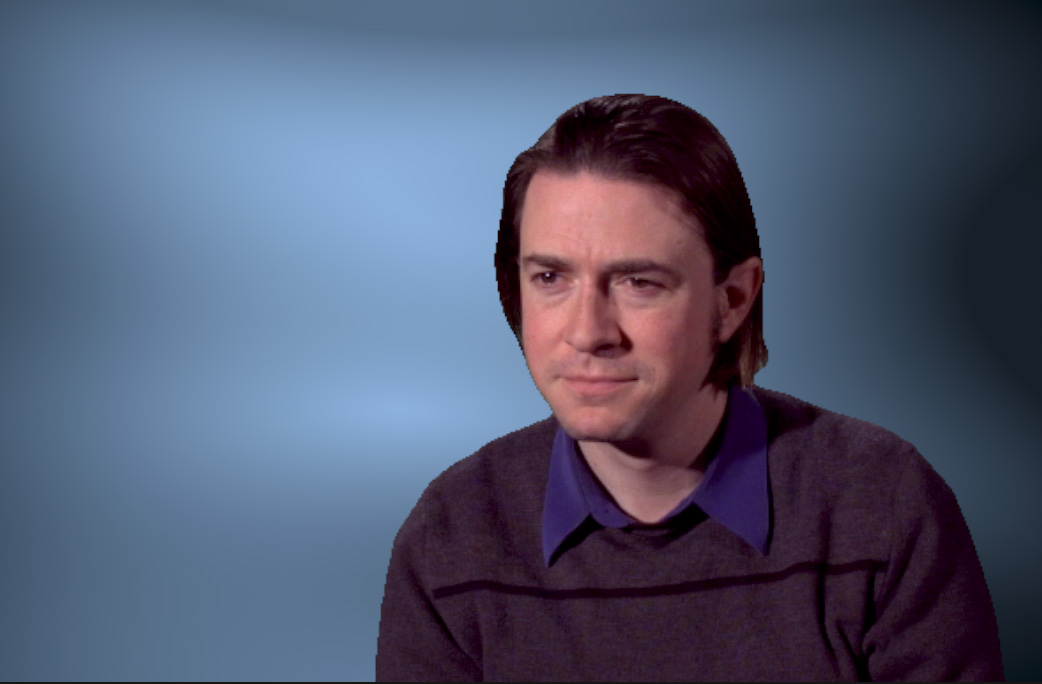
And, we now have a very nice key from a truly awful beginning. Don’t show this tutorial to the folks in production, though. Once they see what you can do in Final Cut, you’ll never get a clean shot out of production again.
EXTRA CREDIT

If you have talent with lots of spill, generally caused by placing them too close to the green background, using a background with some green in it will minimize the visibility of the spill. Viewers will think the spill is coming from the background. During production, try to get at least 10 feet between the background and the talent.

2,000 Video Training Titles
Edit smarter with Larry Jordan. Available in our store.
Access over 2,000 on-demand video editing courses. Become a member of our Video Training Library today!
Subscribe to Larry's FREE weekly newsletter and
save 10%
on your first purchase.