
 This last week, my team and I spent a lot of time rapidly editing videos for our upcoming Adobe Audition CC training release. The whole series is about 80 movies, and over the last few days, we’ve edited, exported, and compressed more than 40 of them.
My role in this process, aside from the original design and recording, is to review the final edit of each movie, output the file, and compress it for the web. Since spare time was in short supply, I was looking for anything I could do to speed this process.
And that was the genesis of this article.
THE BACKGROUND
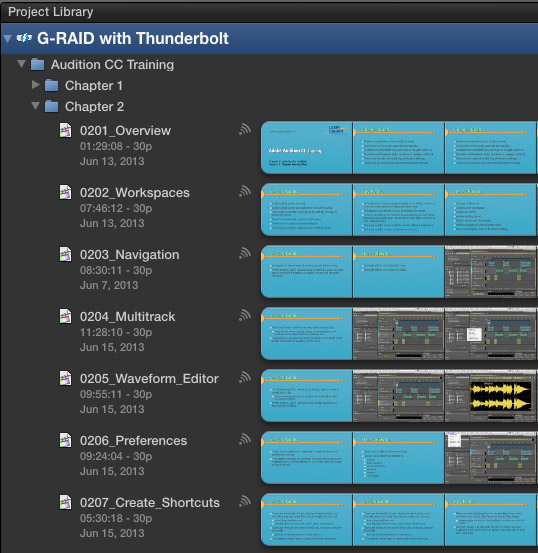
Because I didn’t want to install a beta version of Premiere Pro CC on my main editing system, we edited the videos in Final Cut Pro X. Here, for instance, are some of the movies in Chapter 2 – Learning the Interface, displayed in the Project Library.
As you may know, FCP X does not have a Batch Export function. However, as I discovered, that’s not a big deal, because it does have background processing for all exports, which, if you know the secret key combination, makes exporting very fast.
THE TECHNIQUE
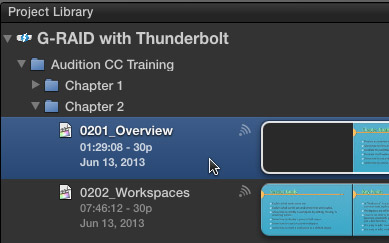
Select the first movie you want to export by clicking its name in the Library.
Type Command+E, which is the default keyboard shortcut for exports. (You can set this in Final Cut Pro > Preferences > Destinations.)
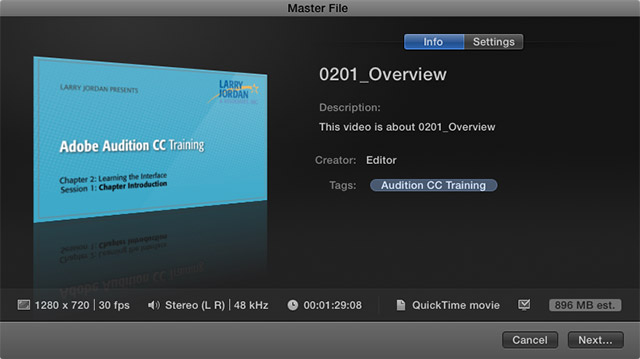
This opens the export window. I always export my projects as Master Files, using ProRes 422, which is the default setting. I then compress the files for the web as a second step on a different computer. However, this Export window remembers the settings you used on your last export, so spend a minute customizing this as necessary. The only changes I generally make are to turn Chapter Markers on, or off.
Press Enter to accept all the current export settings.
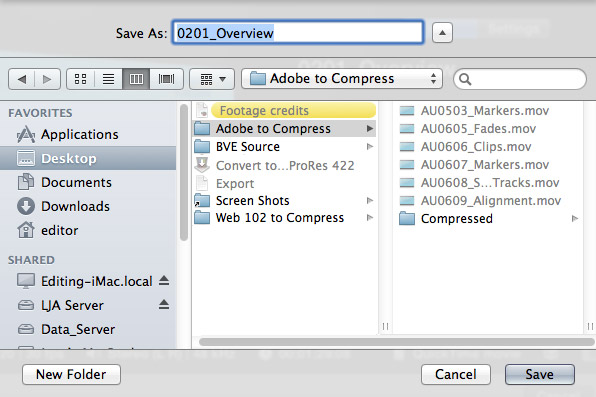
The File Save screen appears, where the default name is the name of your project. I always name my projects in a manner suitable for exporting, so I don’t need to change anything.
This window also remembers the last folder location to which I exported a file. Prior to beginning this project, I created a folder called, in this case, “Adobe to Compress,” as the single location I would use to store all my exported files.
Since nothing in this window needs to change, I press Enter as soon as it appears. This accepts the default file name and location.
NOTE: When I am not working on large projects that generate lots of files, I normally export to a folder named “Exported Files to Compress.” The key is not the name of the folder, but to have a common destination, so I don’t have to keep wondering where I stored an exported file.
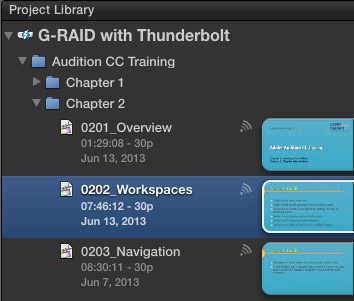
Final Cut starts exporting the file and returns to the Project Library. Press the Down Arrow key to move down the list to the next Project that needs to be exported.
Then, type Command+E to begin the export process again.
I timed myself. One chapter had 11 files to export. I had them all exporting in less than 30 seconds; which is about how long it would take me to create a batch export list in Final Cut Pro 7. Here is the key sequence:
Cmd+E — Enter — Enter — Down Arrow [ repeat as many times as you have files to export ]
Final Cut Pro X exports in the background. This means that, as long as you don’t close the application, you can view other files, continue to edit, or, just let the system run. Any necessary rendering will also be done during the export. There’s no limit to the number of files that can be queued for export.

To monitor the status of your exports, click the small clock to the left of the timecode display in the Toolbar.
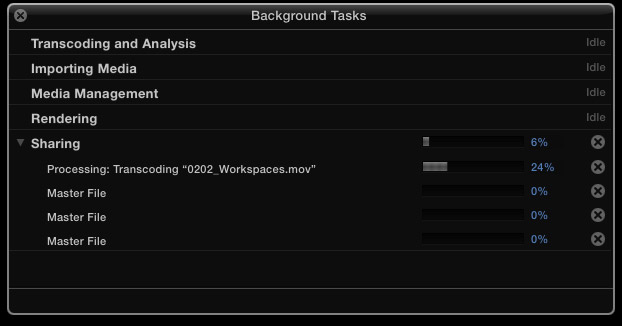
This opens the Background Tasks window where you can monitor your exports. When all files are exported, indicated by a value of 100% in the small clock, or no active jobs in the Background Tasks window, you can quit Final Cut Pro X.
I rarely have more than 12 media files to export at one time and this technique makes exporting very, very fast.
Visit our website to see Final Cut Pro Training & more!

2,000 Video Training Titles
Edit smarter with Larry Jordan. Available in our store.
Access over 2,000 on-demand video editing courses. Become a member of our Video Training Library today!
Subscribe to Larry's FREE weekly newsletter and
save 10%
on your first purchase.

18 Responses to FCP X: High-speed Export Trick
Newer Comments →-
 Jakob Peterhänsel says:
June 17, 2013 at 6:54 am
-
 Erik Olsen says:
June 30, 2013 at 7:25 pm
-
 Lisa Johnson says:
July 11, 2013 at 11:23 pm
-
 Todd says:
August 22, 2013 at 6:27 am
-
 Larry says:
August 22, 2013 at 7:44 am
-
 Egon Freeman says:
September 6, 2013 at 12:36 pm
-
 Egon Freeman says:
September 6, 2013 at 12:41 pm
-
 Claire says:
September 18, 2013 at 11:38 am
-
 Larry Jordan says:
September 18, 2013 at 11:55 am
-
 Peter Swanson says:
November 14, 2013 at 6:06 pm
Newer Comments →Remember that fcpx also does Not need the projekt to stay the same while the export is running!
You can continue editing the event, or even remove the content completely and replace it with other content you need exported, as soon as you have queued the export!
Very handy if you just need export of event snippets 🙂
Excellent workflow… have been using this method to publish to YouTube, but it takes for ever…. I like the idea to export to a master file default ProRes 422. After sending files to the compressor to crunch for YouTube, is there an automatic publish to YouTube option in compressor as it is in FCP-X?
omg. I can go to bed tonight instead of staying up all night doing this one at a time. I have 17 short videos to export. Thank you, thank you, thank you.
What version are you running? When I save the 1st file it will not go back to the library until the first file is exported. Help?
This works in any version of FCP X starting with 10.0.6.
REMEMBER, you must be IN the Project Library when you start exporting. Don’t export from the Timeline itself.
Larry
There is a small bump with exporting in FCPX, though. The total completeness does NOT reflect the actual export status. As in, 20% doesn’t mean “20% of all exports”. So You really HAVE to look at the details to tell how for along You actually are…
You see, what happens is – when FCPX finishes an export, it removes it from the queue, and the “100%” gets recalculated on the remaining files. So if You have 5 files to export, after the first one is exported at total 20%, it’ll go back down to 0% and finish the second file at 25%, go back to 0%… and so on (34%, back to 0%…, 50%, back to 0%… and finally 100%). The exports will gradually SEEM faster as well, but that’s just a side-effect of this math. It’s technically correct, yes, and completely useless.
Also, IIRC, at 10.0.9 I am sure it works no matter where You export from. You can mix and match, and they will still finish. I’m pretty sure it worked like this before.
I think this is also the only way to get rendering done without pauses for editing (some background tasking, meh). The downside is that You end up without a complete render in the timeline (!) – and this can sometimes be a bummer.
On a side note (and hence a separate post), for those of You automator-inclined, it IS possible to have FCPX give You the total percentage (by the use of “tell application ‘Final Cut Pro’…”), as it doesn’t move around in the control tree. That way, when the 100% holds up for, say, more than 5 minutes (to be extra-careful), You can “Tell application ‘System Events’ to Sleep”. It’s a nice fire-and-forget method, and it hasn’t failed me yet.
So I had a lot of extra time on my hands one day…
For some reason this isn’t working for me. Everything seems fine until the file starts exporting. Then it’s impossible to do anything on FCP X… the down arrows don’t scroll through projects and the screen shows “Exporting “Story Name” to “Location” with a percentage of how far along it is. Am I doing something wrong?
Thanks for your wisdom on this!
Claire:
It may be that your computer is too slow, or that you don’t have enough RAM. There’s no “wrong” way to do this – so I tend to suspect your hardware.
Larry
Is anyone asking Apple to include a batch export function? It seems an obvious oversight.