
![]() Normally, we add a mask to a clip to hide something in the edges. However, this technique shows you how to add a mask so you can zoom a clip inside the mask.
Normally, we add a mask to a clip to hide something in the edges. However, this technique shows you how to add a mask so you can zoom a clip inside the mask.
Its a simple trick, but requires a shift in how we think of masks — because in this case, we are not applying the mask to the “foreground,” we are applying it to the “background.” (Um, even though the background is on top… I know, it’s weird, but just watch.)

Here’s the finished result. Let me show you how we got here.
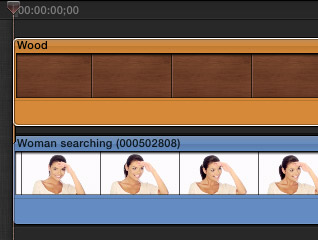
Start with a two layer effect. Place the image you want to zoom into on the bottom in the Primary Storyline. Above it, add the background clip – in this case, I used a Wood generator, with the texture set to Walnut 2.
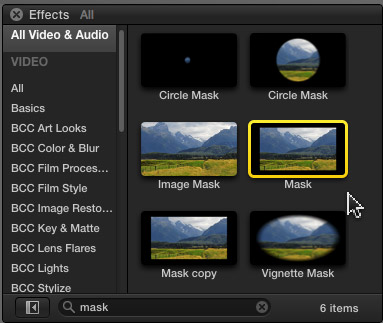
In the Effects Browser (Command+6) search for Mask using the Search box at the bottom of the Browser. Then, drag the Mask effect on top of the UPPER clip — in our case, the wood generator.
Hmmm… Not exactly what I had in mind.
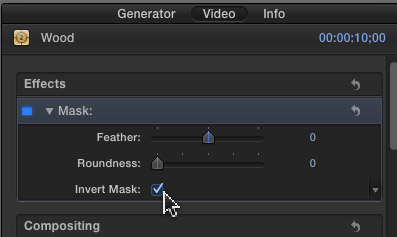
Go to the Inspector (Command+4), click the Video tab and click the Invert Mask option to turn it on.

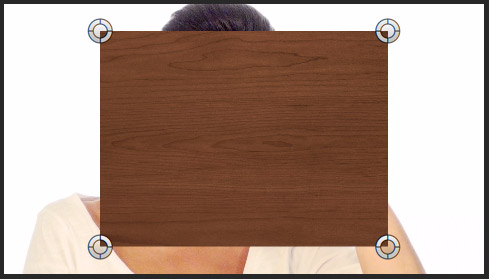
Whew. Better.

Drag the four corner circles to form the shape you want.
NOTE: If I make a mistake in positioning the dots, I’ve found that clicking the reset “Hooked Arrow” does not reset the positions of the dots. I find it easier to delete the filter and add a new copy from the Effects Browser to reset the dots back to their original positions.
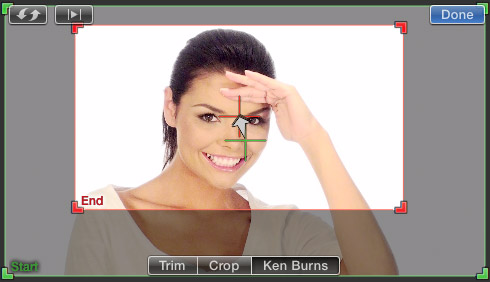
Now, you can add a Ken Burns effect to the bottom clip, or change scale using keyframes to get the lower image to zoom inside the mask, without changing the size of the mask.

NOTE: The Mask effect does not allow dot positions to be keyframed, though you can keyframe both Feather and Roundness.
Done.
EXTRA CREDIT
Because the Mask effect in Final Cut Pro X is so limited, there are a number of high-quality alternatives from 3rd-party developers. Do a Google search for: “Mask Effects for Final Cut Pro X”.
Visit our website to see Final Cut Pro Training & more!

2,000 Video Training Titles
Edit smarter with Larry Jordan. Available in our store.
Access over 2,000 on-demand video editing courses. Become a member of our Video Training Library today!
Subscribe to Larry's FREE weekly newsletter and
save 10%
on your first purchase.
2 Responses to FCP X: An Animated Mask Trick
I have tried this over and over and over and cannot get it to work……
At one time, I did the longest work-around ever: I figured where my mask would have to move, and just spliced the clip there, and moved it. Worked wonders for some post-haste keying work, but it was a major pain.
This is a true workaround in the spirit of it. The idea is to get the same effect by shifting perspective. For those of You still feeling a bit confused by this, think about it this way:
if You moved the world in the opposite direction, instead of Your camera, wouldn’t it produce the same result?
That’s the point. It would. Instead of actually animating the mask (which, at this time, is impossible in FCPX), we animate the footage (which we can do). And if You can’t animate the footage that has the mask on (this sometimes creeps up!) because the stubborn mask refuses to move, just enclose the clip in a compound one. And if THAT still doesn’t work, apply a filter that doesn’t do much to it – even with all options turned all the way down, it will still force the clip down a render pipeline, and produce a clean, “animatable” frame (as it must), hopefully not so stubborn this time…
This also works wonders against suprises like “Why is my zoomed-in footage still bigger than the window?”, by the way.