

[ Updated July, 2014, with additional information on the best way to create keyframes. ]
In creating my new Final Cut Pro X training, one of the new features that I was intrigued by was not so much a new feature as a bug fix which made an existing feature work a lot better. Let me illustrate.
THE WAY IT WAS
In “the olde days,” before the update, keyframes had two states:
When keyframes were set to linear, effects would progress at a steady speed and direction. When keyframes were set to smooth, an effect would start slowly and speed up in the middle, then slow down at the end. However, and it was a BIG however, smoothing almost always caused images to shift position. Sometimes dramatically.
A lot. It drove me nuts.
THE WAY IT NOW IS
With the update, Apple “eliminated unintended movement between smooth keyframes which use position parameters.” So, let’s take a look at how this works.
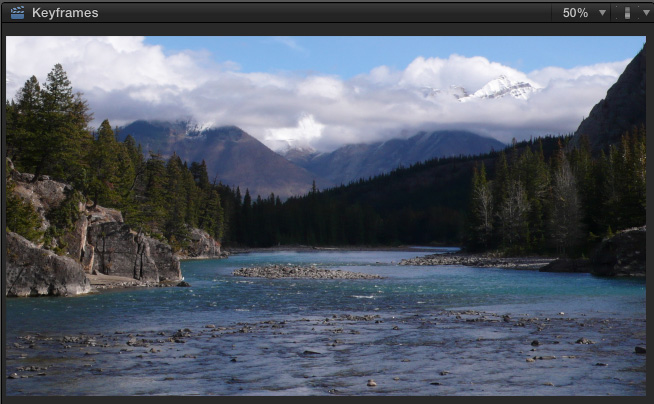
Here, for example, is a photo I took of the Canadian Rockies near Banff. (It is hard not to take a beautiful picture around there.) I want to create a zoom into the peak in the top right corner of the image.
To start, I created this image at 2133 x 1200 pixels – larger than the 1280 x 720 project I was editing it into. This allows me room to zoom into an image without losing quality.
NOTE: To keep image quality as high as possible, avoid zooming much higher than 100%. Beyond that, you are creating fat pixels, which make your image look soft.
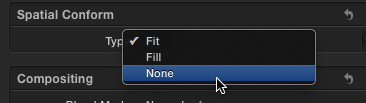
To make sure FCP lets me use all those pixels, I selected the clip in the Timeline, opened the Inspector and set Spatial Conform to None. This displays the image at 100% size, without scaling it to fit the project.
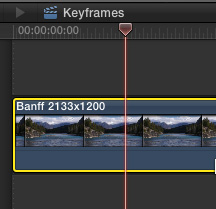
Next, I put the playhead where I want the move to start and selected the clip.
NOTE: The “Ken Burns effect” always runs for the duration of the clip. If you want a move to start in the middle of a clip, you need to create that move manually, or split the clip.
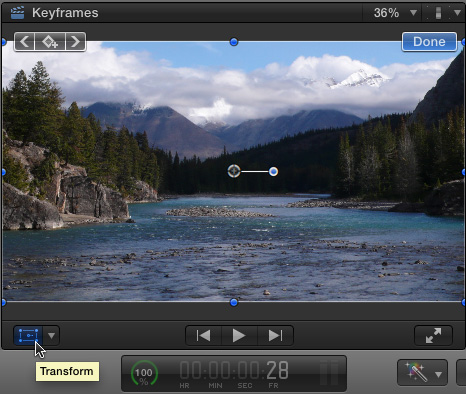
Click the rectangular Transform icon in the lower left corner of the Viewer to enable the on-screen Transform controls.

We could set keyframes using the keyframe button in the top left corner of the Viewer, but that sets keyframes for all Transform parameters; or Crop or Distort if one of those was being adjusted in the Viewer.
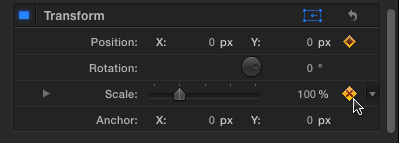
Instead, I manually set keyframes in the Transform section of the Inspector by click the gray keyframe icon to change its color to gold. (Roll your cursor over the icon area to make the icon appear. They are invisible until your cursor gets close to their location.)
NOTE: When the keyframe icon is gray it means that no keyframe for that parameter exists at the current position of the playhead. When the icon is gold, a keyframe exists at the playhead position.
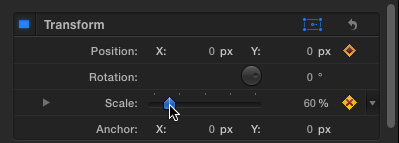
Since the image is larger than full-screen, I reduced the Scale until the full image appears in the frame. In this example, I scaled the image smaller to about 60%. The percentage will vary based upon the size of the original image.
NOTE: FCP is a video editor. It really doesn’t like big images. From my experience, in talking with other editors, I recommend that you keep all still images to 5,000 pixels on a side in FCP or smaller. Giant images choke the system. Scale them in Photoshop as necessary. For my editing, I never work with images larger than 4,000 pixels on a side.
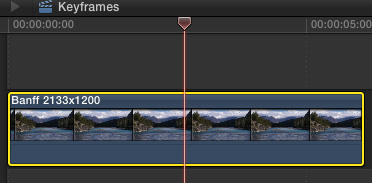
Next, I want to zoom into the peaks on the left, so I position the playhead in the middle of the clip where I want the zoom to end, select the clip, adjust Scale in the Inspector to the amount I want, then adjust the on-screen Transform controls for the position I want.
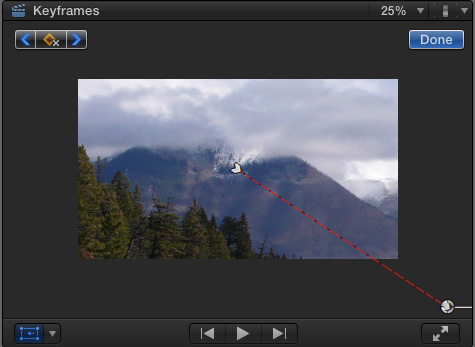
Final Cut automatically sets keyframes for all Transform parameters as soon as I change one of them. (While I wish it would only set keyframes for those parameters that already have keyframes set, setting keyframes automatically is a nice feature. However, if you aren’t paying attention, you’ll discover that keyframes have been set when you weren’t expecting it; as FCP sets keyframes whenever you move something in the Viewer or Inspector once you’ve set a single keyframe.)
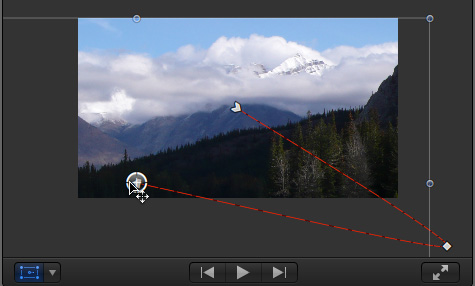
Finally, I position the playhead in the clip where I want the move to end, and slide the image in the Viewer to the final position where the snow-capped peak is positioned where I want it.
NOTE: Again, FCP sets keyframes for all transform parameters at the position of the playhead, not just the position keyframes that I moved.
THE INTERESTING PART
In the past, because the portion of the image we are zooming into is very close to the edge of the image, if we set the keyframes to Smooth, the image would skate past the edge of the frame; revealing black edges.
Not any more.
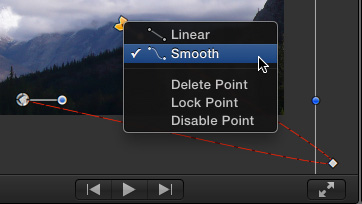
First, right-click any of the keyframes. Note that the keyframe defaults to Smooth.
Smooth means the movement will accelerate from the keyframe, become fastest in the middle of the move, then slow down at the end as it gets close to the next keyframe. It then repeats that speed-up / slow-down process from one keyframe to the next until it reaches the last keyframe.
NOTE: Linear means that speed is constant during the entire move and that all keyframes create sharp corners, not curved corners.
In the past, smoothing would also change the position of the image. But, with the 10.1.2 update, that is no longer true. The image now accelerates and decelerates properly without shifting position
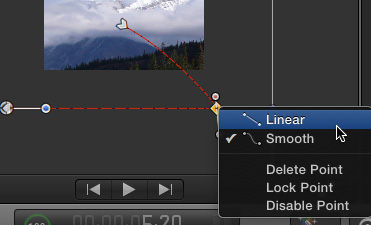
To remove the acceleration, right-click each keyframe and set it to Linear.
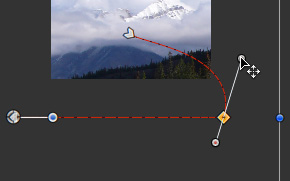
To add curves to your moves, right-click each keyframe and set it to Smooth. At which point small “control handles” appear. Grab a handle, drag it, and watch how the path changes that your image follows.
You can get different results by holding either the Shift, Option or Command keys down while you drag.
UPDATE – JULY 19, 2014
In working with the new keyframe behavior, I discovered that when you want to apply smoothing to position keyframes, creating keyframes in order and not copying/pasting data yields the best results.
If you are not getting the movement you expect, try creating your keyframes in a different order to see if that fixes the problem.
SUMMARY
Animating still images is a classic technique of almost all documentaries. Now, with this latest update to Final Cut, adding moves to your images no longer means your images move as though they had a mind of their own.

2,000 Video Training Titles
Edit smarter with Larry Jordan. Available in our store.
Access over 2,000 on-demand video editing courses. Become a member of our Video Training Library today!
Subscribe to Larry's FREE weekly newsletter and
save 10%
on your first purchase.

11 Responses to FCP X (10.1.2): New Keyframe Behavior [u]
← Older Comments-
 Leon B says:
October 19, 2015 at 11:34 pm
← Older CommentsLarry,
Uh, yeah. But if one keyframe is directly above another, how does FCP discriminate between the two? No amount of zooming is going to reveal it if it’s ‘underneath’ the second of the pair. One would think the ‘selected’ KF (in Timeline or Inspector) should be the one acted upon but that doesn’t seem to be the case. I thought switching the Viewer in and out might ‘select’ the keyframe of interest, but that doesn’t work either. I am being forced to note the X,Y Position parameters, move the top keyframe out of the way, make adjustments to the bottom frame’s Bezier etc, reset the top keyframe X,Y parameters, then re-adjust its parameters to get a smooth trans on to the next keyframe. I notice some users are purposely placing an additional KF a couple of pixels removed but that seems to defeat the purpose.
I’ve also noticed the Bezier handles do not appear sometimes by a simple Control click on the point. It requires deselecting Smooth, then reselecting.
Is any of this making sense?
‘Regards, Leon