
 NOTE: This Macintosh technique requires a Blu-ray Plug-in and BD-R or BD-RE Burner, both of which are sold separately. Without these, a Blu-ray Disc can not be created on a Mac.
As Apple moves ever farther from supporting optical media, creative pros still need the ability to create visually interesting menus and discs. After reading a recent article lamenting the demise of DVD and Blu-ray Disc software from both Apple and Adobe, Peter Weiler shared the following tutorial with me.
Larry
– – –
by: Peter Weiler, Diablo Valley Macintosh User Group
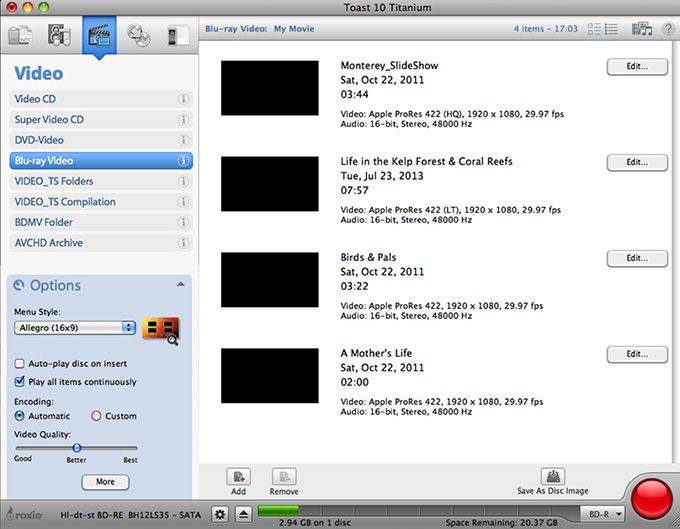
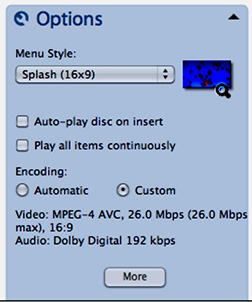
While Toast 10 has over two dozen menu style templates, it actually lends itself to just two layouts. These are based on the appearance of the menu buttons–either graphic or text. Most of the Toast menu styles make use of graphic buttons in boxes. The exceptions are Arabesque and Splash which produce text buttons without graphic boxes. Arabesque centers the text buttons and Splash left justifies them.

(Custom menu using graphic buttons.)
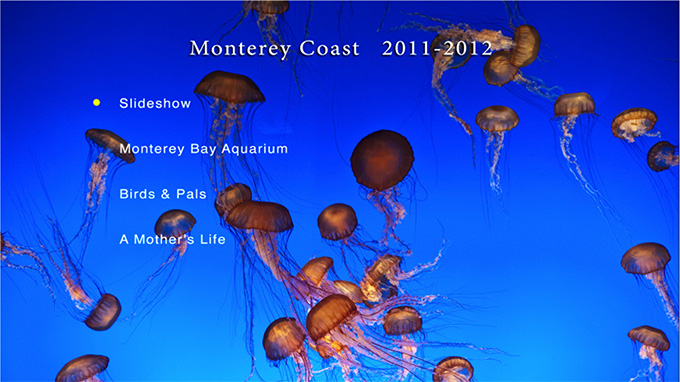
I prefer to use my own background images for menus, even though Toast 10 provides 25 of its own. The four clip Blu-ray menu above was created from video and images shot in Monterey, California.
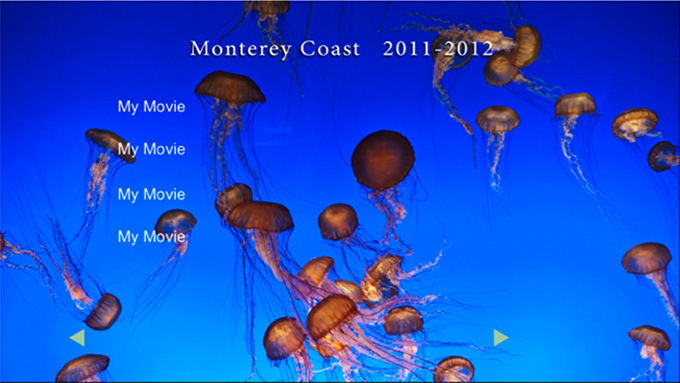
(Custom menu using text buttons)
Here’s the same menu in text button format.
These are the steps to create it:
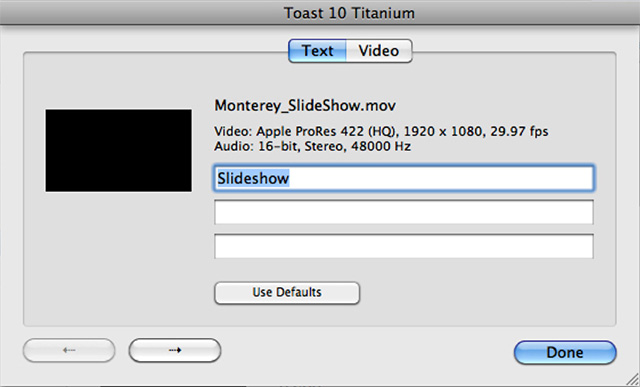
Select a ProRes clip and click the Edit button to the right of the clip name to open Text/Video dialog.
The clip’s title, date, and duration automatically appear in the three text fields.
NOTE: I changed the title to “Slideshow,” and erased the date and duration fields to prevent them from showing up on my completed disc.
Click Done.
Repeat for all your other ProRes clips.
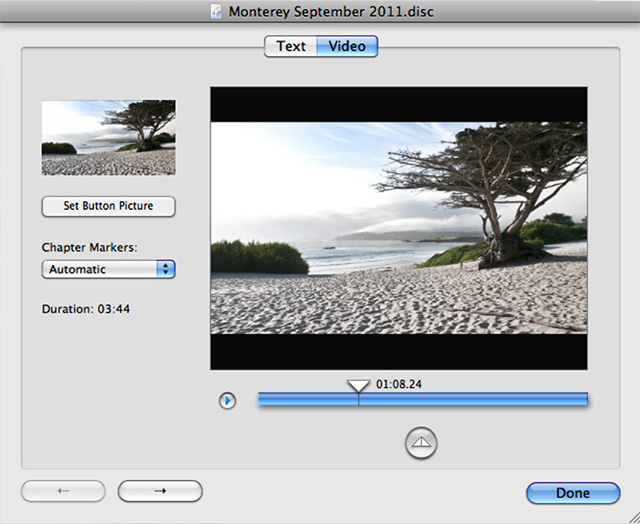
In this dialog, you can insert Chapter Markers if you wish. You have the option to edit or trim your video clips by sliding the trim markers. If you wish to use graphic buttons, you can select the desired clip frame for each menu button graphic .
Click Done.
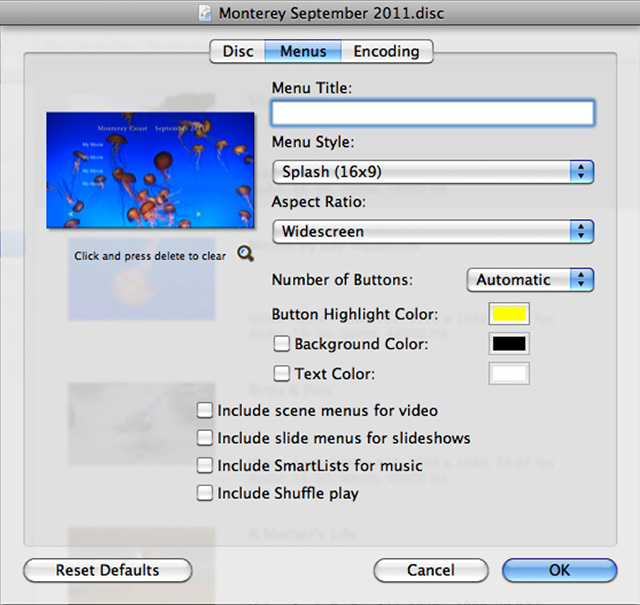
I prefer text buttons to the boxy graphic buttons. I think text buttons produce a cleaner, classier look. They also support longer clip titles. The directions below create left-justified text buttons.
Click OK.
I believe you can set up chapters for scenes within a clip. These will display as numbers (1, 2, 3…) unless setup as scene menus.
Although the individual title buttons on the menu will remain “My Movie”, they will burn to disc displaying the text you chose with the Text Tab. (See p. 3)
Click OK.
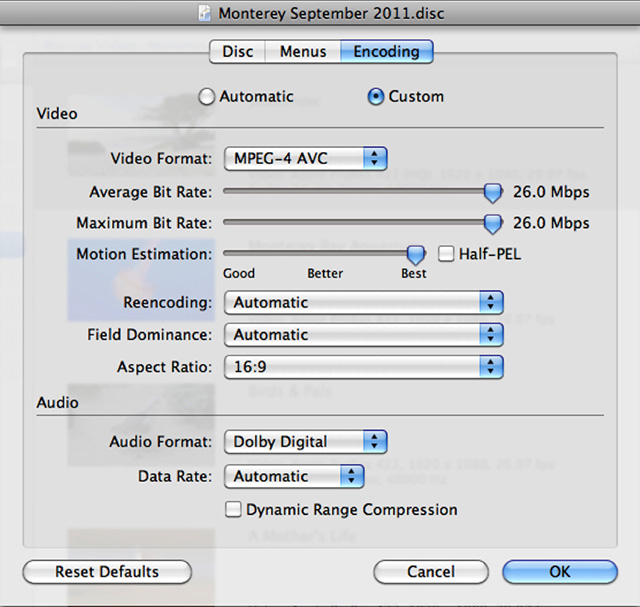
Automatic works well with ProRes clips. Many parameters can be set if using Custom. My settings were chosen to maximize the image quality; which also creates the largest files.
Click OK.

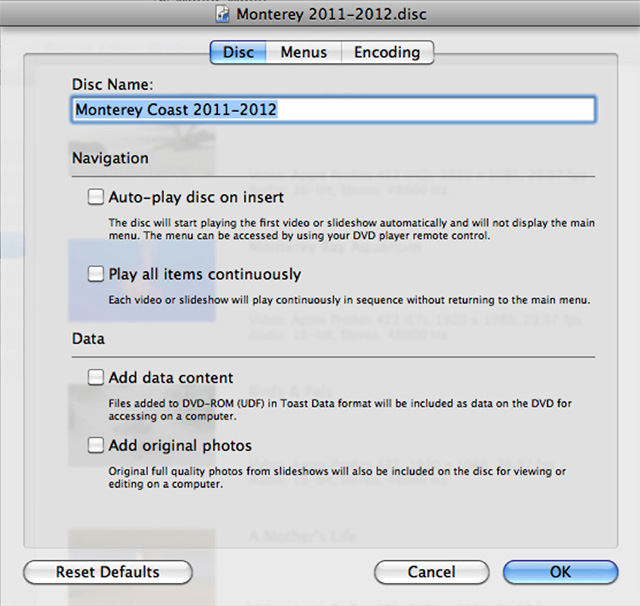
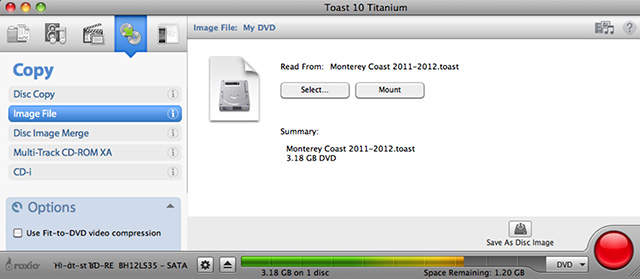
While it’s possible to burn a disc directly with Toast 10, I prefer to create a disc image. This saves all my settings and allows me easily to make additional disc copies whenever I want.
NOTE: This is a good time to take an extended break. It usually takes Toast quite a while to create a disc image.
Larry’s Note: Selecting the DVD option creates an AVCHD disc. This allows you to burn up to 20 minutes of HD video onto standard DVD media, though at a lower bit rate than a traditional Blu-ray Disc. This can be a great option to burn short videos in HD without using a Blu-ray Disc burner. However, an AVCHD DVD still requires a Blu-ray player for playback.
When the burning cycle is completed, you will have a high definition disc that should play on any standard Blu-ray player. It will not play on your Mac unless you install additional 3rd party software.
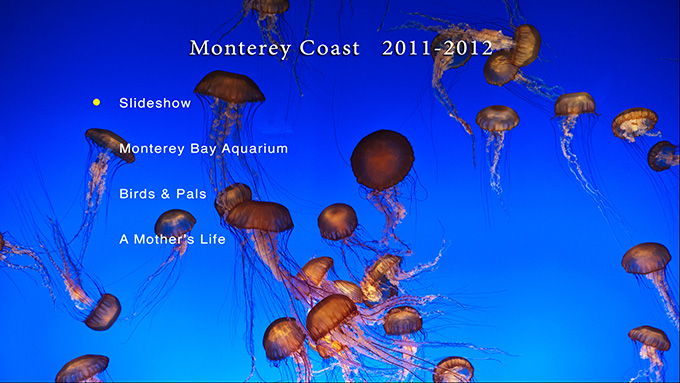
The title for this menu (Monterey Coast 2011-2012) was created in Photoshop on a background image of jellyfish using the Minon Pro font. The button text was generated in Toast.
Done.

2,000 Video Training Titles
Edit smarter with Larry Jordan. Available in our store.
Access over 2,000 on-demand video editing courses. Become a member of our Video Training Library today!
Subscribe to Larry's FREE weekly newsletter and
save 10%
on your first purchase.
12 Responses to Create a Custom Blu-ray Menu Using Toast Titanium 10
Having Toast do the rendering can take forever. Have you found a way to pre-compress in Compressor and have Toast use this file without re-rendering it?
Richard:
No, because Compressor creates MPEG-2 elemental streams, one for video and one for audio, which need to be multiplexed together when the DVD is built. I haven’t found a way for Roxio Toast to do that yet.
Larry
I just made a Blu-ray in Toast Titanium using an h.264 and .aiff made from Blu-ray preset in Compressor 4.2. If you put both files in a folder, each with the same name – just different extension, Toast recognizes them and adds both as assets or whatever it calls files. Then in ‘Customize’ pulldown, you can set it as h.264 and to ‘Never re-encode’
NOTE: This was in Toast Titanium 14
(Sorry to be cluttering up the comments)
Peter Weller’s tutorial based on Toast 10 is certainly very helpful. However, the latest version of Toast is 14 (there is no 13) and, although most of the procedures described in Peter’s tutorial remain valid, there are changes. After spending hours turning perfectly good blank BluRay discs into coasters, I have finally been able to produce chapters within a single video. However, I have still not been able to give a title to those individual chapters. If anyone knows how to do this I would be eternally grateful. Comments on the forums say this is not possible. I have written to Corel Support but I am still awaiting a response. It also seems to me that if “Play all items continuously” is selected, the video restarts automatically when it comes to the end when all you really wanted was for it not to stop at the end of each chapter.
I just made a Blu-ray in Toast Titanium using an h.264 and .aiff made from Blu-ray preset in Compressor 4.2. If you put both files in a folder, each with the same name – just different extension, Toast recognizes them and adds both to as assets or whatever it calls files. Then in ‘Customize’ pulldown, you can set it as h.264 and to ‘Never re-encode’
Has anyone discovered a way to change the font? I’ve read that it was possible with Toast 11 http://kaliska-dyami.deviantart.com/journal/Toast-11-How-to-Change-Menu-Fonts-and-Backgrounds-427709935, but have yet to find a way to make it work with Toast 15 (released today – I believe).
Hope someone knows a way! Thank you!
I am using Toast Titanium 11 and want to make video button but it’s displaying 1 video button before showing the other page on the menu bar. How can I get rid of the first button. I just want to have 6-7 chapters straight on the menu when I insert the disc. Thanks in advance.
Jai:
Hmm…. I haven’t seen this problem. I suggest contacting Roxio Support.
Larry
I contacted with Roxio but use. I just want to access the second window directly.
Here are the pictures: https://www.dropbox.com/sh/gc82r8z4zsr6j1h/AACRIM3moR7E9O0P77gADT-Oa?dl=0
Hi Larry
I am finding it difficult to replace the background on the Menu page after pressing the little magnifying glass, i drag the image but it just bounces off, what am i doing wrong please D Baglin
David:
Here I can’t help. I no longer have Toast installed on my system. Perhaps another reader or Roxio tech support can help.
Larry