
 NOTE: I’ve done a lot of webinars on video compression, but recently discovered I haven’t written a basic tutorial article covering video compression for the web. Click here for my most recent video compression webinar.
We compress video for the web because uncompressed video is far too big to download. Whenever we compress something, we need to remove image and audio data in order to make the resulting file smaller. Whenever data is removed, image quality suffers.
So, the goal in video compression is to make the file as small as possible, while keeping image (and audio) quality as high as possible. This is a constant balancing act and no one compression setting works perfectly for all files.
THE BASICS
File size is totally and completely dependent upon compression bit rate. The lower the bit rate, the smaller the file. A bit rate of 1 creates a phenomenally small file. However, such a low bit rate totally destroys the image.
The choice of codec also influences bit rate settings. For example, MPEG-2 requires higher bit rates than MPEG-4 in order to achieve the same level of quality.
DEFINITION: Codec (COmpressor/DECompressor) is the mathematics that the computer uses to convert analog light and sound into a form that the computer can record, store, and playback. By far, the most popular codec today is H.264, which is often called MPEG-4.
Image quality is based upon balancing the bit rate against the final compressed frame size, frame rate, and the amount of movement from one frame to the next. The larger the frame size, the faster the frame rate, or the more movement between frames, the higher the bit rate necessary to preserve overall quality.
For example, a 320 x 240 still image can be compressed to virtually nothing, while a 1920 x 1080, 60 frames per second handheld dance video is gonna be huge, no matter what you do.
WHAT DOESN’T MATTER
Several factors that you think might affect final image quality or file size really don’t matter. For example, the file size, in bytes, of the source file really doesn’t matter. Whether your source files is 20 GB or 200 GB doesn’t matter when you are compressing the file. Strange, but true.
Also, within reason, the frame size, frame rate, or codec of the source image doesn’t matter as much as the final, compressed frame size, frame rate or codec
COMPRESSING VIDEO
Whether you are running Compressor 4, Compressor 3, Telestream Episode, Sorenson Squeeze, or any other compression software these settings, and their rationale, remain the same. I’m going to illustrate this process using Compressor 4.
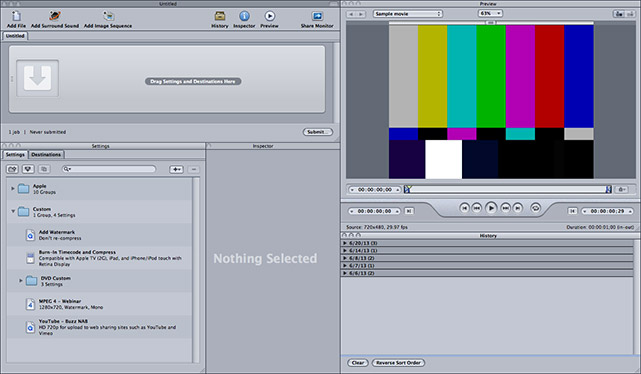
The Compressor interface consists of five windows, starting in the top left and rotating clockwise:
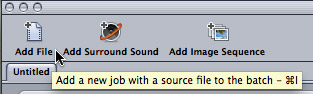
To add a file for compression, click Add File in the top left corner. (You can add as many files at a time as you want.)

Once the file is added, select the task tile (the rounded rectangle containing the small image of the video) to display the movie in the Preview window.
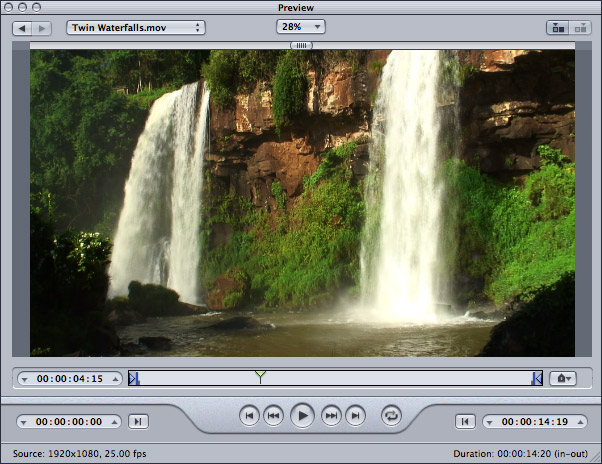
The Preview window allows us to view the video, set an In or out to compress only a range of the video, review or add markers, and, in general, make sure that the file we are compressing is the file that we actually WANT to compress.
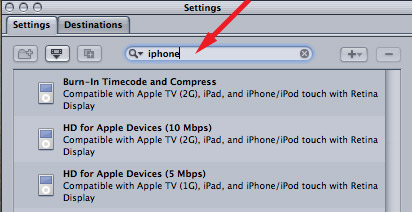
The easiest way to compress a video is to work with one of Apple’s settings. For example, enter “iphone” in the search box at the top of the Settings window and the three Apple presets for the iphone appear. There is nothing wrong with using a preset and its a great way to get started.
To apply a preset to the clip, drag the preset from the Settings window and drop it on top of the video in the task bar.
At this point, you can skip down in this article to “Geometry Tab.”
CREATE YOUR OWN PRESET
In this article, I’ll explain how to create a basic compression preset. I’ve already written about how to change frame rates, add watermarks and other effects, and how to change image sizes. (I list where to find these articles at the end of this article.)
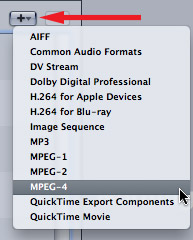
To create your own compression setting, click the Plus button in the top right corner of the Settings window.
For web video today, the best option for compression is MPEG-4, so select that.
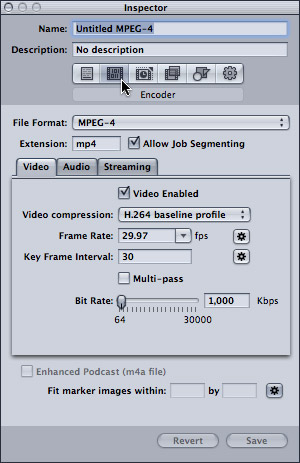
This opens a new compression setting into the Inspector, where we can customize it.
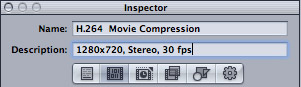
Before you do anything else, give your new compression setting a name and description. Don’t be fancy, the best settings are those that are clearly defined and described.
ENCODER TAB – VIDEO
While there are a lot of potential choices, when it comes to simple video and audio compression you only need to adjust two tabs: Encoder and Geometry.
NOTE: If you are compressing video solely for YouTube, ignore this step and search for “YouTube,” in the Settings window. How to use the YouTube setting is described here.
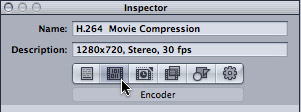
The Encoder tab is where we adjust the compression settings themselves. If the word “Encoder” does not appear near the top of the Inspector, click the second tab in from the left to display it.
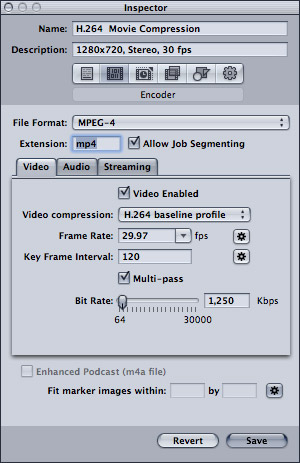
Here’s a quick explanation of the top settings:
Video Compression. In the past, lots of time was spent debating whether to use H.264 Baseline or Main Profile. However, recently, the industry has standardized on H.264 Baseline. Leave this setting alone.
Frame rate. If you shot 60 fps, set this to 30 fps. If you shot 59.94 fps, set this to 29.97. If you shot any other frame rate, leave this setting alone.
Keyframe interval. If you have lots of movement in your video, set this to two times your frame rate. If you have limited movement in your video, set this to five times your frame rate. The lower the keyframe interval, the larger your file size, but the better your image quality will be for pieces with lots of movement. I generally set this to 120 for my movies.
Multi-pass. I tend to think multi-pass yields better quality with smaller file sizes. But it also takes longer to compress. Do a test for yourself. Compress a short video with this on and a second version with it off. Compare how long it takes to compress, image quality, and file size. Pick the option that works best for you. I tend to leave it checked.
Bit rate. This is the crux of compression and every movie is different. However, in the interest of giving you someplace to start, here are four settings you can use as starting points for your own compression.
IMAGE SIZE BIT RATE
480 x 270 500 Kbps
640 x 360 750 Kbps
960 x 540 1250 Kbps
1280 x 720 1500 Kbps
Currently, I don’t recommend putting 1920 x 1080 images on the web because both the image and file size are too big. This restriction will change in the future, but for now, huge file sizes like this tend to cause very choppy web playback.
ENCODER TAB – AUDIO
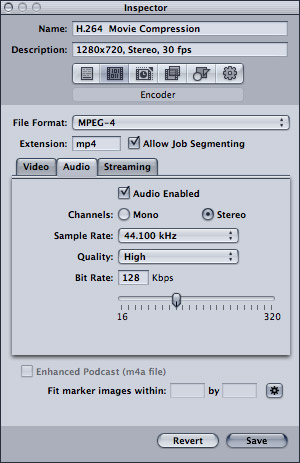
If you are only compressing video, uncheck Audio Enabled.
These default settings create a very high-quality stereo clip. My recommendation is to leave these alone, unless you don’t need stereo. For example, one person narrating a video can easily be compressed as Mono and your audio file sizes are reduced by 50%, with no loss in quality.
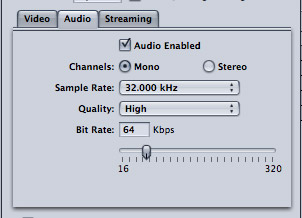
However, for my audio podcast, I use the settings illustrated above, because the human voice can be compressed smaller than music. These settings reduce my audio files significantly, without damaging aural quality.
ENCODER TAB – STREAMING
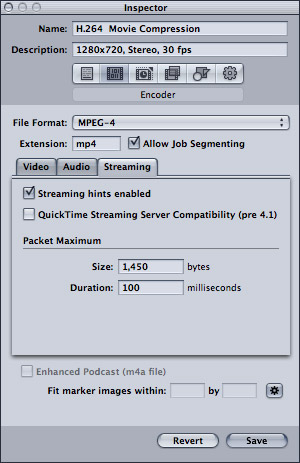
The settings in the Streaming tab are fine as is, don’t touch them.
GEOMETRY TAB
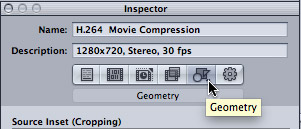
The Geometry tab controls the size of your final, compressed image. Again, don’t worry about the size of the original image, you only need to specify what you want it to become.
The default setting for this window creates an image which is 640 x 480, which is wrong for just about everything.
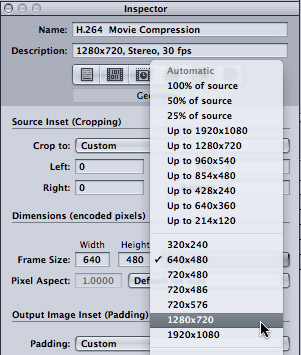
My recommendation is to create all your videos at 1280 x 720 or smaller. In this case, you select the image size you want from the Dimensions popup menu. To create a different image size, select it from the Dimension popup menu.
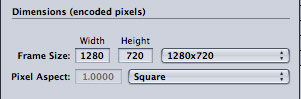
The Pixel Aspect should be changed to Square.
NOTE: Adjusting Cropping, at the top, allows you to remove elements from your image, exactly as we would do in our video editing software. Padding, at the bottom, allows you to add black to the top/bottom of an image to convert 4:3 to 16:9 (called “letter-boxing”), or add black borders to the sides of an image to convert 16:9 to 4:3 (called “pillar-boxing”).

When you are happy with your settings, click Save at the bottom. (You can modify these settings at any time, by selecting the preset in the Settings window, which reloads it into the Inspector.)
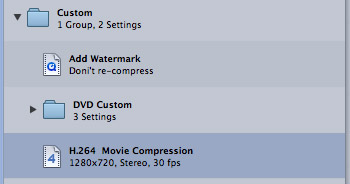
Your newly-created setting now appears in the Custom folder inside the Settings window.
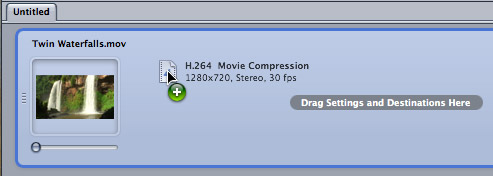
To apply it to a clip, drag the setting from the Setting window and drop it on top of the video you want to compress in the Task window at the top.

Then verify you have the correct destination (middle column) and file name (right-hand column).
CREATE A TEST MOVIE
Before you spend time compressing your complete video, make a point to create a short test movie.

The hardest part of any video to compress is where the action is moving. Movement is far harder to compress than stillness. So, in your movie, find a 2-4 second section where things are moving AND you care about image quality. Set an In (“I”) and an Out (“O”) to mark a test section. Then, apply your compression setting and compress the short segment. (You can also move the In and Out by dragging their icons.)
Because this test clip is short, it will compress quickly, allowing you to check image and audio quality without wasting a lot of time. This also allows you to see that your settings are correct and the final compressed version looks great.
If the test movie doesn’t look great, either increase the bit rate or modify the image size. I should also probably mention that you should check your other settings to be sure you don’t have an accidental typo.
Once you are happy with the look of the short test movie, drag the In to the far left and the Out to the far right to select the entire movie.
STARTING COMPRESSION

To start compression, click Submit in the lower right corner of the Task Window, then click Submit again when the smaller window appears.
A NOTE ON COMPRESSOR
Compressor, the application, is only a front-end to a background process. This means that once you click “Submit,” you can quit Compressor, as all the compression actually happens in the background. Compressor does not need to be running for you to compress a file.
OTHER READING
I’ve written about Compressor a lot. Here are some relevant articles:
SUMMARY
Video compression is central to all the videos we create. Pick a video compression program that meets your needs and spend time learning it. Creating great-looking video is an essential skill today. COMPRESSING great-looking video will guarantee you work a long into the future.
Visit our website to see Final Cut Pro Training & more!

2,000 Video Training Titles
Edit smarter with Larry Jordan. Available in our store.
Access over 2,000 on-demand video editing courses. Become a member of our Video Training Library today!
Subscribe to Larry's FREE weekly newsletter and
save 10%
on your first purchase.

44 Responses to Compressor 4: Compress Video for Web
Newer Comments →-
 Grant says:
November 12, 2013 at 10:56 am
-
 Larry Jordan says:
November 12, 2013 at 12:23 pm
-
 James says:
November 29, 2013 at 7:47 pm
-
 Brian says:
December 1, 2013 at 12:06 pm
-
 Brian says:
December 1, 2013 at 12:08 pm
-
 Rick Helderman says:
December 22, 2013 at 1:00 am
-
 Larry Jordan says:
December 22, 2013 at 9:29 am
-
 Rick Helderman says:
January 11, 2014 at 10:06 am
-
 Larry Jordan says:
January 11, 2014 at 10:25 am
-
 Mike says:
March 30, 2014 at 12:16 pm
Newer Comments →Hi Larry – what settings would you recommend for compressing videos for universal download from the web, ie. best size and format for playback on tvs, portable devices etc?
Thanks
Grant
Grant:
There is no “BEST” – in fact, web browsers don’t even support the same codec. Firefox, for instance, won’t play MPEG-4 movies.
For IOS devices, you’ll need to use HLS encoding, which requires your webmaster to sense whether a iOS device is connected to your server. Here’s an article with more info: http://www.larryjordan.biz/basics-of-http-live-streaming/
Bit rate is also dependent upon image size. The bigger the image, the higher the bit rate.
Basically, you need to create multiple versions if you are streaming. If you are simply downloading, create MPEG-4.
Larry
A blog article about software without a link to the software?…. Wow.
@James: for the uninitiated… https://www.apple.com/finalcutpro/compressor/
@Larry: Thanks so much, this is exactly what I needed to get started!
I am trying to compress a 45 min. HD video. When I use quick time movie it takes about 29 minutes to get a pretty good looking copy to burn to dvd but when I use compressor it takes about 17 hours. What’s the deal? Compressor looks a little better but not that much. Am I doing something wrong. I am using the setting 60 min. h264 at 10.3Mbps.
Rick:
That is a SERIOUSLY fast data rate? What are you compressing this for? Are you resizing the video? Have you applied any filters? Single, or multi-pass?
I generally budget 2x real time for H.264 compression on a current issue computer. So, yes, I would agree with you that setting is out of whack.
Larry
I am just about to buy Toast Titanium 11 Pro for burning Blu rays disks for my clients. I have searched and searched for info on this product and the reviews all seem bad. Is there any other way to burn 1080p files using final cut studio 2 or Adobe with a price tag of $2300.00. Can I burn them using a compressor file? And if so would I use QT apple codec pro res 422 or MPEG 2 = MPEG 4-QT AIC HD 1080i – QT DVCPRO HD 1080i60 – QT HDV 1080i60. I mean really, I guess my program is 2008 but it seems like it should be a lot simpler than this to burn a 1080i 16×9 hi quality blu ray.I guess final cut studio 3 has the ability to burn blu rays but it is no longer available. I just want it to look like the original footage and be 16 bit if possible. not 720p at 8 bit. what would you suggest? Oh yea, thank you for responding with a understandable answer. I did not mean to take so long to respond.
Rick:
The short answer is that you can’t do what you want to do without spending some money.
Macs have never supported Blu-ray natively, You’ve always needed to buy additional software or hardware for both burning and playback. (Yes, we can create AVCHD discs, which are a lower bit rate version of Blu-ray, but they can only run 20 minutes.)
Video is 8 bit, 10-bit and 12 bit. 16-bit only applied to audio. ALL compressed formats are 8-bit, including the H.264 codec that Blu-ray uses. So, 8-bit is the best you can achieve.
If all you need to do is burn a single movie to a Blu-ray Disc, you can use Apple Compressor 3.5 or later. You will need Blu-ray burner hardware and the drivers that come with it. (I’ve heard good things about Blu-stor drives.) If you need to author multiple movies to a single disc, then you’ll need a authoring program such as Adobe Encore, which is part of the Premiere suite. The current version of Encore is CS6.
ALL Blu-ray Discs use the H.264 codec for compression, any other codec creates files which are too bit. So, master your movie using ProRes, then compress the movie into Blu-ray using H.264. Virtually all compression programs – Compressor, Episode, Squeeze, Adobe Media Encoder – should support creating the Blu-ray file.
Larry
Larry, I’d like to get around to creating blu-rays with a few years’ worth of HD (1080i) video from various cameras I’ve owned. Some of the files are in MPEG-2 and a lot are in H.264@10Mbps. I’m not averse to shelling out the money for FCP and Compressor (I assume I would need both?), but can these two programs handle these types of files and make decent looking blu-rays? I’m not sure if the content type makes any difference…a lot of the footage is family vacations, but some is high school sports (basketball and hockey)