
[ I have an entire video tutorial on how to compress video for the web. To learn more, click here. ]
Compressor scares a lot of people because video compression can be very complex. However, if all you want to do is compress a video for YouTube, Compressor makes the process very easy; especially if you plan to post more than one movie.
Let me show you how.
THE SECRET
The trick to compressing for YouTube, and many other social media sites, is to remember that they ALWAYS recompress your video into their own format. This means that you need to send YouTube a compressed file which is designed to be compressed again.
We do this by creating an intermediate movie with a high data rate. While you could build your own compression setting file, it is faster and easier to just work with the YouTube settings built into Compressor. That way, we don’t need to understand anything about data rates or compression to make our movies look great.
THE OUTLINE
Start Compressor.
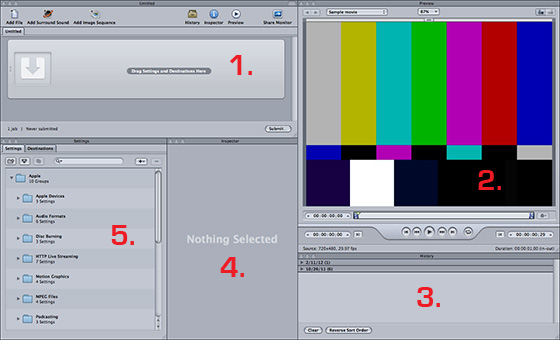
There are five windows in Compressor:
1. Task. Where movies go to be compressed.
2. Preview. Where you can preview your movie.
3. History. Where you monitor compression, or locate past jobs.
4. Inspector. Where you make changes to settings.
5. Settings. Where setting and destination files are stored.
The workflow is simple:
1. Create a new batch using a template
2. Import the movie you want to compress
3. Apply a destination setting
4. Enter your Youtube account and movie information
5. Compress
At which point, Compressor will compress your file and automatically transfer it to YouTube – marking it private, if you want, so you can review the results before making it public. Plus, it stores the compressed movie in a folder on your hard drive so you review it, file it, or share it to another site.
TAKING IT STEP-BY-STEP
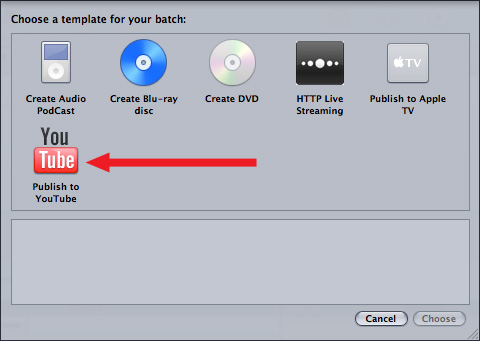
Select File > New Batch from Template. The template window opens. Click Publish to YouTube, then click Choose.
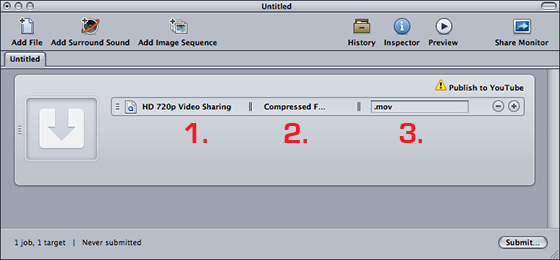
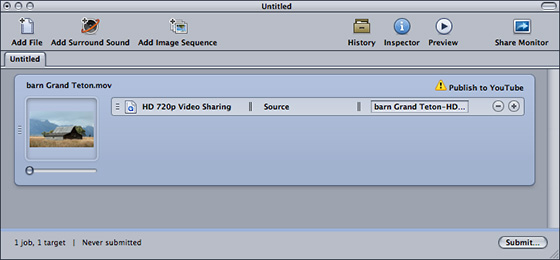
This loads a new Task into the Task window, and automatically configures it to compress your file for YouTube. There are three settings applied to each file you want to compress:
1. Compression setting
2. Destination
3. File name
Also, notice up in the top right corner it says Publish to YouTube. This is a Job Action, which is something that is performed when compression is complete.
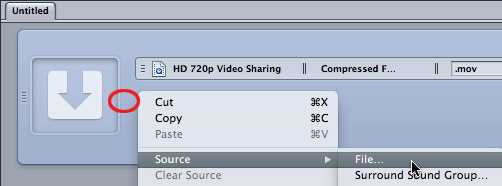
Select the Task that contains the settings and do one of the following:
* Type Shift+Command+I
* Select Job > Source > File
* Right-mouse-click and select Source > File
Select the movie you want to compress and click OK.
You movie is now added to the task. The compression setting is correct for YouTube and the file name of the compressed file defaults to the file name of the source file.
However, by default, the compressed file is stored locally on your system in the same location as the original movie. While this isn’t a bad thing, I prefer having all my compressed files stored in the same place. So, I created a custom destination for all my compressed files. Changing destinations also prevents conflicts where the compressed file has the same name as the source file.
CREATE A CUSTOM DESTINATION
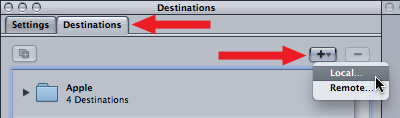
To create a new destination, click the Destinations tab in the Settings window.
Then, click the Plus button to create a new Destination. There are two types:
* Local
* Remote
Local is a folder on one of the hard drives attached to your computer.
Remote is either an FTP or iDisk server.
For maximum speed, I always save my compressed files locally, then transfer them to a remote server later. So, select Local.
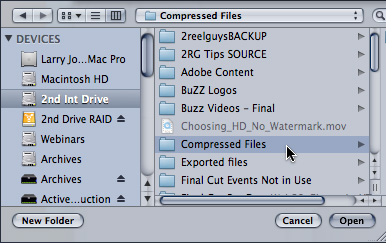
On my second drive, prior to starting Compressor, I created a folder called Compressed Files. We’ll use this for our example, but you can make any folder on any hard disk a custom destination.
Select the folder you want to set as a custom destination, then click Open.
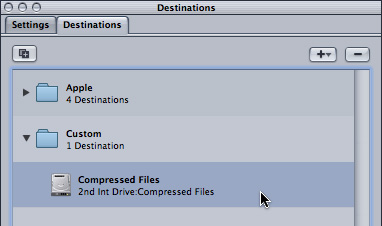
The new custom destination is now available in the Destinations tab. If you don’t see it, twirl down the Custom folder to display its contents.
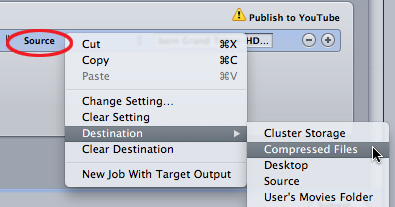
Right-mouse-click on the middle setting (Source) and change it to the new destination; in my example, Compressed Files.
Although this sounds like we are taking a lot of time and steps to get this file compressed, you only need to create a custom destination once.
CHANGE A PREFERENCE
In fact, if you change a preference setting, Compressor will automatically apply this custom destination to all your compressed files so you never have to think about this again.
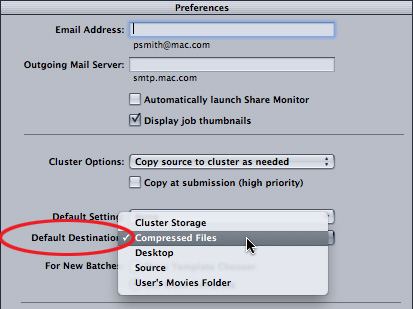
Select Compressor > Preferences and change the Default Destination to Compressed Files, or whatever you called your local folder. Now, whenever you import a file, Compressor will automatically set the destination to this folder.
PUBLISH TO YOUTUBE
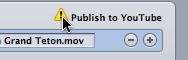
See that yellow warning in the top right of the Task Window? It means that Compressor needs a bit more information before it can publish your file to YouTube.
This, too, only needs to be entered once.
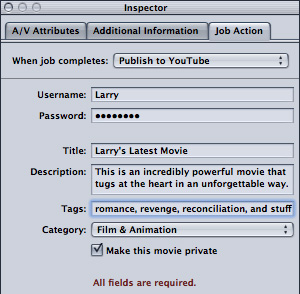
Click the yellow warning in the Task window, then, down in the Inspector, click the Job Action tab.
Enter your YouTube User Name, password, and information about your movie. Compressor will remember your user name and password whenever you compress another movie for YouTube.
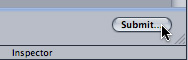
You’re now ready to compress. Click Submit, in the low-right corner of the Task Window.
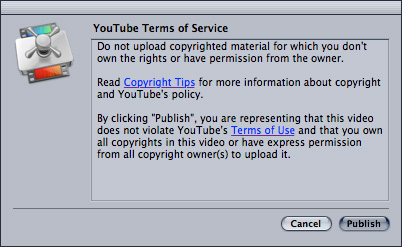
Accept the YouTube Terms of Service by clicking Publish.
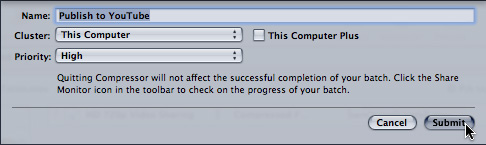
And click Submit once more to start the compression process. (If you are wondering why you click Submit twice, this second option allows you to send the file to a compression cluster or compress on your local system. Compressing locally is the default.)
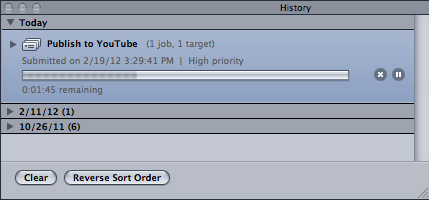
A thermometer appears in the History window that shows the status of your job. To continue monitoring your job, leave Compressor open until compression and file transfer are complete.
SUMMARY
Once you’ve set a custom destination as a preference and entered your YouTube account information, the process of compressing files for YouTube is amazingly quick — less than a minute from import to start of compression.
Plus, by starting simply with templates and learning more about the power of Compressor, you will be able to quickly graduate to more complex projects like adding watermarks, timecode, cropping, scaling, and audio effects to your projects.

2,000 Video Training Titles
Edit smarter with Larry Jordan. Available in our store.
Access over 2,000 on-demand video editing courses. Become a member of our Video Training Library today!
Subscribe to Larry's FREE weekly newsletter and
save 10%
on your first purchase.
32 Responses to Compressor 4: Compress Video for YouTube
← Older Comments-
 Syd Blue says:
February 12, 2014 at 3:18 pm
-
 Lee says:
August 24, 2014 at 6:13 am
-
 Larry Jordan says:
August 24, 2014 at 9:28 am
-
 Cousin Cathy says:
September 25, 2021 at 8:16 pm
-
 Larry says:
September 26, 2021 at 6:55 am
← Older CommentsWe shot my trailer in 4K. I exported it directly from FCP 10.1 to Youtube. Any way to make the action running scenes look better on the default playing mode? Not many people know they can click on “720 HD” for better quality.
I tried numerous settings from different programs. Just wondering if this is as good as it gets on YouTube:
http://www.youtube.com/watch?v=OqRftSt0tJ8
Thanks,
Syd Blue
youtube.com/FlyGirlFlyGirl
I will be filming football games (lots of quick motion) on a Canon HG30 and posting them to youube (quickly) in 720p for post-game analysis. Preservation of smooth motion is key, and I won’t be doing any editing or adding anything other than very simple titles. Any particular camera settings that you would recommend (AVCHD vs. MP4 – each would be at the highest bit rate), or settings in FCPX, or whether there is any benefit to buying/using compressor to publish to YouTube instead of just publishing directly from FCPX? Thank you very much.
Lee:
As with all things, spend a bit of time doing some tests.
However, 720p/60 would provide excellent image quality and smaller files. AVCHD at high bit rates will look good and uploading direct to YouTube from FCP X will work and allows FCP X to output in the background while you continue editing.
However, if speed is of the essence, I would export a master file out of FCP X – which will be the FASTEST export – copy that file to a separate computer for compression and uploading.
In fact, he said, thinking about this, I would:
* Export from FCP X as a master file
* Transfer the file via an ethernet network to a separate machine
* Use Adobe Media Encoder to create the YouTube file – it will be about three times faster than FCP X or Compressor
* Use that second system to post to YouTube.
This allows your editor to work as fast as possible, export in the background and deliver files to YouTube without slowing down editing.
Larry
Do you have a more current video or recommendation for this subject or has nothing changed since 2014? Thanks Cousin Cathy
Cousin Cathy:
While interfaces have changed, the basic settings remain the same; as does YouTube’s continuing to recompress your video.
I should update this article at some point to show the new interfaces we work with, but my recommendations for settings remain the same. (Also, while YouTube supports HEVC-formatting video, it isn’t worth your time to compress your media into that format, given that YouTube recompresses anyway. Just stick with H.264.)
Larry