
[ To see how Compressor works, check out this step-by-step video training. ]
Recently, I received a variety of emails from folks having grayscale or color problems when compressing files using Compressor 4 and H.264. Their images were looking dark, or washed out.
If you are looking for ways to improve your images when they get compressed, this article can help. However, this is an intermediate article. If you are new to Compressor, or compression, this will seem a bit daunting; however, the results should be worth the work. (With video compression, every compression project is different and there is no one perfect compression setting. That would be too easy!)
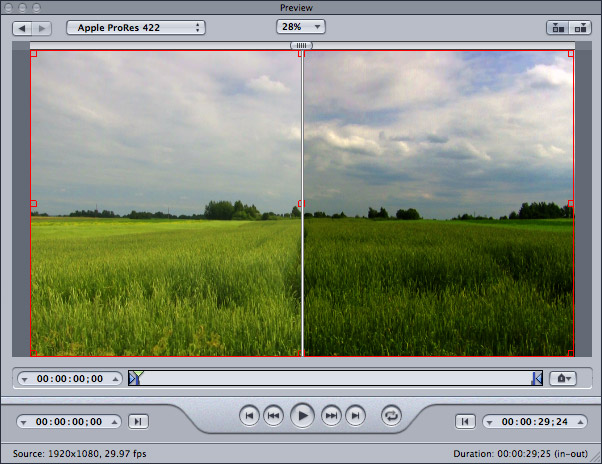
This image is a mock-up, but it illustrates the problem. The Before image, on the left, is lighter than the After image, on the right.
THE PROBLEM
The problem, in some cases, is caused by the H.264 codec that Apple ships with Compressor. I have found, in my own work, that this codec tends to wash out colors and modify the gamma (gray scale) values of an image.
I’ve noticed this problem in both Compressor 3.x and 4.x. Sometimes, these changes are not visible enough to care about. Other times they are.
OPTIONAL SOLUTIONS
There are several options to fix this. First, is to use other software for video compression. Alternatives are:
In addition to these, there are many others to choose from. However, if you are working with Final Cut, the benefits of using Compressor often outweigh the image problems. In which case, we need to find a fix.
CHANGE FILTER SETTINGS
If I know I need to use the H.264 codec for compression, I will always add two filters to compensate for the image changes.
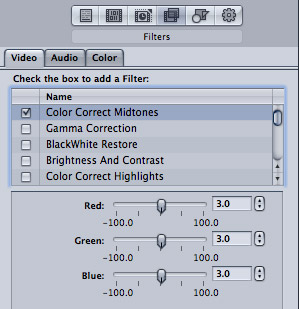
In the Filters section of the Inspector, I will add the Color Correct Midtones filter, then boost the Red, Green, and Blue channels by 3.0. What this does is increase color saturation without adding any color casts.
While we can also alter color settings for highlights and shadows, the “sweet spot” for color correction is the midtones. For this reason, I only add this one filter to adjust for color.
NOTE: While there is a long technical explanation behind this, think about a grapefruit. The shape of the grapefruit represents your color space. White is at the north pole, black is at the south pole. Saturation is determined by the amount of horizontal distance from the center of the grapefruit to the edge. Clearly, you have more room to move in the middle (Midtones) than you do at the poles (highlights and shadows).
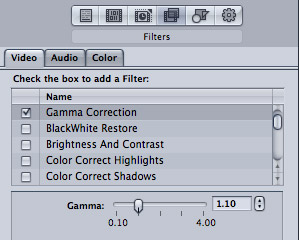
Next, I add Gamma Correction. This adjusts the gray-scale value of the midtones. Here, I’ll add a setting between 1.05 and 1.10. To me, this adds a bit of richness to the image during compression.
These settings generally work fine and I use them in many of my projects.
PLAN B
However, another way to solve this issue is to change the codec from H.264 to X.264. X.264 is the open source version of H.264. They are fully compatible and interchangeable.
I’ve found that the X.264 codec delivers great looking images, at equal or greater compression speed, to H.264, without needing to add compensating filters. In some cases, you may see slightly improved file size.
Best of all, it’s free.
INSTALL THE CODEC
To get started, you need to download and install the X.264 codec. Be sure to download version 1.2.27 or later. There are many earlier X.264 versions which won’t work with later versions of the Mac OS. You can find this in a variety of places, here’s one: http://www.macupdate.com/app/mac/24173/x264encoder
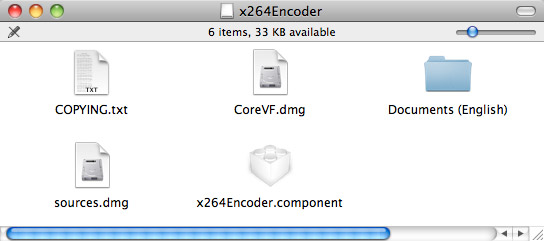
Once the DMG file downloads, double-click it to uncompress the components. The x264Encoder.component is what we need to install, but, before you do, open the Documents (English) folder.
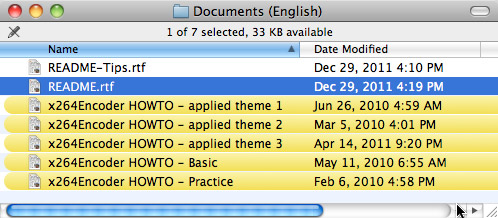
This files – especially the README.rtf – will tell you a lot about how to really optimize this filter. (Don’t panic if this starts to get really complicated. You don’t need to know all of this to get started.)
To install, open your boot drive (generally called Macintosh HD) then open the Library folder.
NOTE: This is NOT the Library folder in your Home directory.
Open the Library folder, then scroll down until you find the QuickTime folder.
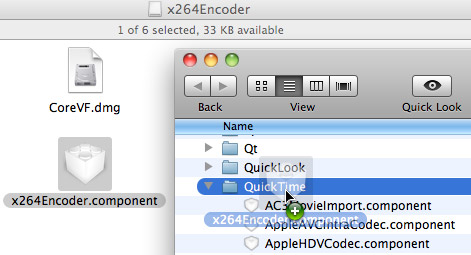
Then, drag the x264Encoder.component file into the QuickTime folder.
NOTE: Be careful to put this into the QuickTime folder. Dropping it by accident into either the Qt or QuickLook folders is gonna cause problems.
Once the component is installed, close the folders. You don’t need to restart your system for this to work.
NOTE: You must install this Encoder before starting Compressor.
USING THE CODEC
Installation is a one-time effort. After that, we can turn our attention to Compressor. Start by opening Compressor. (These instructions work for either Compressor 3.x or 4.x.)
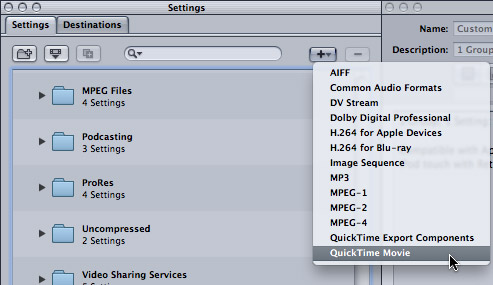
Next, create a new QuickTime compression setting by clicking the Plus key. I won’t go through all the settings, as I’ve written dozens of articles about Compressor – you can find them here: Click here
Select QuickTime Movie, because this allows us to change the codec.
NOTE: Once you’ve created a QuickTime movie, you can use QuickTime Player 7 to export it into an MP4 movie, without recompressing the file. I use this technique for many of my training movies.
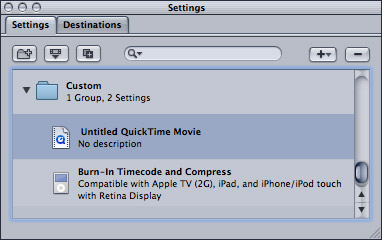
Select the new Setting in the Settings tab – it will be called Untitled QuickTime Movie – to open it into the Inspector. Click the Encoder icon (second from left, just below the Description field).
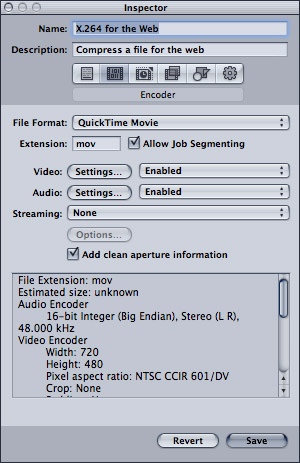
Give the file a name and description.
NOTE: X.264 and H.264 should only be used when creating files for the web. If you plan to edit the resulting file, convert it to ProRes instead. AVCHD files compressed into H.264 for editing will look just awful.
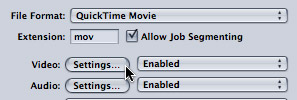
Click the Settings button next to Video to open the Compression Settings window.
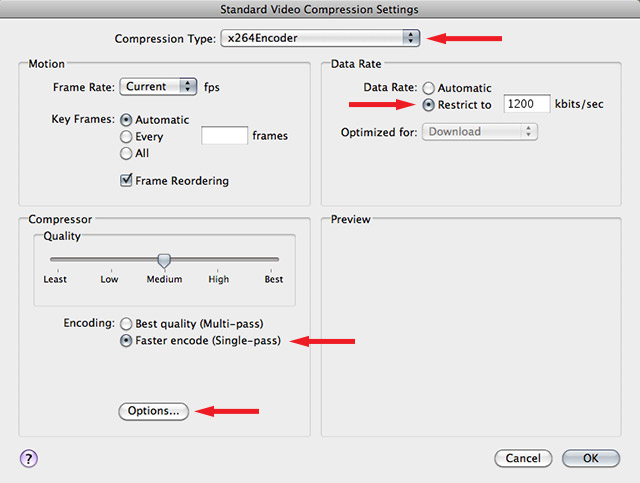
At the top, set the Compression Type to x264Encoder.
If you set Data Rate to Automatic, the Quality slider can be used. If you set the Data Rate to Restrict to, you need to then enter a number for the data rate and ignore the Quality slider. I always set a data rate, and here, I’m using 1200 kbps.
The developer of this codec provides the following compression suggestions:
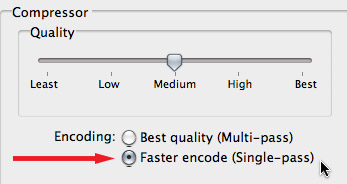
Click the Encoding radio buttons to switch between Multi-pass and Single-pass.
Click the Options button, below the Compressor Quality setting, to display a HOST of other options. Frankly, this whole screen scares me. Don’t touch nothing here!

Except, to turn on CRF, click the Flags tab and check the CRF checkbox. Look around if you like, but don’t change anything else. Click OK when you are sufficiently impressed.
Then, in the encoding window, click OK.
NOTE: I compressed the same video with CRF on and off and didn’t notice any difference. In both cases, I compressed 720p HD video using a 1200 kbps rate.
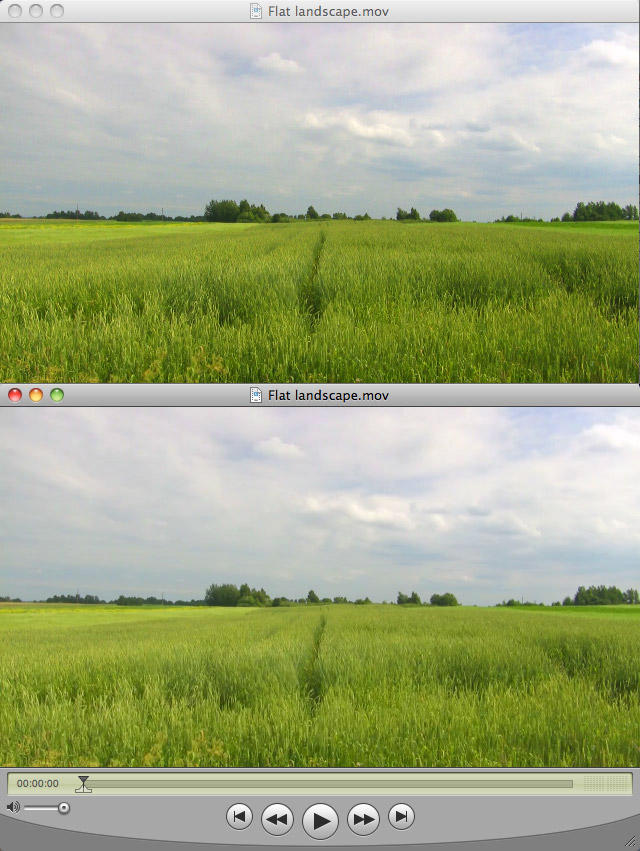
Here’s the final result. The Source is on top and the Compressed version is on the bottom. (I encoded it as single-pass, CRF turned on.) In this screen shot, both images are reduced to about 25% of normal size.
Try this yourself. Start by not changing the CRF. See if you like the results. Then, turn CRF on and see if anything improves. Great compression is a matter of making small changes and watching the results. Now, you have another tool you can use to improve your work.
42 Responses to Compressor: X.264 to Improve Video
← Older Comments-
 Ryan says:
July 1, 2020 at 9:30 am
-
 Larry says:
July 2, 2020 at 8:04 am
← Older CommentsDo you know if there’s a way to get x264 into Compressor 4.4.6 in macOS Catalina?
Ryan:
I don’t know, but I suspect you can’t. If you need X.264, try using Handbrake – a free compression utility.
Larry