[Updated Aug. 28, 2023, with screen shots for QuickTime Player v10.5.]
Chapter markers were traditionally the domain of DVDs. However, both QuickTime movies and MPEG-4 movies for the web can also contain chapter markers, which makes navigating through a long movie a lot faster when you are trying to find a specific section to review.
Starting last year, we included chapter markers in many of our training titles because viewers told me they watch our training multiple times to be sure they understand a subject. So, we added chapter markers to help them navigate between sections.
Which is a great idea… provided, that is, that you know how to find them. And that’s what this article is about.
First, open your movie in QuickTime Player.
What appears next depends upon the version of QuickTime Player you are using.
QUICKTIME PLAYER

In the current version of QuickTime Player, click anywhere in the video image to display the Controller at the bottom. Then, click the right-pointing chevron (red arrow).

QUICKTIME X PLAYER

In QuickTime X, do one of the following:
(Command+R, by the way is a toggle that turns chapter display on or off.)

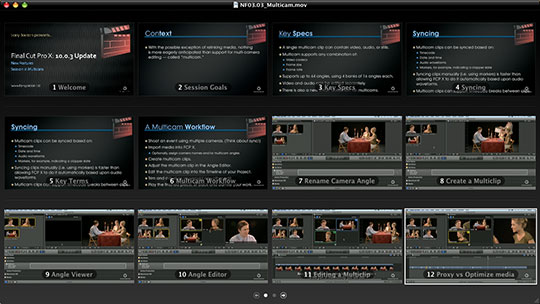
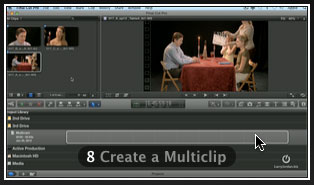
All available chapters in that movie are displayed, along with the name of that chapter.

Click a thumbnail image which represents the chapter where you want to jump.
QUICKTIME 7

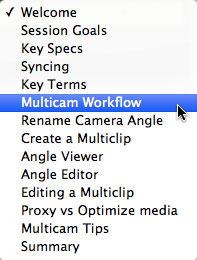
In QuickTime 7, look in the lower right corner of the player window. If you see text, click to reveal a pop-up menu.

The checkmark shows your current location. Click the location where you want to jump.
Moving between chapters is easy, once you know how.
2,000 Video Training Titles
Edit smarter with Larry Jordan. Available in our store.
Access over 2,000 on-demand video editing courses. Become a member of our Video Training Library today!
Subscribe to Larry's FREE weekly newsletter and
save 10%
on your first purchase.
24 Responses to QuickTime: Display Chapter Markers
← Older Comments-
325: Explore the New Cut Page in DaVinci Resolve 17 | Larry Jordan says:
December 2, 2021 at 4:06 pm
-
334: New Features in Apple Final Cut Pro 10.6.2 | Larry Jordan says:
May 5, 2022 at 12:20 pm
-
346: Working with Still Images in Apple Final Cut Pro | Larry Jordan says:
March 9, 2023 at 4:55 pm
-
357: Small Things That (Really) Matter | Larry Jordan says:
August 17, 2023 at 11:27 am
-
 Björn Obenius says:
August 28, 2023 at 8:31 am
-
 Larry says:
August 28, 2023 at 9:27 am
-
360: Ask Larry Anything! | Larry Jordan says:
December 15, 2023 at 6:29 am
-
384: Video Scopes & Color Grading in DaVinci Resolve 20 | Larry Jordan says:
July 4, 2025 at 6:54 am
← Older Comments[…] you quickly find the information you need, we include chapter markers in the QuickTime download. Click here to learn how to display them in your […]
[…] you need, we include chapter markers in the QuickTime download to simplify navigation. Click here to learn how to display them in your […]
[…] you need, we included chapter markers in the QuickTime download to simplify navigation. Click here to learn how to display them in your […]
[…] you need, we included chapter markers in the QuickTime download to simplify navigation. Click here to learn how to display them in your […]
Hi,
and strange… The symbols in QT don’t match yours.
I only have a button for minimizing the window and another one for sharing. How come?
Björn, on an M2 MacBookPro 14″ with Ventura 13.5
Björn:
Good point. I just added two screen shots to reflect the QuickTime Player interface.
Thanks,
Larry
[…] you need, we included chapter markers in the QuickTime download to simplify navigation. Click here to learn how to display them in your […]
[…] you need, we included chapter markers in the QuickTime download to simplify navigation. Click here to learn how to display them in your […]