
![]()
![]() [This article covers both Adobe Premiere Pro CC and Apple Final Cut Pro X.]
[This article covers both Adobe Premiere Pro CC and Apple Final Cut Pro X.]
If you are creating videos exclusively for the web, you don’t need to worry about illegal luma or chroma levels.
But… if you are creating programs for broadcast, cable, DVD, DCP or HDR, then video levels are critically important. This is because the technology involved in each of these distribution platforms has limits; and excessive luma levels, especially with highlights, will get your program rejected by QA (Quality Assurance) at the distributor.
NOTE: While there are also limits on chroma saturation, most of the time chroma levels will be fine. The only exception is when you create images on the computer, which makes it easy to create images with excessive levels.
BASIC RULES
What the Video Limiter/Broadcast Safe effect does is clamp – or lock – luma and chroma levels so that they don’t exceed a specific level. (100% in the case of Luma levels.) This clamping means that any texture or detail associated with those levels will be lost.
You would use the Broadcast Safe effect to clamp, say, video levels coming from street or ceiling lights, where you don’t care about retaining texture detail about the light. But you would NOT use the Broadcast Safe effect to protect white levels on a close-up of a bride wearing a white wedding dress. The effect would mush all the lovely white texture of the white lace into an amorphous blob, resulting in life-long animosity from the bride.
There are several basic rules about levels that apply in both applications:
NOTE: Acceptable saturation levels vary by luma levels. Video supports the greatest amount of saturation at 50% gray. Saturation levels decrease the closer a pixel gets to luma levels of 100% or 0%. Pure white or pure black do not allow any saturation.
Generally, you apply the Broadcast Safe effect to a completed project after all color grading work is complete. This catches any excessive levels that may have slipped through the cracks. Here’s how.
ADOBE PREMIERE PRO CC
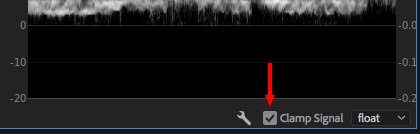
The Clamp Signal checkbox at the bottom of the Lumetri Scopes affects the scope display only and does not change the video levels in your clips.
The Video Limiter, which is what Adobe calls this effect, works best when it is applied to an Adjustment layer placed above all the clips in your project.

In the Project panel, right-click in the gray area and select New Item > Adjustment Layer.
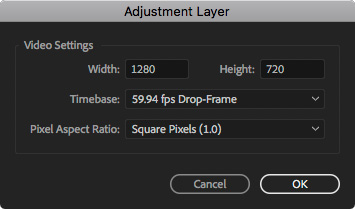
Accept the settings displayed in the Adjustment Layer panel, these will match your project settings.
Then, drag that Adjustment layer so it is above all the clips in your timeline.
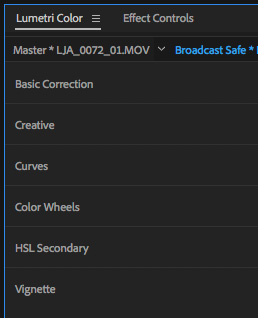
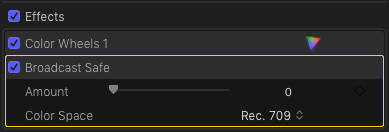
The Lumetri Color Panel does not have a Broadcast Safe filter built into it.
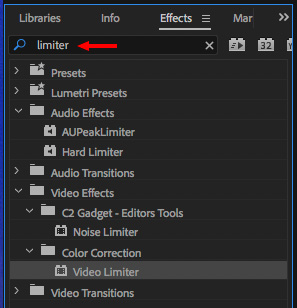
Instead, search for Limiter in the Effects panel. Then, drag the Video Limiter on top of the Adjustment Layer.
NOTE: Adding the Limiter to the Adjustment Layer means that it is processed after all color effects applied to the clips themselves.
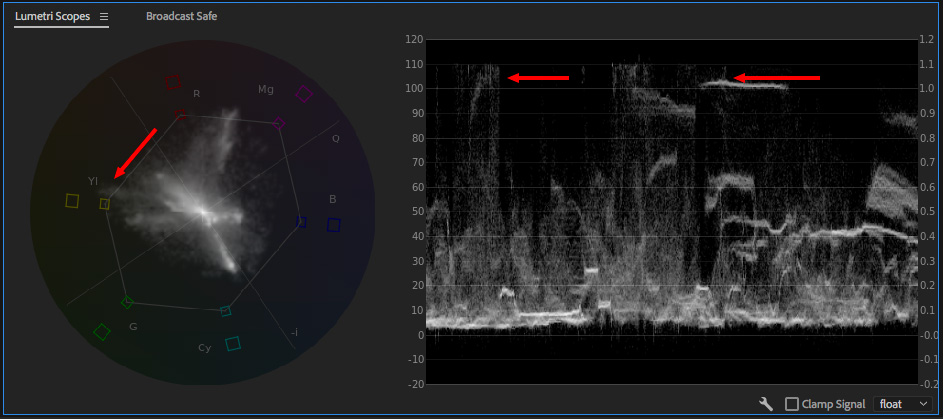
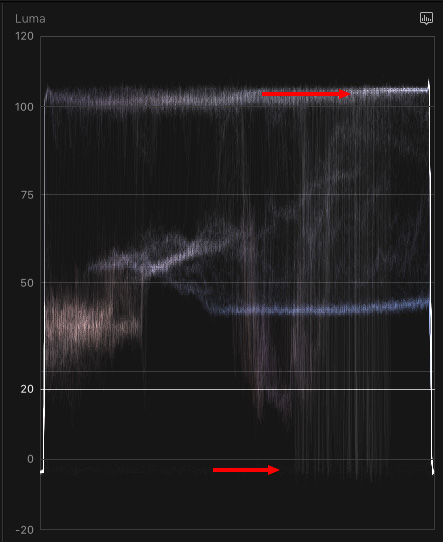
(Click to see a larger image.)
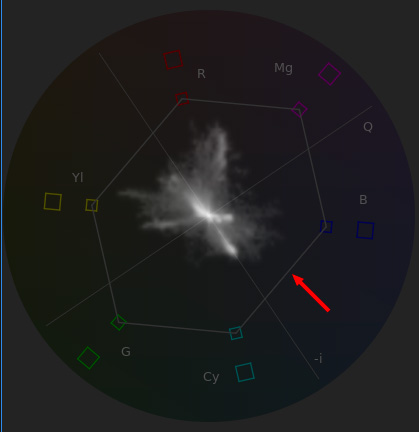
Here’s the “Before” image. Luma levels are pushing 110% and chroma saturation is exceeding the inner boundary.
NOTE: These chroma levels are not, in themselves, illegal. I am using the thin gray line as an easy way to illustrate the change the Video Limiter is about to make.
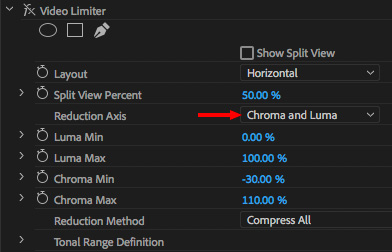
Change one setting in the Video Limiter:
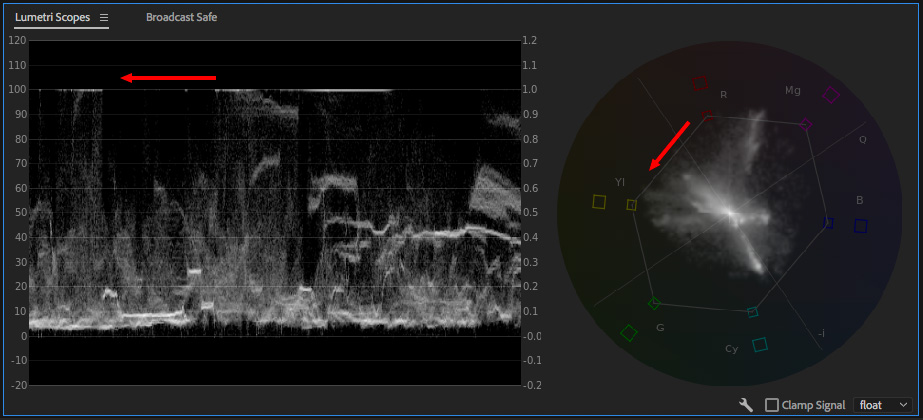
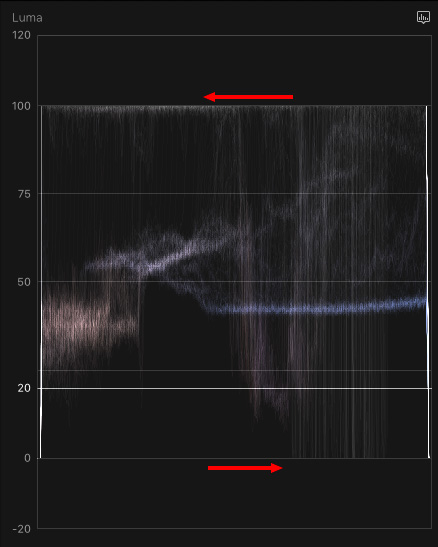
(Click to see a larger image.)
Here’s the “After.” Note that both chroma saturation and luma highlights are clamped within safe boundaries. (Again, safe levels of chroma saturation vary by luminance level.)
FINAL CUT PRO X
In this image, white levels are close to 110%, while black levels are in negative territory. Both levels are illegal.
NOTE: While FCP X does not have an adjustment layer, it is possible to create one in Motion. I strongly recommend you create or download one. It will simplify your life.
Here’s an article that explains how. This technique works with all versions of Motion 5.
If you have an adjustment layer, apply the Broadcast Safe effect to the adjustment layer. If not, you will need to apply it to all the clips in your Timeline.
Select all the clips in your Timeline.
Go to Effects Browser > Color > Broadcast Safe and double-click it to apply to all selected clips.
NOTE: BE SURE that you apply the Broadcast Safe filter AFTER all other effects are applied. It must be at the bottom of the Effects stack in the Video Browser; just before any Inspector effects.
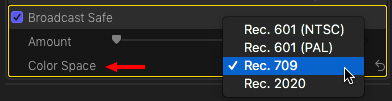
Within the effect, you can select the color space of your Project, as the limits vary depending upon color space. As with the Video Limiter, the Broadcast Safe effect will clamp excessive chroma levels as well as luma.
Here are the final results. Note that both white and black levels are successfully clamped.
SUMMARY
The Broadcast Safe effect is the last stage in prepping a program. It prevents shows being rejected for technical reasons. Remember, this effect is always applied last and, ideally, to an adjustment layer.

2,000 Video Training Titles
Edit smarter with Larry Jordan. Available in our store.
Access over 2,000 on-demand video editing courses. Become a member of our Video Training Library today!
Subscribe to Larry's FREE weekly newsletter and
save 10%
on your first purchase.
29 Responses to Broadcast Safe: Keep Video Levels Legal
Newer Comments →-
 Rick Llewellyn says:
January 15, 2018 at 6:47 am
-
 Larry says:
January 15, 2018 at 7:12 am
-
 Deb G.` says:
July 26, 2018 at 1:45 am
-
 Larry says:
July 26, 2018 at 7:08 am
-
 Catriona Black says:
September 10, 2018 at 9:19 am
-
 Larry says:
September 10, 2018 at 10:40 am
-
 Brian says:
August 23, 2018 at 2:48 pm
-
 Peter Josyph says:
September 12, 2018 at 11:13 am
-
 Larry says:
September 12, 2018 at 1:58 pm
-
 Peter Josyph says:
September 15, 2018 at 8:33 am
-
 georgios says:
October 15, 2018 at 7:58 am
-
 Larry says:
October 15, 2018 at 8:41 am
-
 John Pollack says:
October 16, 2018 at 5:27 am
-
 Larry says:
October 16, 2018 at 8:11 am
-
 John Pollack says:
October 18, 2018 at 2:49 pm
-
 Larry says:
October 18, 2018 at 3:11 pm
-
Color Correcting for Video: A Starter Guide - Viewfinder: A Blog by KitSplit says:
March 20, 2019 at 11:39 am
-
 Nestor says:
August 9, 2019 at 7:57 am
-
 Larry says:
August 9, 2019 at 10:15 am
-
 greg Bell says:
August 19, 2019 at 6:47 am
-
 Larry says:
August 19, 2019 at 9:33 am
-
 Faleena Hopkins says:
September 2, 2019 at 6:30 pm
Newer Comments →Is it ok for the RGB levels to go over 100%, as long as luma and saturation are ok?
Also, if you are encoding for the web, some codecs will clip the luma at 100.
Rick:
In general, yes. RBG levels are another way to look at saturation, which varies by brightness.
Larry
You ARE supposed to keep the Amount at 0% in the Broadcast Safe filter settings in FCPX? Just double-checking.
Deb:
Well… maybe. Generally 0 is the best number as it provides the widest range of safe gray-scale levels. But, there is nothing preventing you from increasing this number. What it does is lower the maximum white value setting, while raising the minimum black level setting. This doesn’t hurt anything, but, in general, I leave this value at 0.
Larry
In FCPX I’ve applied the Rec. 709 Broadcast Safe effect to an adjustment layer. With the amount slider set to zero it doesn’t seem to clamp anything. I have to up the amount slider to about 2 or 3 to get the blacks up past zero. Why would this be?
Catriona:
I have not noticed this. Remember, it clamps to 100%. I found that a setting of 0 clamps whites to 100% and blacks to 0%. If you are getting significantly different results, please contact Apple Support.
Larry
In Premiere Pro CC 2018 the Video Limiter Effect has changed with only options to clamp the high end of the signal. How do I limit the black levels to 0 with this version of CC?
DuArt Film Labs is trying to figure how to make a better DVD out of a doc I shot and edited on FCP 6. The lab wants me to export at 709 Color Space for Broadcast. But my Quicktime Movie export doesn’t allow for that. Any solution?
Peter.
If you exported standard def out of FCP 6 it will be Rec. 601. DuArt should know how to deal with that.
If you exported HD it will, by definition, be Rec. 709.
You should not need to do anything. QuickTime can’t handle a color space conversion.
Larry
Thanks a ton, Larry. Helped a great deal. You’re the best! I only wish FCP could still do what it used to do. I’ve won awards on a film I edited on the original and I’ve edited many more, but now it looks like I need to switch…
Thanks Larry.
About the adjustment layer on top of the clip..isn’t this applied first?I believe the ierarchy is top to bottom..
Georgios:
An adjustment layer affects all clips below it. Think of an adjustment layer more as a lens through which we view the clips underneath. If effects are applied to the clips below, the “lens” will see both clips and effects.
Larry
In FCPX the broadcast safe filter turned all the areas saturated past the legal limit black.
John:
Hmm… that’s not supposed to happen. Please contact Apple Support.
Larry
Exporting a master file after my colour correct and re-importing the master allowed me to apply the broadcast safe filter without the above-mentioned glitch.
It was FS7 footage in S-Log3.cine with FCPX’s Camera LUT setting in the inspector set to Sony S-Log3/S-Gamut3.cine, that was generating this glitch in the broadcast safe filter turning oversaturated areas black when applied.
John:
Thanks for the tip.
Larry
[…] Depending on the ultimate destination of your project you might need to be concerned about keeping your work broadcast safe or legal. If you project is for the web, then you typically don’t have to worry about this. If it’s going out to broadcast, DVD, DCP, or a similar form of distribution this may be a concern. Larry Jordan breaks down what you need to do to keep your image legal in this post. […]
Larry, it doesn’t really work as the RGB limiter o n the old FCP7. I’m looking for similar results ir order to clamp RGB signals, not only Luminance. Do you know any? Thanks!
Nestor:
Hmm… The Broadcast Safe filter in FCP 7 has the ability to clamp either Luminance, chroma saturation or both. If you need more, you’ll need to look for a third-party color grading package such as, perhaps, Color Finesse.
Larry
I don’t understand why anyone would use a broadcast safe filter. If you stick to the rules mentioned above you needn’t worry about things being non compliant surely? Am I missing something?
Greg:
What you are missing is “speculars.” Bright reflections off shiny objects, such as chrome, water or glass. If you set levels based on these really bright reflections, normal highlights are too dark. Some productions have enough staff to light so as not to create any seculars, but most productions don’t.
The broadcast safe filter allows you to control speculars without darkening highlights too much.
Larry
Thank you so much for this, Larry! You just saved me and my QC report. :))))