
![]() This article was suggested by Bruce G. who wrote:
This article was suggested by Bruce G. who wrote:
Larry, would you consider doing an in-depth tutorial devoted to the use of the BLUR effect in FCP? I’d like to know more about how to blur multiple(up to 10) items (faces) , how to shape the blur, advantages/disadvantages of different types of blur.
Larry replies: Sure. Let’s take a look.
APPLY AND ADJUST A BLUR
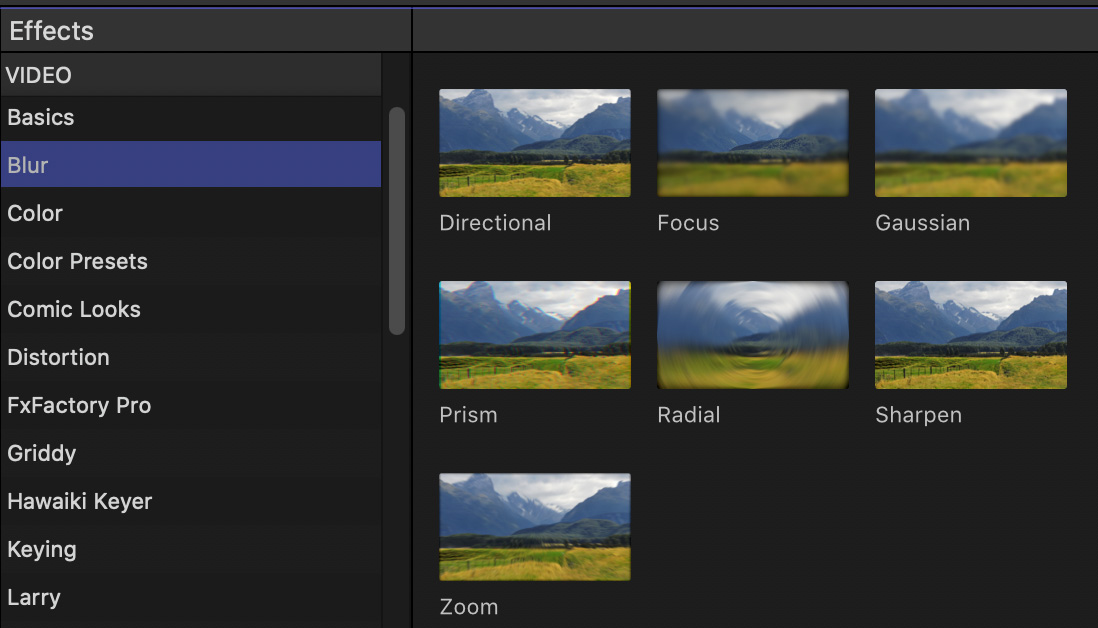
A blur is an effect stored in the Effects Browser > Blur. Illustrated in this screen shot are the seven default blurs in Apple Final Cut Pro.
To apply a blur:
NOTE: To apply a blur to multiple clips at once, select the clips in the timeline first, then double-click the blur you want to apply in the Effects Browser.
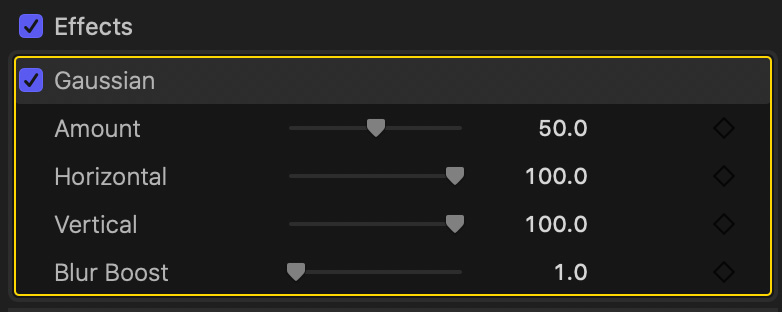
Though the settings vary by blur, to adjust any blur, select the clip containing the effect, then adjust it in the Video Inspector.
The Amount slider is the key setting that determines the amount of the blur.
TYPES OF BLURS
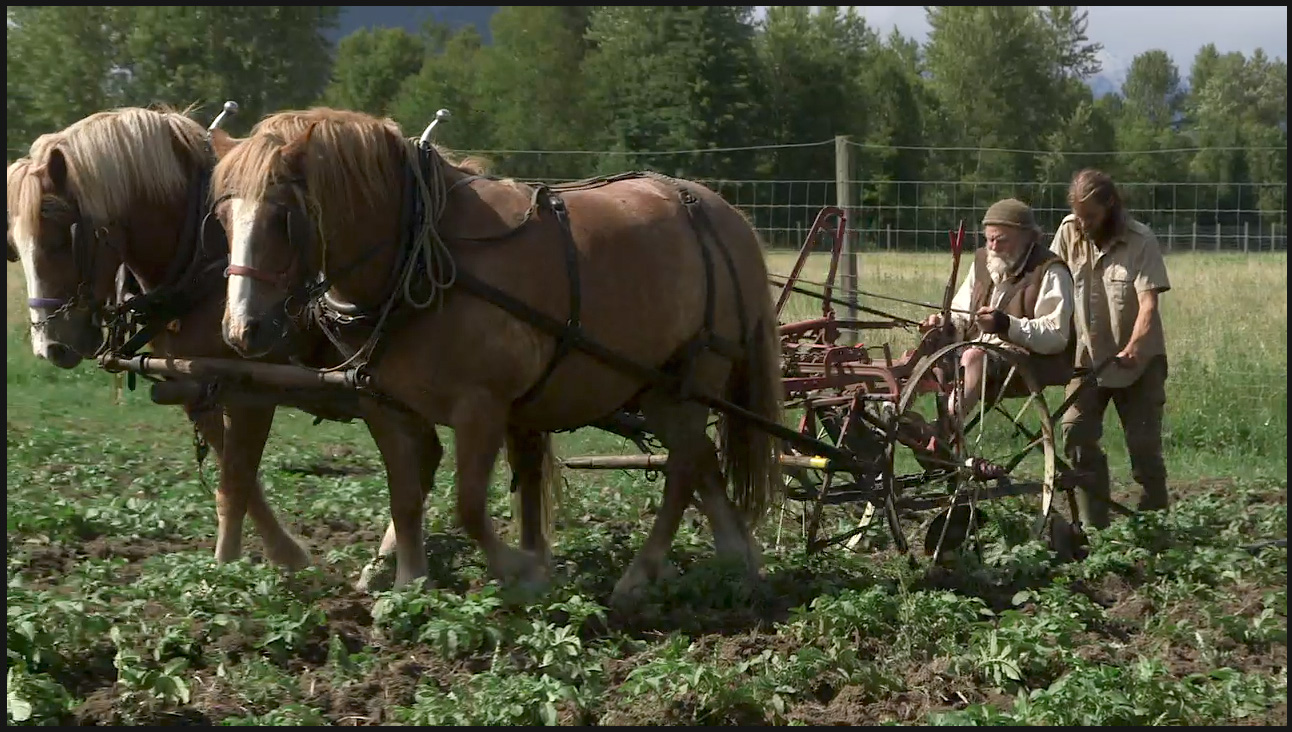
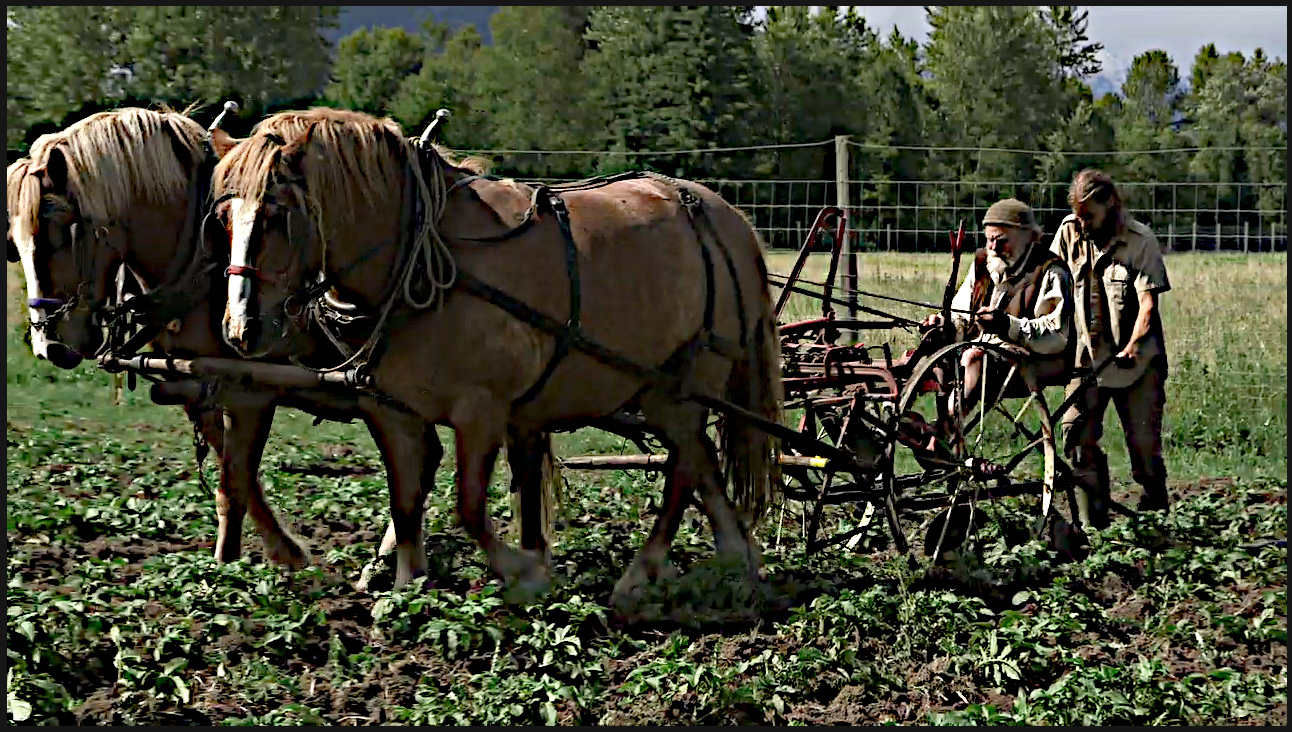
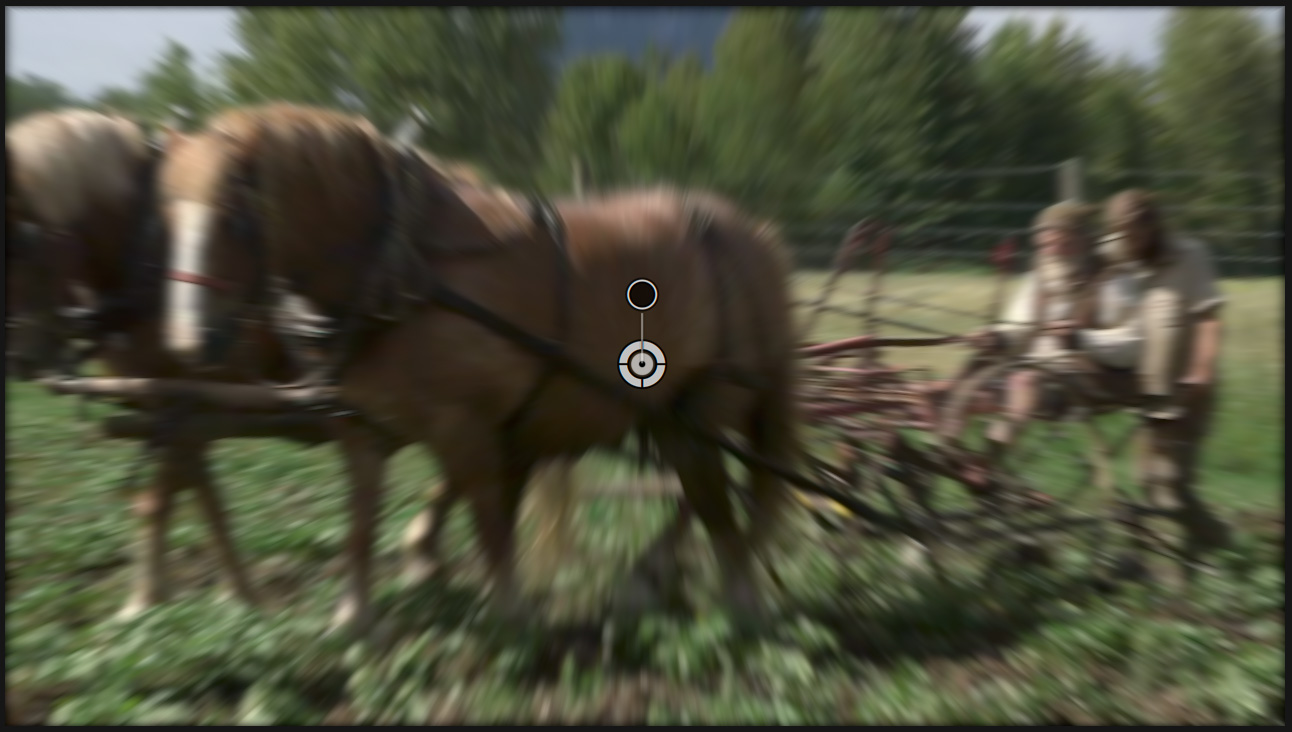
Here’s the source image, courtesy of EditStock (www.editstock.com). Let’s see what we can do with it.
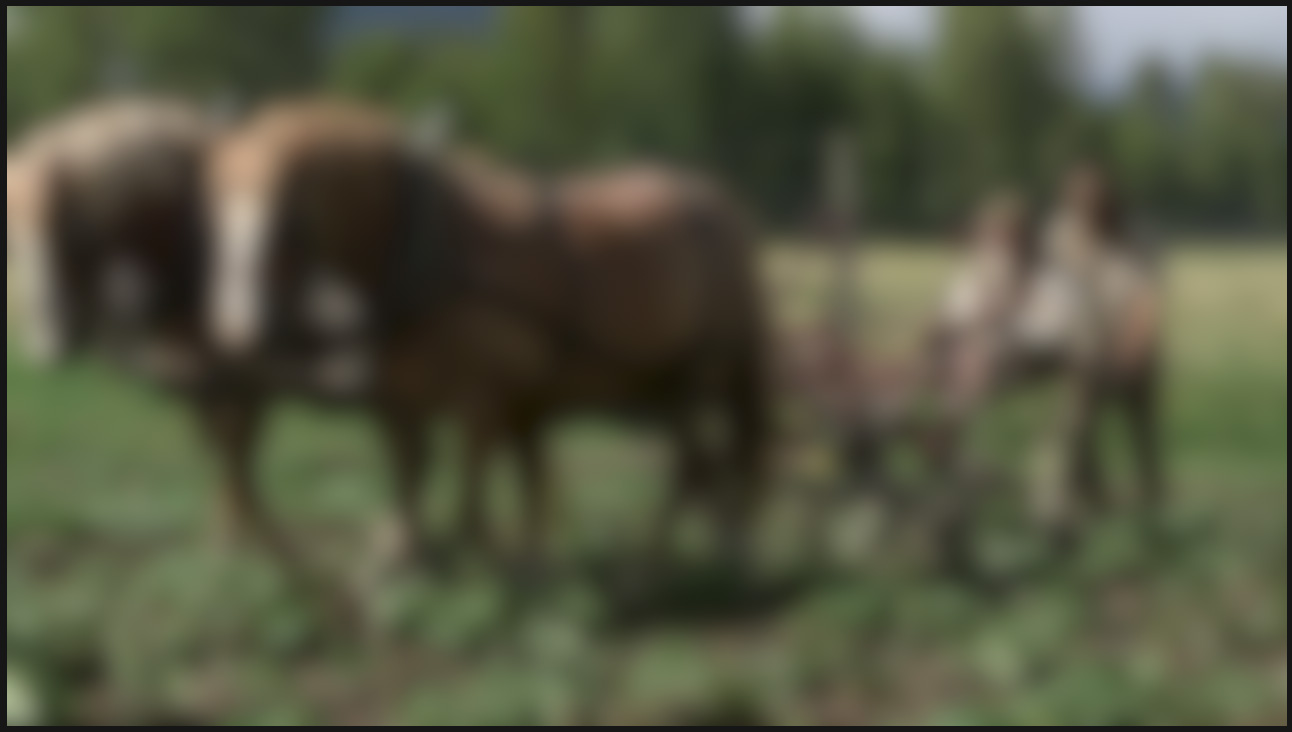
Gaussian is my favorite, all-around blur. It smoothly blurs the entire image.
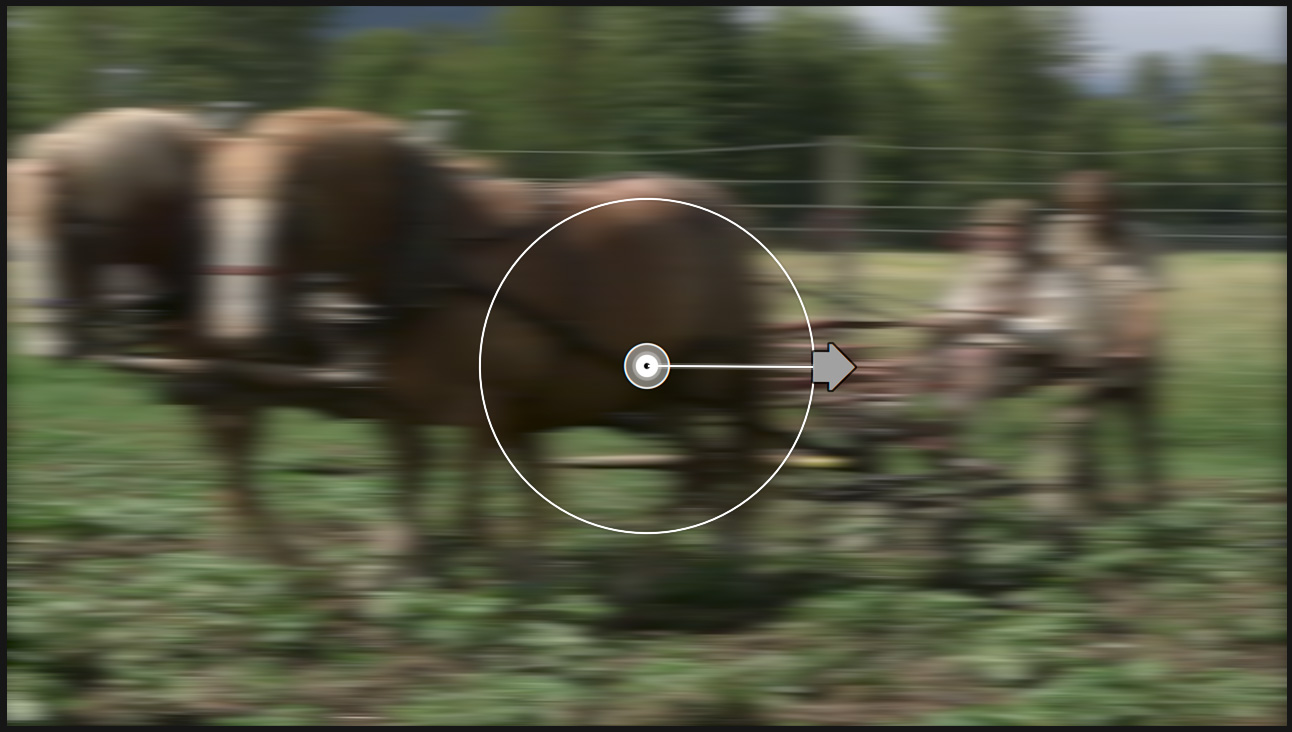
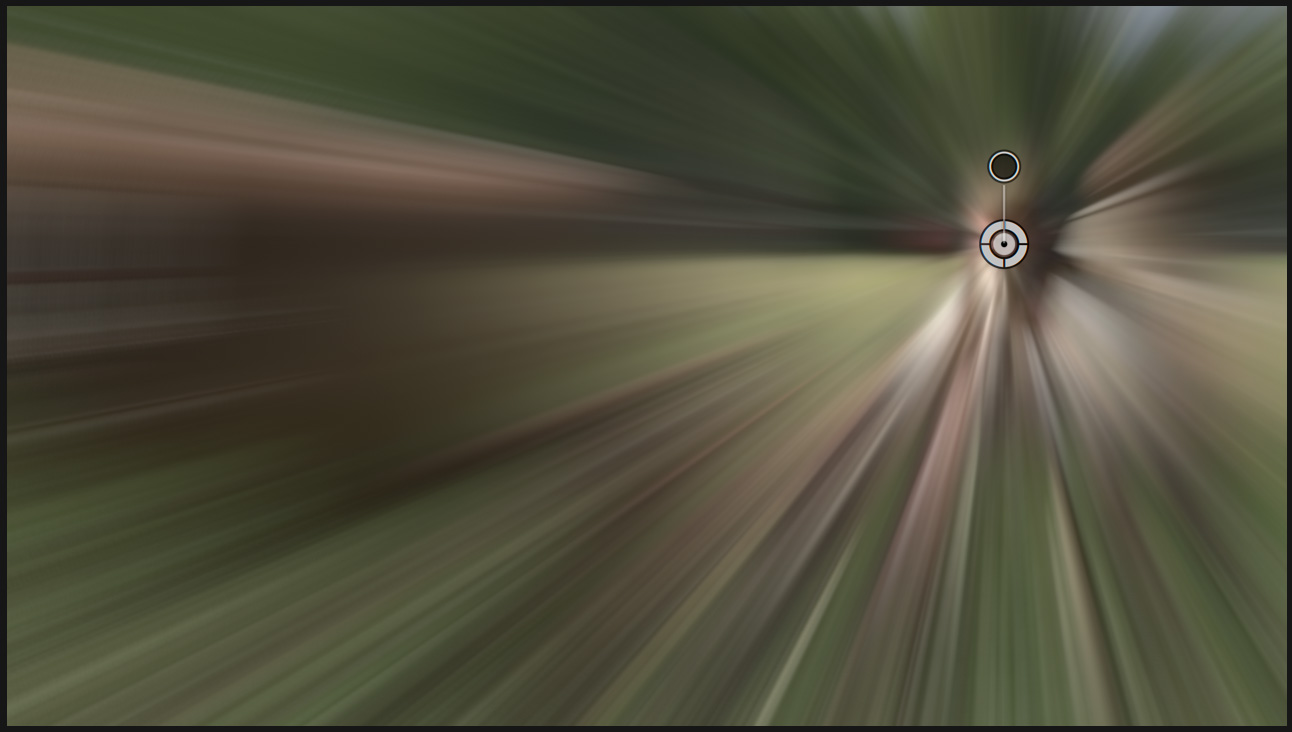
Directional create a blur where things seem to be moving in a direction, as indicated by the on-screen arrow. The arrow determines both direction and force.
NOTE: You can also make these same adjustments using the numeric values in the Video Inspector.
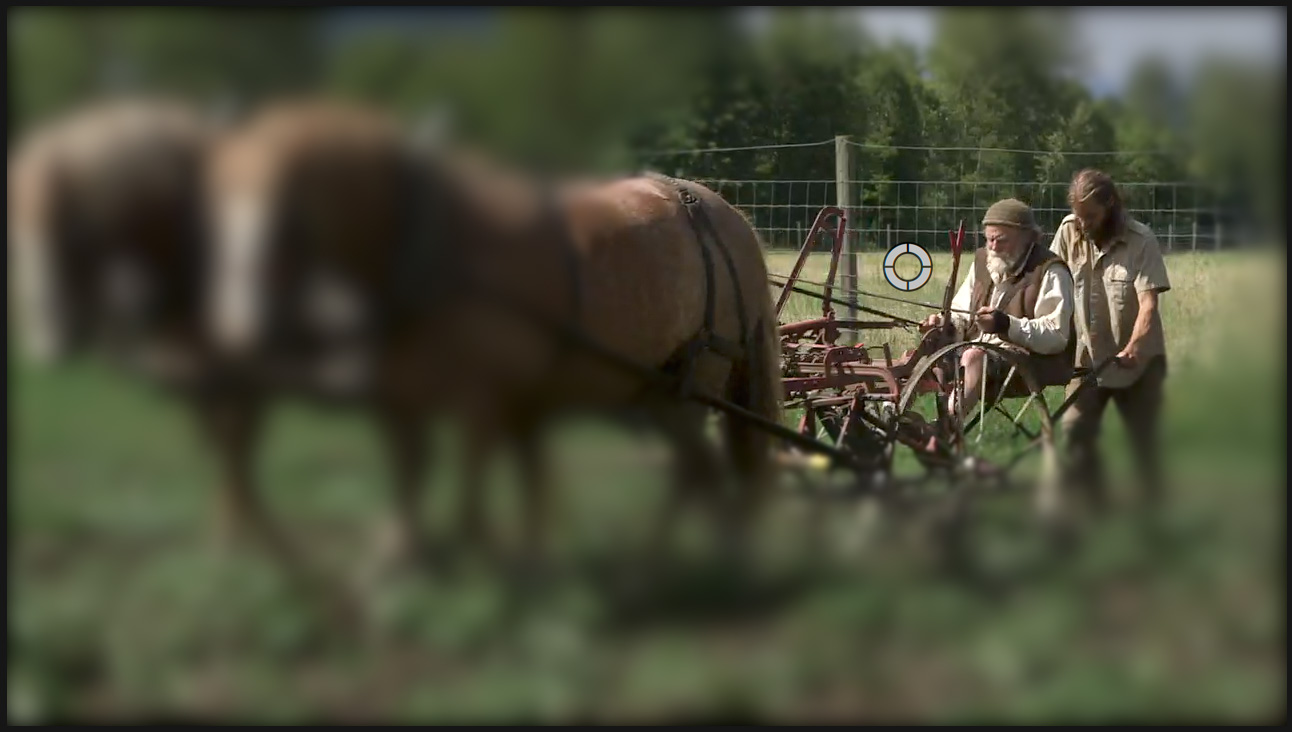
Focus displays an area of focus, determined by the white onscreen circle, surrounded by an increasingly blurry image.
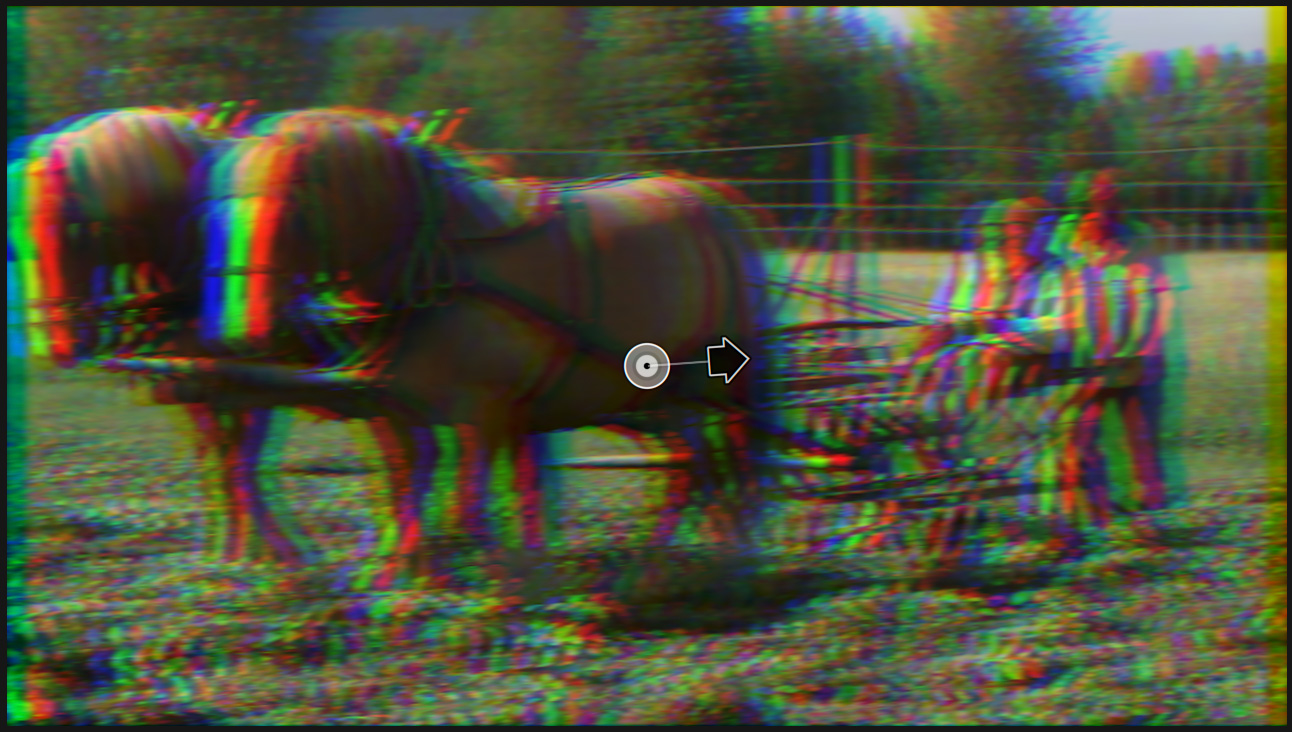
Prism blurs each color channel then separates them to display a surreal effect. Truthfully, this is not an effect that I personally like. The on-screen arrow determines the amount and direction of the blur.

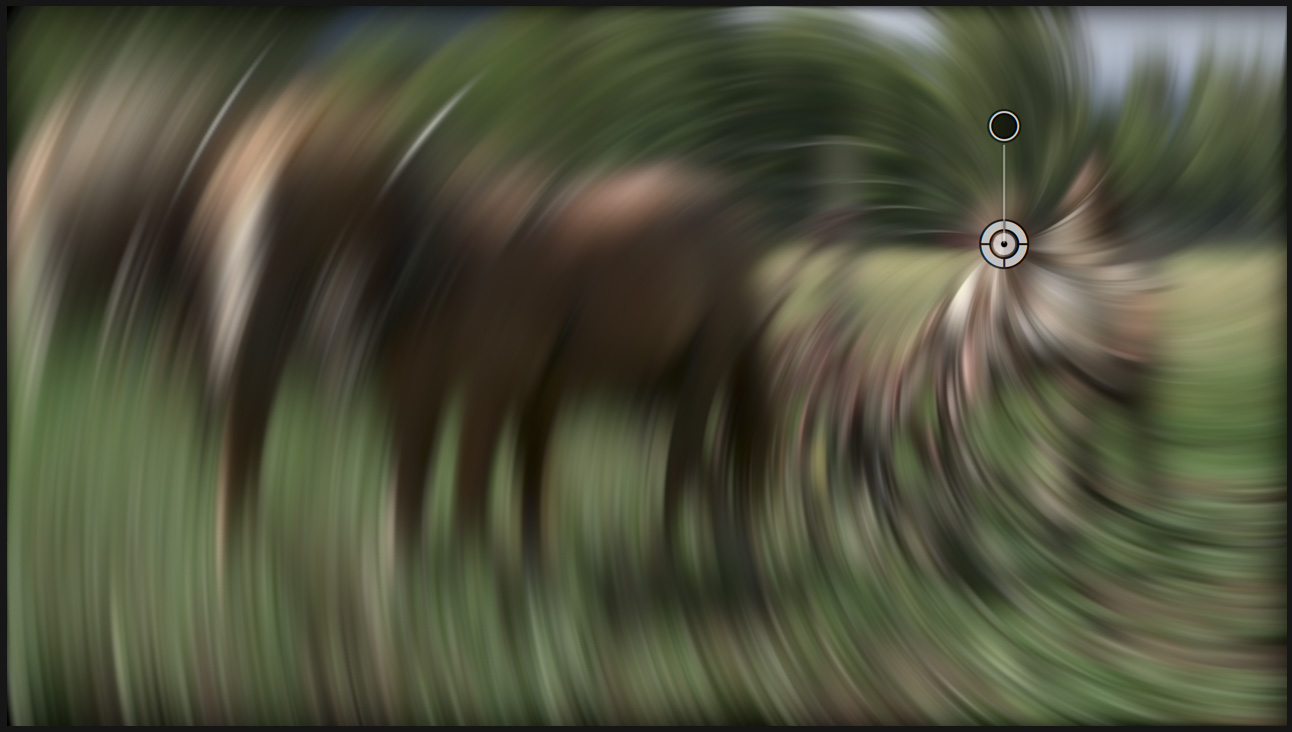
Radial creates a circular blur around a central object. The on-screen white circle determines the center. The Amount slider determines the amount.
Sharpen is exactly the OPPOSITE of a blur. It increases the contrast of an edge to make an image appear more in-focus. This screen shot illustrates a severely over-sharpened image, making all the edges very obvious and harsh.
NOTE: Sharpen should be used gently and in small amounts.
(Zoom effect, no swirl, Uniform value)
(Zoom effect, clockwise swirl, Uniform value)
(Zoom effect, no swirl, Variable value)
Zoom is an intriguing effect that needs to be used sparingly. There are more creative options with Zoom than with any other blur effect.
MASK A BLUR
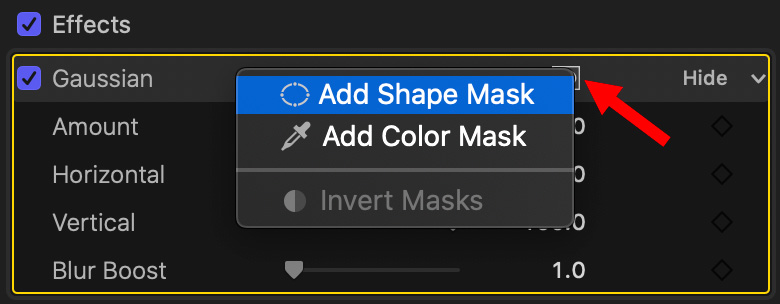
To apply a mask to a portion of the frame, click the small icon at the top right of virtually every effect and select Shape Mask.
NOTE: A color mask selects a portion of the frame based upon its color, for example, to change the color of a shirt. However, for blurs, a color mask is rarely used.
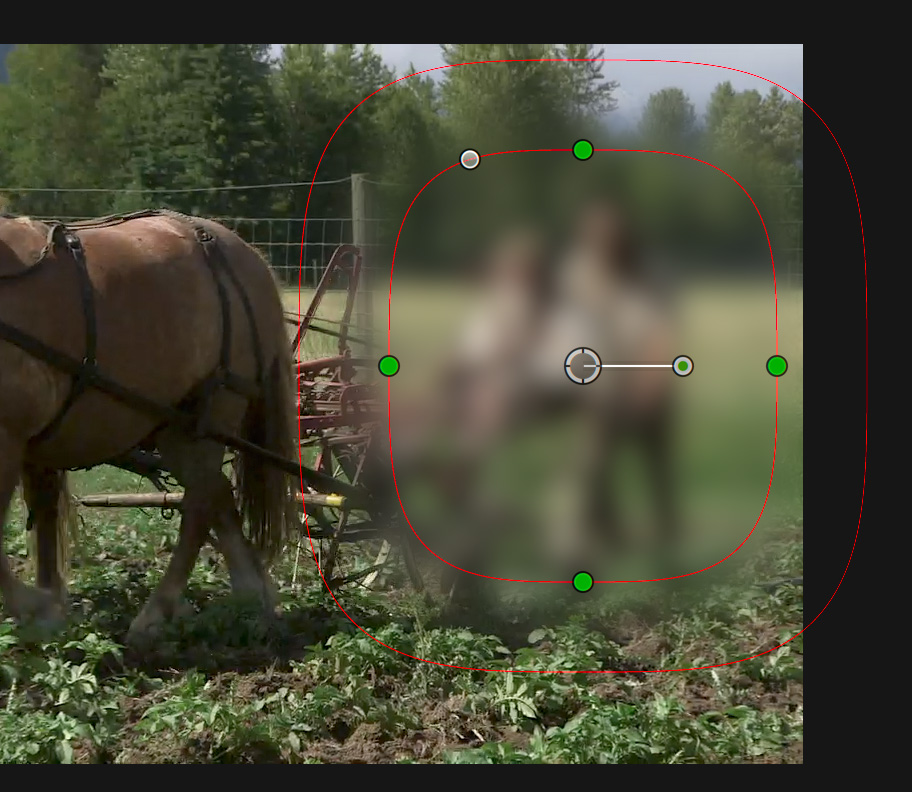
A mask shape appears in the frame. Drag the center circle where you want the mask to occur.
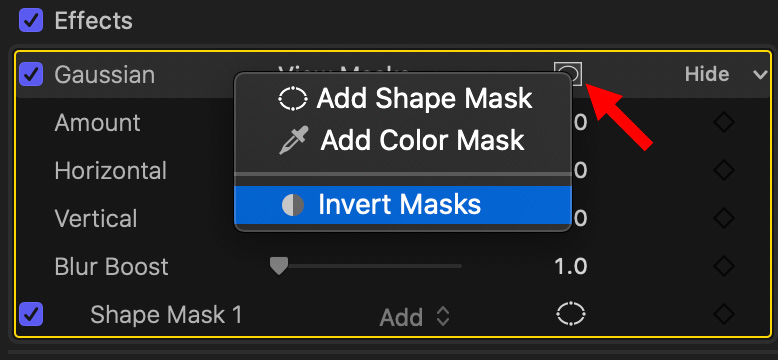
Once a mask is applied to a clip, the menu in the top right corner of the effect in the Video Inspector displays an Invert Mask option. This flips the area that’s clear with the area that’s blurred.
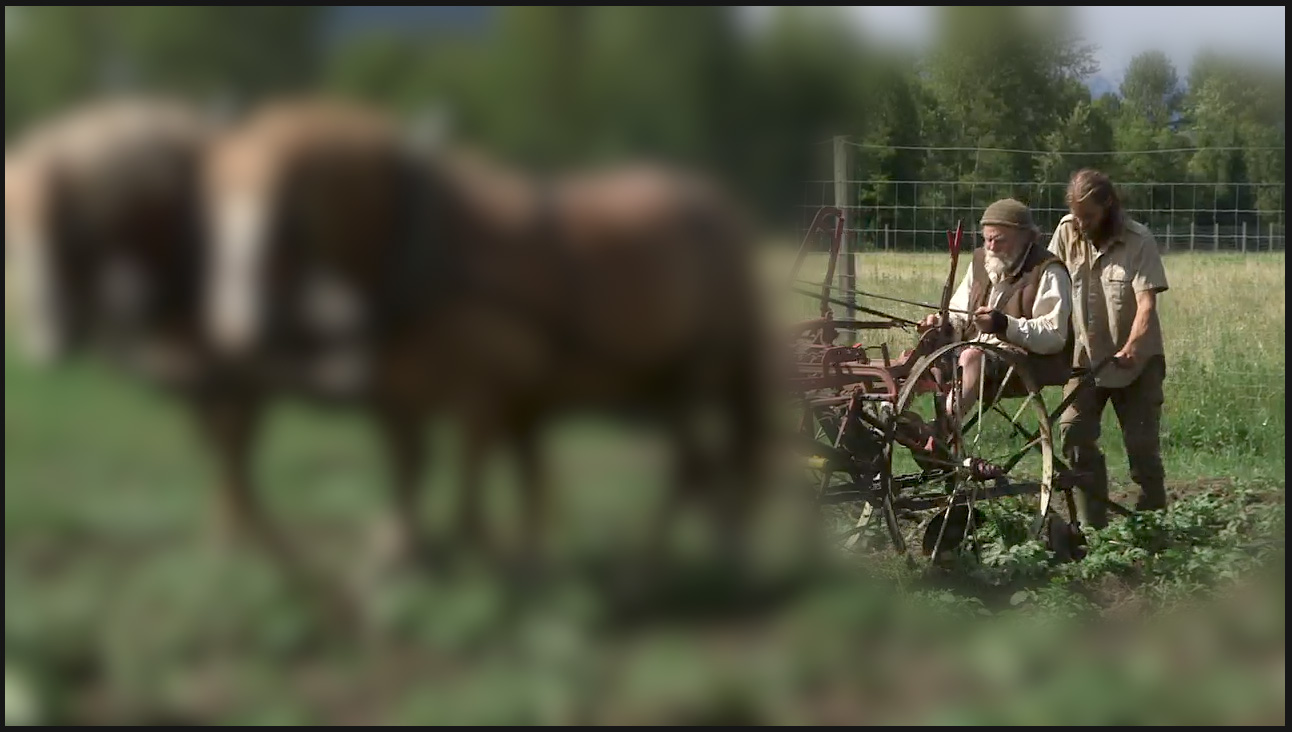
Here’s an example of a masked effect using Gaussian.
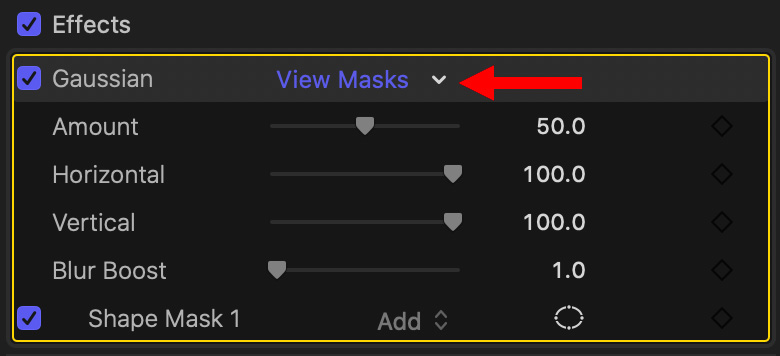
Click the View Masks text button…

…to toggle between displaying the image or an alpha channel of the mask.
To delete a mask, highlight the name of the mask in the Video Inspector and press Delete.
ANIMATE
While we can’t animate shape or color masks associated with an effect – though we can in Motion – we can keyframe any other blur settings.
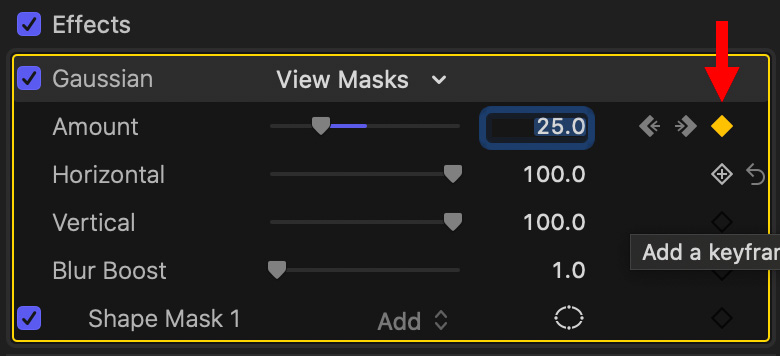
To create a keyframe, click the hollow diamond to the right of the parameter you want to animate.
NOTE: A hollow diamond means no keyframe exists for that parameter on that frame. A gold (solid) diamond means a keyframe does exist.
Move the playhead and adjust that setting again. Once the first keyframe is applied, anytime you adjust the setting another new keyframe is created.
NOTE: There is no limit to the number of keyframes you can place in a clip. However, you can only add one new keyframe per parameter per frame. You can’t do anything sub-frame.
AN EXAMPLE
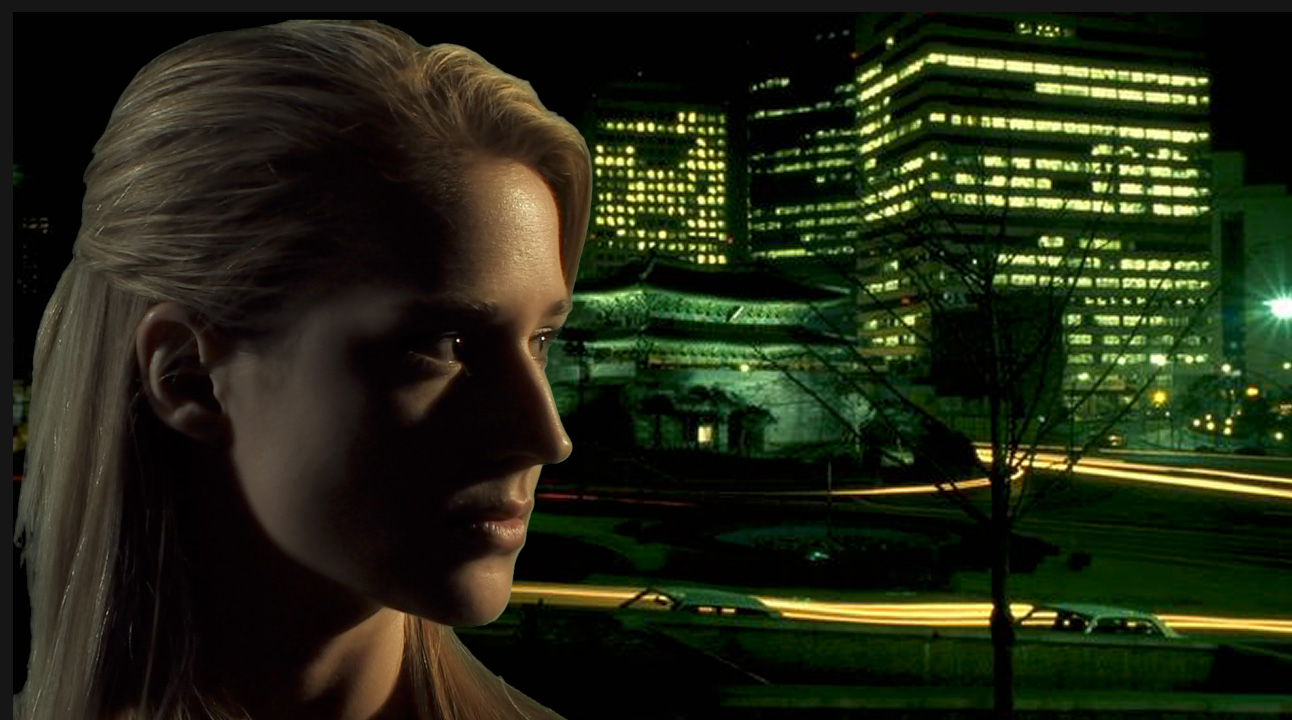
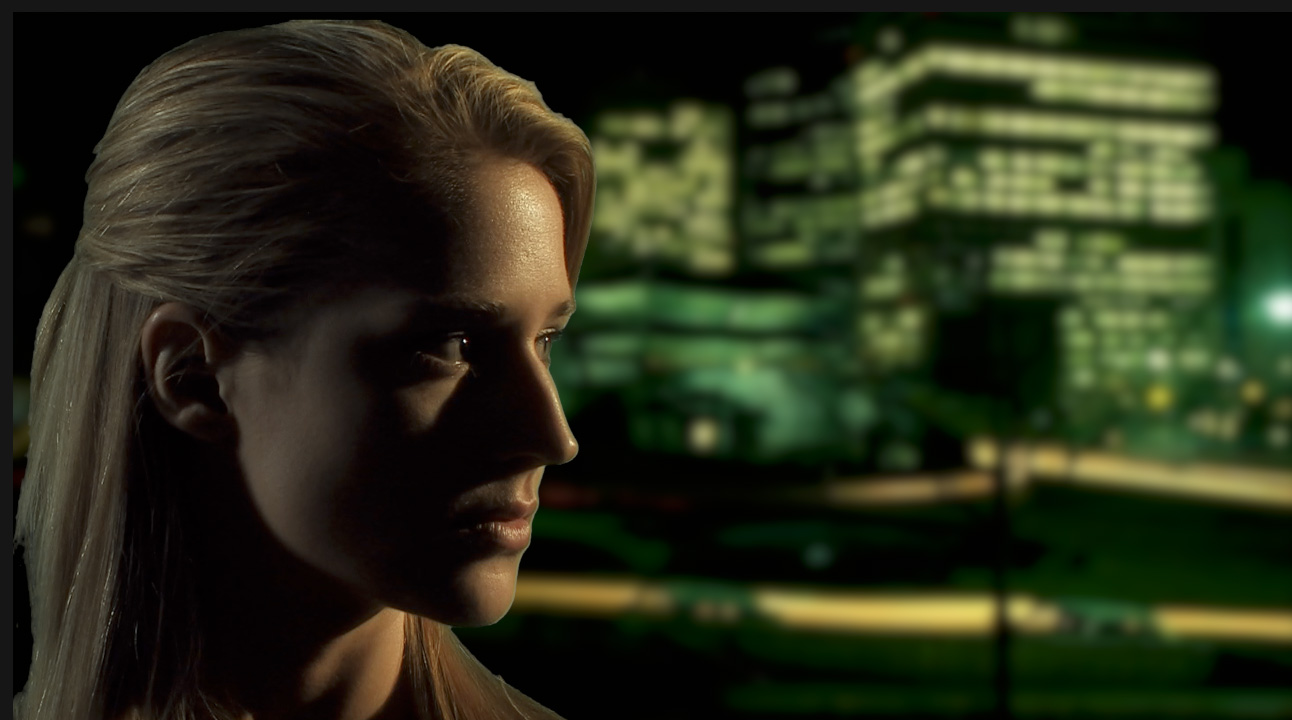
Here’s an example where blurs can help. A chroma-key with no blur (top) and Gaussian blur (bottom). See how the blur makes the shot much more believable.
SUMMARY
I use blurs all the time, to keep a background from becoming too distracting, or improve a green-screen shot, or provide the illusion of depth. I’ll sure you’ll find many uses for them yourself.

2,000 Video Training Titles
Edit smarter with Larry Jordan. Available in our store.
Access over 2,000 on-demand video editing courses. Become a member of our Video Training Library today!
Subscribe to Larry's FREE weekly newsletter and
save 10%
on your first purchase.