
Recently, I’ve started working more with Adobe Audition, which is part of their Production Premium suite of products. Audition is similar to ProTools and Soundtrack Pro in that it handles audio recording, editing, and mixing.
While I’ve done video training on Audition – view Webinar here – I haven’t written about it. So, in this tutorial, I want to show you how to record a two channel audio interview. (You can use this same technique to record a single-channel narrator, just ignore any steps that refer to a second audio channel.)
This technique is especially helpful when you want to edit, process, or set levels for one speaker separately from a second speaker.
GETTING STARTED
Open Audition. (Yes, I know; but you gotta start somewhere…)
Select File > New > Multitrack Session
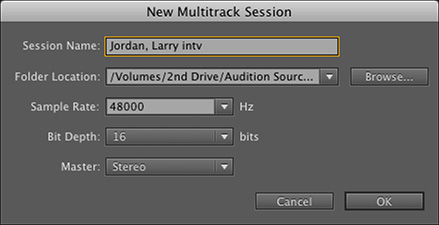
Audition displays a dialog asking for the specs for your project.
Session Name. This can be anything you want, however, for my interviews, I always name the file using “Last Name, First Name Intv” — this helps me keep track of my projects when I’m searching for them later.
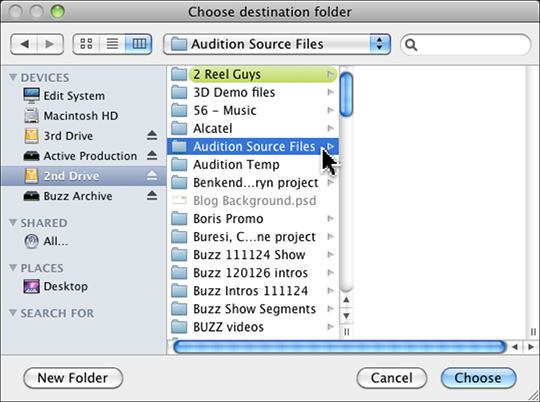
Folder Location. On my second drive — yes, I am absolutely allergic to storing any media on my boot drive, ALL media gets stored on a second drive — I created a folder called Audition Source Files. I make sure all Audition files are stored in that folder.
Sample rate. For most purposes, a bit depth of 48 kHz is appropriate. Specialized audio recording will use higher sample rates, however, since sample rate determines frequency response and 48k already exceeds normal human hearing, you won’t hear any difference between audio recorded at 48K and audio recorded at 96k.

Bit Depth. Here, I’ve changed my opinion recently. While I record my audio at a 16-bit depth, I edit and mix my audio at 32-bit floating point. The difference in bit depth can make a BIG difference in final result. You can see the bit-depth of your project at the bottom of the Timeline window.
The rest of the settings in this window are the defaults.
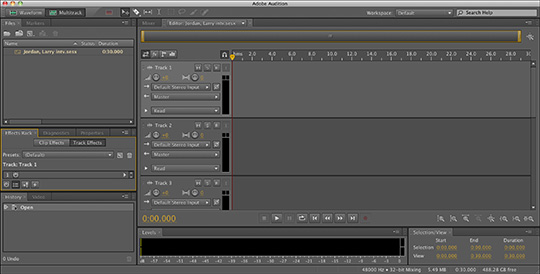
When you click OK, Audition opens a new multi-track project.
CONFIGURING INPUTS
The next step is to assign each mic (input) to its own channel. That way, speaker one will be on channel one, while speaker two will be on channel two.
NOTE: My edit system uses Edirol gear, which is what I illustrate here; specifically an Edirol UA-25A 2-channel mixer. However, any Mac-compatible audio interface – of which there are dozens – works the same way.
Whether you are using the built-in microphone of your monitor (which I REALLY don’t recommend), a mic plugged into your computer, or a separately attached USB device (which is what I DO recommend), you need to tell Audition what you are using.
There are two ways to do this – the better way and the easy way.
The better way.
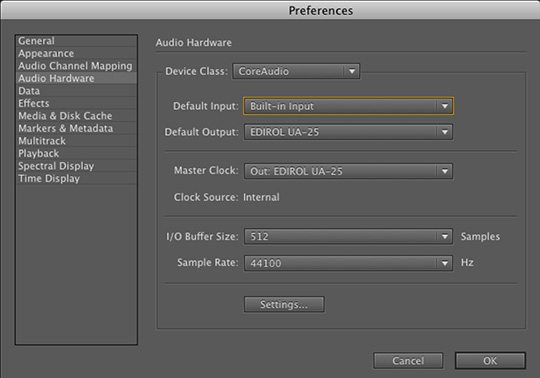
Select Audition > Preferences > Audio Hardware.
Make sure the Default Input and Default Output are set to your device. In the screen shot above, the Output is correct, but the Input is wrong.
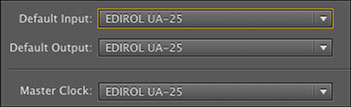
In this case, I set them both to the Edirol. (Again, remember, that you should select the audio device that’s plugged into your system.)
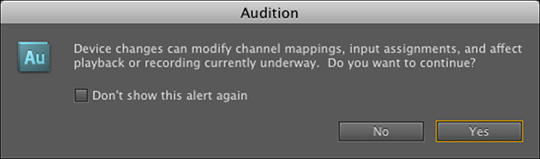
You may see this warning. As long as you set your default input and output to the correct device, you can click OK. If you changed a setting by mistake, click Cancel.
If you are someone that worries that whatever you do will destroy something, don’t panic. Write down your Input and Output settings before you change them. If something goes wrong, reset them back to where they were. You are only changing a preference here, which means mistakes can easily be set right.
Click OK to save your preference settings.
The benefit to changing these settings as part of preferences is that you don’t need to worry about them as long as you use the same audio gear. Each new project you create will use these settings, thus saving you lots of time in setting up.
However, if you want a fast way to do the same thing – but only for a single project, try this.
The easy way.
You can also access the Audio Hardware preferences directly from the Timeline. This is necessary if you created a new project first, before changing your preference settings.
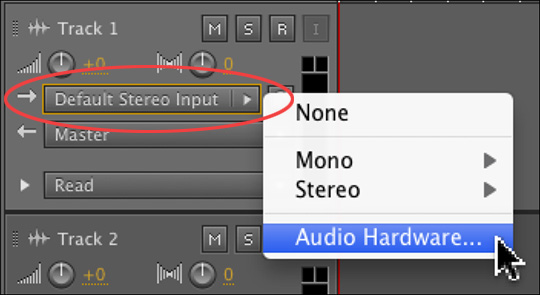
Click directly on the words Default Stereo Input and select Audio Hardware.
This takes you to the Audio Hardware settings FOR THAT PROJECT. Change the input and output settings as discussed above. Keep in mind that you are not changing preference settings for future projects, just the input settings for THIS project.
SETTING CHANNELS
So far, this sounds like a lot of work. But it isn’t. Once preferences are set properly you can skip past setting them. And, once you do this, you’ll discover that changing preferences is a matter of just a few seconds.
Now we need to determine which channel records on which track. A channel is a single audio source – think a microphone.
Most mixers provide a stereo output to the computer – and stereo is two channels of audio mixed into a single signal.
Since we want to record one interview guest on track 1 and the second interview guest on track 2, we need to separate this stereo signal into two separate tracks.
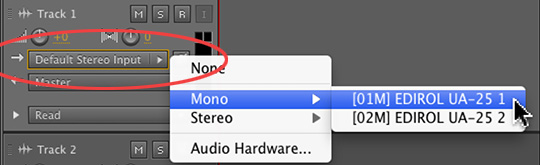
Again, we do that from the Input popup menu. Click it and select one of the two audio tracks coming from your mixer.
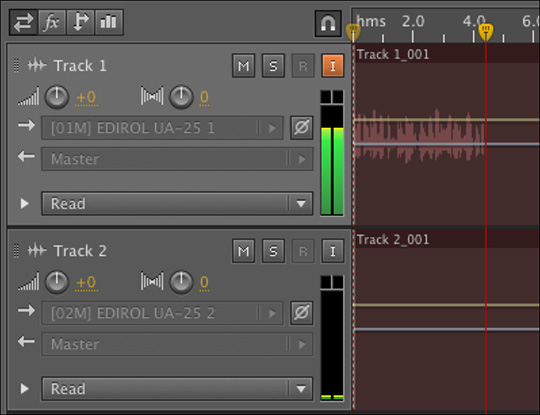
In this example, I’m putting channel 1 from the mixer on track 1 of my project. (You can put ANY channel on ANY track – however, I tend to opt for simplicity and match the channel number with the track.
For a stereo file, channel 1 is the left channel and channel 2 is the right channel.
When you are recording individual speakers, you ALWAYS want to record them to a mono track, not a stereo track. Mono is MUCH easier to edit. Stereo is for music and sound effects, mono is for narrators, actors, and interview guests.
NOTE: If you only have a single mic plugged into your computer, you can skip this step, provided your mic is already selected as an input.

Here, you can see that I have Channel 1 on Track 1 and Channel 2 on Track 2.
ARMING TRACKS AND SETTINGS LEVELS
The next step – and, don’t worry, we are almost done – is to tell Audition which tracks we want to record on. This is called “Arming Tracks.”
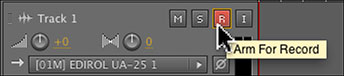
Click the small “R” in each track header that you want to use for recording. In this interview example, I want to record on two tracks, so I click the “R” so it turns red for both Tracks 1 and 2.
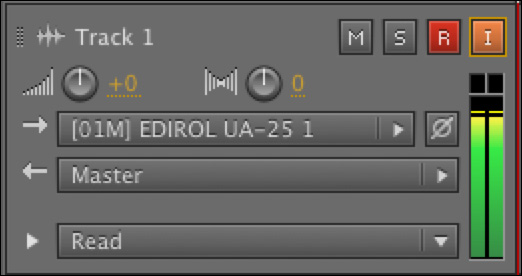
Then, to allow me to monitor the audio – and, more importantly see it on the big audio meters at the bottom, I click the “I” button next to the record button.
This turns on audio monitoring and allows me to set proper recording levels.

Bar fights have started over what I’m about to tell you next, but here goes. Since Audition only displays audio peaks, I set my levels based upon peak levels, not average levels.
Because you NEVER want any recorded audio levels to exceed zero, I record my interviews so that the levels are around -12 dB. I will mix them louder, but record them a bit softer.
Audio gain for recording is NOT adjusted inside Audition, but in your mixer. (This is why I use a mixer, not a mic plugged directly into the computer. Mixers allow me to adjust levels much more easily.)
Adjust the level so that each voice is bouncing the meter around -12 dB.

When you are ready to record, click the red Record button at the bottom of the Timeline.
When you are done recording, click the red Record button to stop recording, then the Stop button to stop the playhead.
SAVE YOUR WORK!
Audition doesn’t have autosave. So type Command+S (File > Save) to save your new recording.
Done.
Whew!
That seems like a lot of work, but, actually, once you’ve done it a few times, you can get your system set up in less than 20 seconds. So, it really isn’t that hard.
SUMMARY
What we’ve done is configure the audio inputs to match your audio gear, assign channels to each track – in this case, we are recording mono audio to each track – then, start and stop recording.
In a future technique, I’ll talk about how to edit your audio. If you want to see this in a video tutorial, take a look here.

2,000 Video Training Titles
Edit smarter with Larry Jordan. Available in our store.
Access over 2,000 on-demand video editing courses. Become a member of our Video Training Library today!
Subscribe to Larry's FREE weekly newsletter and
save 10%
on your first purchase.
5 Responses to Audition: Recording an Interview
Hello Larry, Thank you for this great tutorial. I have a question. I would like to record interviews in the field. I would like to record directly in Adobe Audition multitrack using a small portable laptop and 2 mics. Would I need to have a mixer too? I can’t wrap my head around recording on a phone or recorder, bringing it back to the PC and trying to separate the tracks. I usually record directly through Skype onto two tracks. I have a mixer and a Avid Mbox interface. Warning – I am technically challenged, but I work at understanding.
Paula:
Yes, you can do this. You’ll need one more piece of gear — a converter to plug the mics into that provides level (gain) control and conversion from analog to digital audio. Three manufacturers that I like are: Edirol, Steenberg and Focusrite. They run about $150 and are powered by the USB bus on your computer. I’ve used these for years with great results.
This “A/D Converter” (also called an “audio interface”) connects to the computer via USB. Audition will work with these perfectly without requiring any other software.
Larry
Hello Larry,I have a question about side-chaining in Adobe Audition. I know how to set up one track for the music to duck, but I am unsure of how to set it up for ducking on 2 tracks. I have the music on track 1, host on 2 and guest on 3. I set up the effects for dynamics processing, 24 db soft limit and change gain to 3 db. I go to the sends on host track and set to side chain the music. How do I do the same for the guest? Thank you.
Paula:
Great question and I don’t know the answer. Let me see if I can find out.
Larry
Paula:
This was a great question. So much so, that I wrote an article to explain it. You’ll find your answer here:
https://larryjordan.com/articles/adobe-audition-automatic-music-ducking/
Larry