

Adobe Audition is an audio editing application that I am increasingly impressed with; especially with the death of Soundtrack Pro.
My career in media began so long ago that, well, let’s just say that faders were large rotating knobs and not sliders, and we could still buy records that spun at 78 rpm. (And for the younger set, here’s a description of a 78 record…)
Anyway, lest I wax too nostalgic, my audio career evolved from analog into ProTools, from ProTools to Soundtrack Pro, and from Soundtrack Pro to… ?
As Apple was phasing out Soundtrack Pro, Adobe announced the CS5.5 release of Adobe Audition which brought this audio recording and editing software to the Mac. I’ve been looking at it ever since. As every editor knows, making the transition from one major editing application to another is fraught with all kinds of stress and as more of my work involves audio than video, my stress level was higher than usual.
However, Adobe Audition, while new to the Mac, is very well-established in the broadcast industry and professional audio on Windows. A couple of months ago, I finally decided to take a closer look.
Out of that has evolved a series of video training on how to record and edit audio using Audition. (Click here for a list.) I’m releasing another session on mixing and effects shortly.
For this article, though, I want to share some quick tips on working with Audition There are some very cool features here that you might not find right away.
NOTE: By the way, we’ve made the decision to use Audition for our NAB Show audio coverage in April in Los Vegas. Stop by our booth if you want to see it in action – South Lower 11505. I’ll also write up our experience as a blog post shortly after NAB ends.
WORKSPACES
There are close to 20 different panels and tabs in Audition. If all of these were displayed at once, space would be so cramped that we wouldn’t be able to get any work done.
Instead, Adobe created Workspaces – organizations of related tabs and panels that revolve around common tasks.
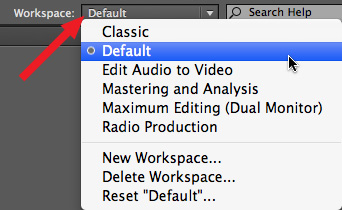
When I’m doing audio-only work, I like the Default workspace. When I’m mixing to picture, I like Edit Audio to Video. You can create, modify, reset, and delete your own workspaces, allowing you to customize the interface as much as you want.
For the screen shots in this article, I’ll use the Default workspace.
KEYBOARD SHORTCUTS
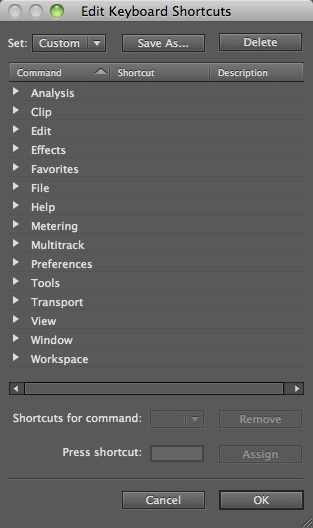
A feature I really like is the ability to create your own keyboard shortcuts. However, this option is located under the Edit menu, not Audition, so you may overlook it. This would be a mistake.
Not only can you assign keyboard shortcuts to menu items, you can also assign them to workspaces, audio meter ranges, help files, preferences, transport controls….
If you are a power user with the need for speed, this, alone, will make your heart beat faster.
OPEN VS. IMPORT
Audition allows you to open Audition sessions, Adobe Premiere Pro XML sequences for mixing, Final Cut Pro XML sequences for mixing, and and huge variety of audio file formats, including WAV and a variety of PC formats that Soundtrack didn’t support.
NOTE: Did you notice I said that Audition opens FCP 7 XML files so you can mix your FCP projects in Audition? You aren’t limited to using OMF. Very cool.
When you select File > Open, sessions open into the Multitrack timeline and audio files open into the Waveform editor.
When you select File > Import, sessions open into the File Browser and audio files are imported and loaded into the Waveform editor, but placed behind the currently displayed multitrack project or waveform.
In other words, if you want to open a file and see it immediately, select File > Open. If you want to open it, but look at it later, select File > Import.
MAKE A QUICK FIX
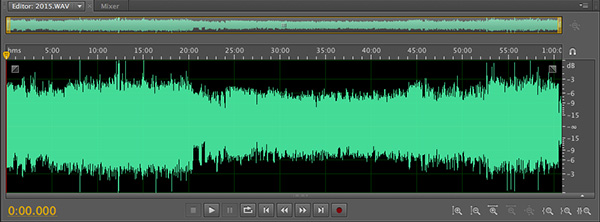
Notice the varying audio levels in the screen shot above? What if you want to open a file, get rid of garbage at the top and tail, even out the levels, save it, and get on with your life fast – for example, to quickly extract a sound bite from an interview. Here, Audition’s speed is amazing:
1. File > Open
2. Select the portion of the waveform you want to remove
3. Press Delete – repeat Steps 2 & 3 until your clean up is done
3. Apply Effects > Amplitude & Compression > Speech Volume Leveler
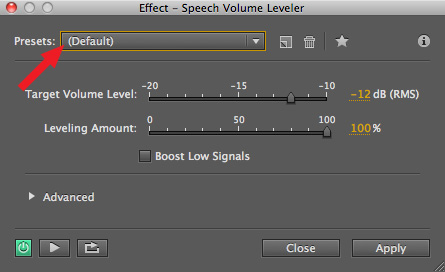
4. Accept the defaults and press OK.

5. Poof! Levels are smooth and your audio sounds great.
6. Save the file.
Done. (I wish I learned this trick a LONG time ago…!)
NAVIGATION

These eight buttons allow you to zoom vertically, horizontally, to the In, to the Out, or, my favorite, zoom the selection to fill the window!
Need a faster way? Every one of these has a keyboard shortcut. Shift+S zooms into the selection.
Need something still faster?
+ Zooms in
– Zooms out
Need the flat out FASTEST way? Roll the mouse scroll wheel to zooms in or out!
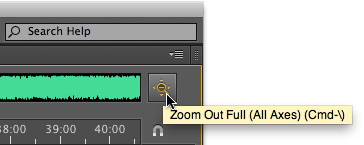
Click the Zoom Out Full button to fit your entire clip into the Window and reset track heights.
A faster way, though, is to type Command +
CREATING A MIX
The Waveform Editor is used to edit audio. Generally, this makes destructive edits, and you save the results to your hard disk. For mixes, though, you use a Multitrack session. This is exactly the same process used by Soundtrack Pro.
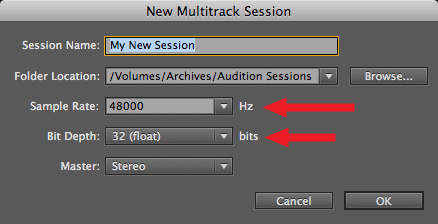
A HUGE caution with Audition, however, is that you need to specify the audio specs of the session before you start adding clips to it.
AND, even more important, your audio sample rates need to match the session settings. If they don’t, Audition won’t allow you to add the audio clips to the timeline.
For all the audio recording I do for my podcast, Digital Production Buzz, I standardized on a sample rate of 44,100 Hz. For the audio recording I do for video, I’ve standardized on a sample rate of 48,000 Hz. Soundtrack allows you to mix and match sample rates – so does Final Cut Pro, for that matter. However, Audition does not.
But, it is very fast and easy to convert sample rates using setting presets in Compressor, in case I have a problem with an audio file not having the correct sample rates. For that matter, Audition also supports batch audio file processing.
All my audio recordings use 16-bit depth. This is fine for recording. Audition defaults to 32-bit float space for mixing. This is ideal for mixing and should be left alone. It is perfectly OK, and, in fact, recommended, that you mix 16-bit audio in 32-bit float space. This provides more room for effects to work and helps your audio sound better.
NOTE: Once you set the sample rate for a multitrack session, it can not be changed.
ADDING AUDIO
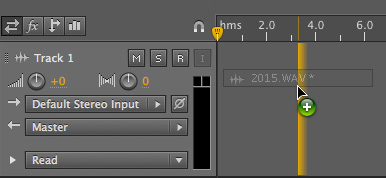
To add audio from the File Browser to the Multitrack timeline simply drag it. The gold border indicates the start of the clip.
Want to open a clip into the Waveform editor? Double-click it.
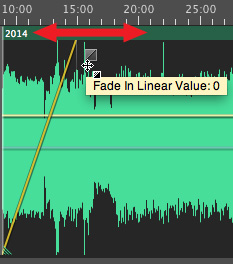
Looking for a fast way to create a fade? Grab the fade box in the corners and drag left or right.
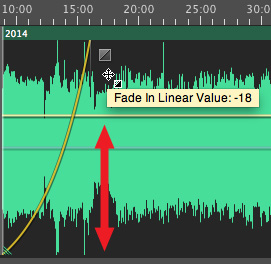
Want to change the shape of the fade? Drag the fade box up or down.
EDITING AUDIO
To select the Arrow tool, press V — same as Photoshop
To cut a clip, press R (or RR) for the razor blade to cut a single (or all) tracks.
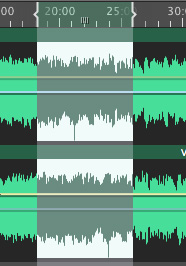
To select a range within a clip, press T — the Time Selection Tool and drag to select a region.
To select a region across tracks, drag across the tracks.
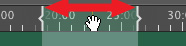
To move the region, drag the selection area at the top.
To change the In or Out of the region, drag the In or the Out at the top.
To delete a region and leave a gap, press Delete.
To delete a region and remove the gap, press Shift + Delete.
OTHER GOODIES
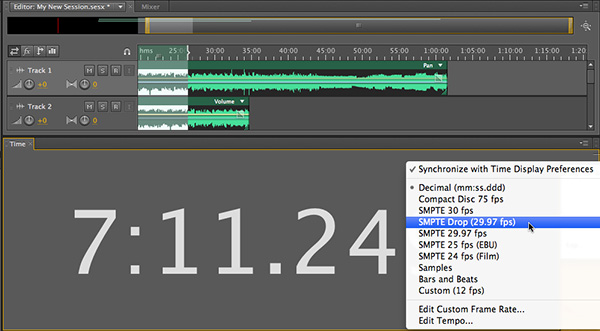
Want some seriously big Timecode? Go to Window > Time and drag the top divider up, and UP! To select the type of time display, right-click in the Time window and pick your poison.
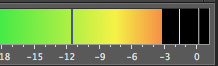
Need to see both the highs and the lows? Control-click in the audio meters and turn on both Peaks and Valleys. Peaks (yellow line) show the loudest peaks in your audio for the last three seconds. Valleys (gray line) show the softest parts of your audio for the last three seconds. I don’t know why, but I love this feature.
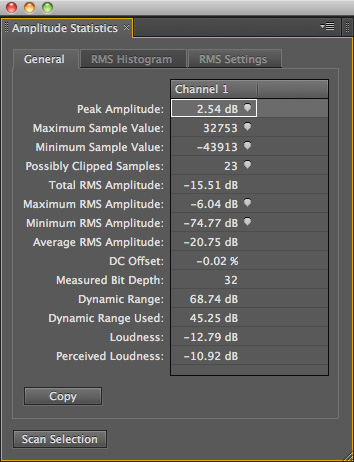
Want to know PRECISELY how loud your audio is? Open your clip in the Waveform Editor, then choose Window > Amplitude Statistics. Click Scan, in the low-left corner. Instant stats.
There are more details in this one window than I have time to explain — EXCEPT, notice that this not only displays peak levels, but RMS (average) levels and actual loudness. If you, like me, keep getting into arguments about whether audio levels should be expressed as peak or RMS, this one screen will ease a lot of tension.
FINAL THOUGHT
There is a lot for Final Cut editors to like with Audition. I’m really looking forward to showing you more about Audition in the future.
NOTE: Have your own favorite Audition trick? Add it to the comments below.

2,000 Video Training Titles
Edit smarter with Larry Jordan. Available in our store.
Access over 2,000 on-demand video editing courses. Become a member of our Video Training Library today!
Subscribe to Larry's FREE weekly newsletter and
save 10%
on your first purchase.
51 Responses to Adobe Audition: Quick Power Tips
← Older Comments-
 Stephen Carlton says:
July 28, 2019 at 6:28 am
← Older CommentsGreat article and worth referencing to.