
![]() Apple Compressor has the ability to add both still and moving watermarks to compressed video. These images are burned into the video and are always displayed wherever the video is viewed.
Apple Compressor has the ability to add both still and moving watermarks to compressed video. These images are burned into the video and are always displayed wherever the video is viewed.
Here’s what you need to know.
STILL WATERMARKS
Still watermarks can be either black and white or color and are best created in Adobe Photoshop, or any other still editing package that can create a transparent background (also called a “transparent alpha channel).

The easiest way to do this is to create a new layer in Photoshop with your watermark on the upper layer.
NOTE: It is best if your Photoshop document is the same size as the video files you’ll be inserting this into. Set the resolution to 72 dpi and make sure to position the Watermark exactly where you want it to be placed in the final video. You can change the location in Compressor, but Photoshop allows you to be much more accurate.
In the screen shot above, you can see the watermark I use for my webinars. The text is placed as the upper layer in this PSD file. (In this screen shot, I’ve filled the lower layer with black so you can see the actual text of the watermark.)

Next, either select the bottom layer and make it transparent, or simply delete the bottom layer, which creates a transparent background. In this screen shot, I selected the entire bottom layer and deleted its contents.
At this point, save the file in PSD format which preserves the transparent background.
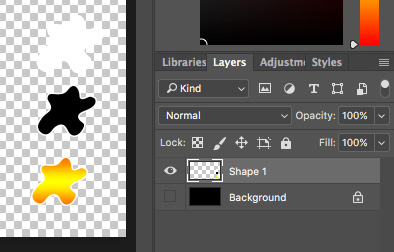
In this example, I created three different watermarks on the same layer. Why? Simply to illustrate that watermarks can be white, black or multi-colored; though I hope to never use a watermark this big and, um, ugly, in an actual video!
In this example, notice that the watermarks sit on a layer above a transparent background.
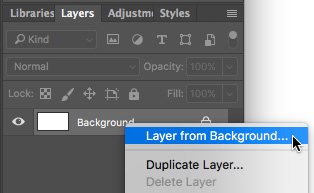
NOTE: When first created, the background is not transparent. To convert the background into a layer that supports transparency, right-click the word “Background” in the Layers panel and choose: “Layer from Background.”
CREATE A MOVING WATERMARK
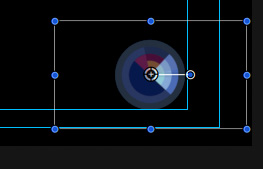
The easiest way to create a watermark that moves is in Motion. In this screen shot, I’m using a generic design from the Motion Library. You can create any motion graphic you want. Be sure to pick a color palette that will stand-out from the video itself.
NOTE: You can use any video application that creates video with an alpha channel. This includes: After Effects, Premiere and Final Cut Pro X, though Motion makes this quite easy because you have fewer settings to change.
Notice, here, that the watermark is carefully positioned to be exactly in the lower right corner of Action Safe. (While you can position watermarks anywhere, they are generally positioned in either the lower left or lower right corner just inside Action Safe.)
When creating moving watermarks in Motion there are three things you must do:
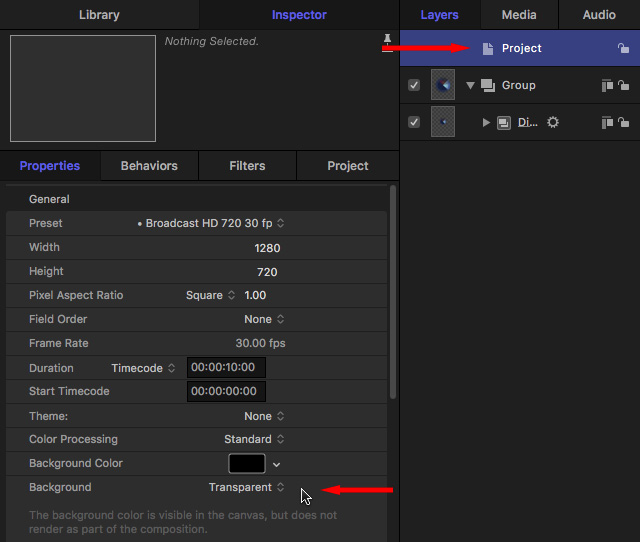
In order for the watermark to be placed on top of the video during compression, make sure that it has a transparent background. To do so, select the Project in the Layers pane, then choose Inspector > Properties and be sure the Background is set to “Transparent.”
NOTE: Play with the colors a bit. Lighter colors in your logo may look better over video than darker ones.
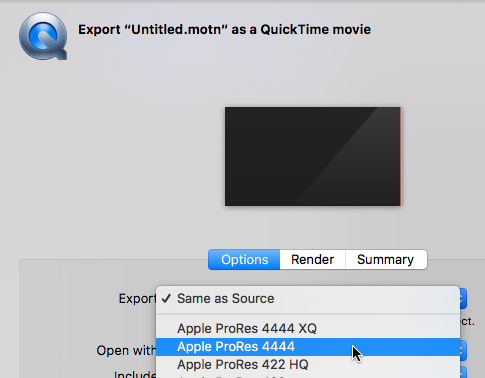
When exporting the final file, you need to change one export setting. First, choose: Share > Export Movie and set the Export setting to Apple ProRes 4444. This makes the background transparent.
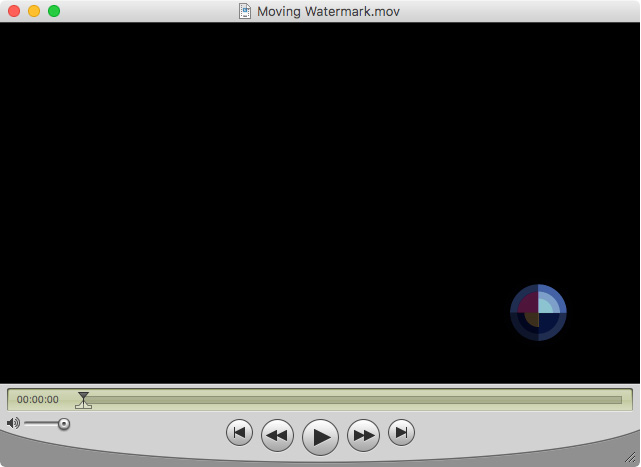
Here’s the exported QuickTime movie in QuickTime Player 7. The transparent background is displayed as black, but it is still transparent.
ADD THE WATERMARK
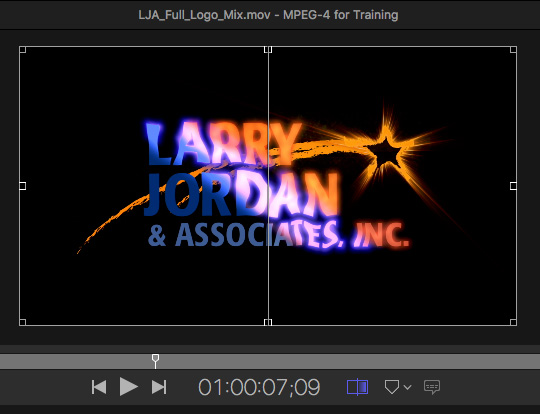
Once the watermark is created, open Compressor and import your movie. For example, here’s an animated production logo we created, but never used.
Apply whatever compression setting you want to use for the final compressed video. Since the watermark is added before compression, the actual compression setting doesn’t make a difference.
Once applied to the clip, select the compression setting, open the Inspector, click the General tab and scroll down to the bottom. Selecting a specific compression setting already applied to a clip adds the watermark just for that clip.
NOTE: You can make a watermark the default setting for any compression setting by choosing the setting first, in the left-hand Settings panel, then following the steps below. If you are choosing an Apple-defined setting, make a copy of it first.
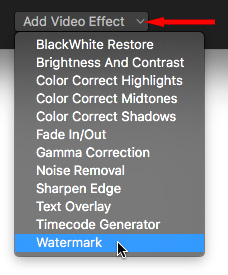
Click the Add Video Effect popup menu and choose Watermark, so that it is checked.
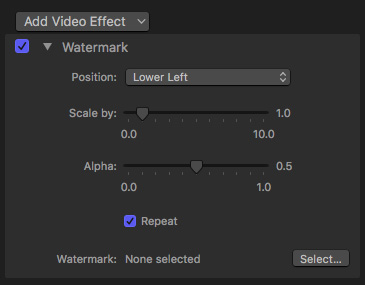
Here are what the watermark settings do:
Click the Select button and choose the watermark you want to apply.
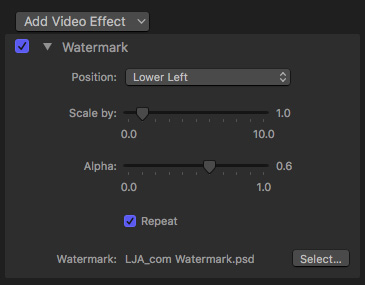
For the next three examples, the screen shot above illustrates the settings I used.

Here is the black and white logo at 0.6 Alpha.

Here is the color watermark, also at 0.6 Alpha.

And here is the moving watermark, also at 0.6 Alpha.
NOTE: With the 4.3 version of Compressor, I sometimes have problems getting watermarks to look clean. If you have problems, try increasing the resolution of the Photoshop document or the frame size of the Motion project, while keeping the watermark in the correct position.
SUMMARY
Watermarks are a great way to mark your videos as yours. They don’t necessarily deter piracy, but, if your videos are stolen, at least people will know where they came from.

2,000 Video Training Titles
Edit smarter with Larry Jordan. Available in our store.
Access over 2,000 on-demand video editing courses. Become a member of our Video Training Library today!
Subscribe to Larry's FREE weekly newsletter and
save 10%
on your first purchase.
2 Responses to Apple Compressor 4.3.x: Add Watermarks to Video
i want to learn how to edit with final cut
Tilsetso:
This training package covers Final Cut Pro X in detail, and doesn’t assume any video editing expertise:
https://larryjordan.com/store/final-cut-pro-x-workflow-editing-10-3/
Larry