
 In the beginning, before GPUs existed, all video scaling and rendering was done by the CPU. And, as you can imagine, that took a long time.
(I still clearly remember adding a Gaussian Blur to a clip in Premiere 4, back in 1998, that took 30 seconds to blur a single frame of video. And, at the time, I thought that was amazingly fast!)
Since then, as GPUs took over the rendering load from CPUs, editing has gotten much, MUCH faster! A GPU is optimized for rendering digital images quickly in a way that a CPU just can’t.
However, converting Premiere from CPU-based effects to GPU-based effects is neither simple or fast. Because of this, these two render options appeared many years ago and have been confusing editors ever since.
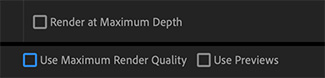
These settings can be applied to individual sequences or an entire export. But, what do they do and when do you use them?
The short answer is: As Adobe migrates toward more GPU-based effects both of these options are quickly becoming unnecessary.
SETTING SUMMARY FOR GRAPHICS ON A MAC

In Adobe Media Encoder, which handles all exports from Premiere, make sure that the Video Renderer is set to Metal (or the soon to ship Metal 2).
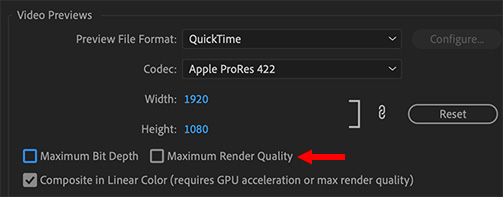
When creating a new sequence in Premiere Pro CC, make sure both options are turned off.
When exporting from Premiere, leave both these options off unless you are scaling images larger and seeing jagged lines on the edges of your images. In that case, turn Maximum Render Quality on.
Given the number of effects that are now GPU accelerated, there is no benefit to using Maximum Bit Depth, because that is used by the GPU automatically.

2,000 Video Training Titles
Edit smarter with Larry Jordan. Available in our store.
Access over 2,000 on-demand video editing courses. Become a member of our Video Training Library today!
Subscribe to Larry's FREE weekly newsletter and
save 10%
on your first purchase.

17 Responses to Adobe Premiere Pro CC: When to Use Maximum Render Quality
← Older Comments-
 Larry says:
August 3, 2020 at 8:48 pm
-
 Mike Curtis says:
August 20, 2020 at 11:31 am
-
 Larry says:
August 20, 2020 at 11:42 am
-
 Noah says:
December 24, 2020 at 1:24 pm
-
 Larry says:
December 24, 2020 at 1:55 pm
-
 JLo says:
February 10, 2021 at 8:45 am
-
 Larry says:
February 10, 2021 at 1:54 pm
← Older CommentsSteve:
For the same project, the setting should match. Otherwise, the instructions above should hold true.
Generally, I’d suggest defaulting to unchecked unless you see a problem with the finished result.
Larry
HI Larry! Mike Curtis here, I used to write HD for Indies, I think we maybe were on some panels together Back In The Day. I’ve got a client doing 8Kx8K over/under 360/VR video exports, and the renders are, unsurprisingly, colossally long. They’ve got a 2080 card, but I don’t know if it has enough VRAM to handle those frames, and we want a 10 bit deliverable. My question – if Render at Maximum Depth is OFF, and the GPU can’t handle it, what bit depth is used? 8? 16? Other? I don’t know, do you?
Mike:
It is good to hear from you again!
(Um, tell me they are editing 8K 360° media on a 2012 Mac mini…? Sigh… sometimes you just need more horsepower.)
OK, I’m done complaining. Premiere still doesn’t use the GPU for most rendering, so they are constrained by the speed of the CPU, not GPU. Adding VRAM probably won’t help. Premiere is converting to GPU rendering, but it is a slow process.
When rendering, Premiere will match the bit-depth of your sequence, unless you tell it otherwise.
Keep in mind that render speed will also be affected by the number and complexity of effects applied to the clips. So, if you have an intense color grade going on, that, too, will slow things down.
Finally, if you have access to a faster CPU, read this article and see if this helps speed things up:
https://larryjordan.com/articles/premiere-pro-use-two-computers-to-speed-exports/
Larry
If I am rendering down from slightly above 4k res to strict 3840×2160 and i have an GForce GTX 1070 CUDU situation, do I need to use the “Use Maximum quality” setting?
Noah:
You probably don’t need it, but it wouldn’t hurt to turn it on. Maximum render quality only affects clips that are scaled.
As the article states, if you see jagged (bumpy) edges, turn this on. Otherwise, you can leave it off.
Larry
Great info here! Thanks for making this write up.
I have a specific question relating to ProRes and MXF files. If I am exporting either of those hi-res formats, do Maximum Depth and Maximum Render Quality become irrelevant? I am worried they may do more harm than good, as these formats are already incredibly high quality on their own.
JLo:
Leave both turned off.
Larry