
![]()
[ To watch a video showing how this works in Audition CS6, click here. ]
There are some good noise reduction tools in Final Cut Pro X and Premiere Pro CC. However, it is often best to clean-up audio in a dedicated audio program, such as Adobe Audition.
This is Part 2 on Noise Reduction. Click here to read Part 1.
BACKGROUND
Noise is anything you don’t want to hear in your clip.
For example, in a football video, a cheering crowd adds energy to your video. But, in a sad death scene, a cheering crowd is distracting. Machine noises are interwoven with everyday life; unless “everyday” is the Middle Ages.
The easiest noises to get rid of are low-pitched hums. The hardest noises to get rid of are echoes and people talking in the background.
Why? Because all sounds exist as a series of rapidly changing frequencies. Human speech is roughly 200 cycles per second to about 6,000 cycles. (We use “Hz,” or “Hertz,” as the abbreviation for “cycles per second.”) Low frequency hum is around 60 Hz, so it is easy to separate voices from hum based on this frequency difference. Machine noise, like fans or air conditioners, are higher frequencies, but, generally, defined by some very specific pitches.
Not so the human voice. Pitch and volume range wildly. Worse, the frequencies of the talking you want to remove are, essentially, the same as the frequencies of the talking you want to keep. Removing voices behind your actors can be very, very difficult.
On the other hand, most of the time we don’t want to remove these sounds, we simply need to reduce them. After all, hearing the sound of the location is why we went to that location in the first place.
NOTE: I can’t stress this point enough. If you want to remove noise, your best – and sometimes only – option is to re-record your actors in an acoustically-treated room. This ALWAYS yields the best quality with the greatest control. However, syncing these new recordings with the originals is time-consuming and tricky.
OPTION 2: NOISE REDUCTION
Unlike Adaptive Noise Reduction, if you want the noise reduced without a fade, then you should use this technique.
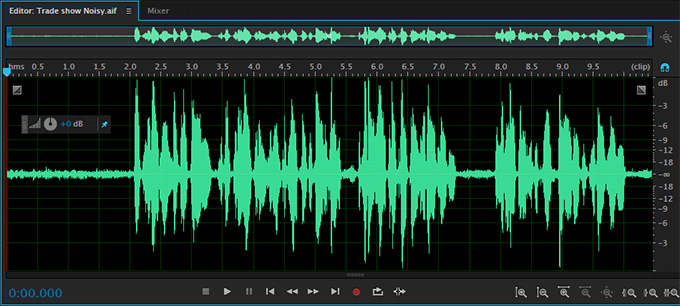
After importing the clip into Audition, double-click the clip to load it into the Waveform editor.
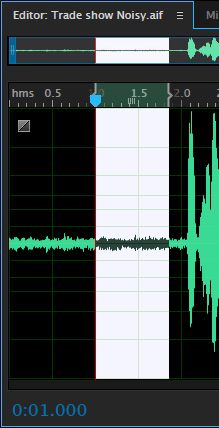
Select as much “pure noise” as you can find in the clip. This needs to be at least 1/4 second to get a decent sample. You don’t need more than a second. The best place to look is the short space between sentences; however, be careful not to include a breath from your speaker.
With the noise selected, choose Effects menu > Noise Reduction/Restoration > Capture Noise Print.
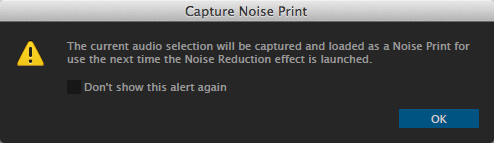
This dialog warns you that you are copying that audio data into a special clipboard that will use your selection to determine the noise you want to remove.
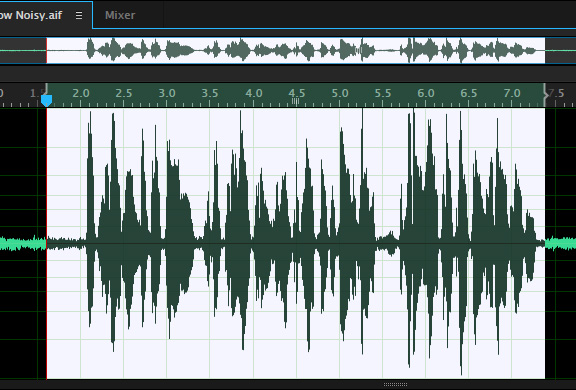
Select the audio from which you want to remove the noise. Generally, I remove it from the entire clip. However, since I want to illustrate a “before” and “after,” I’ll only select a portion of this clip.
With the noisy portion of the clip selected, choose Effects menu > Noise Reduction/Restoration > Noise Reduction (process).
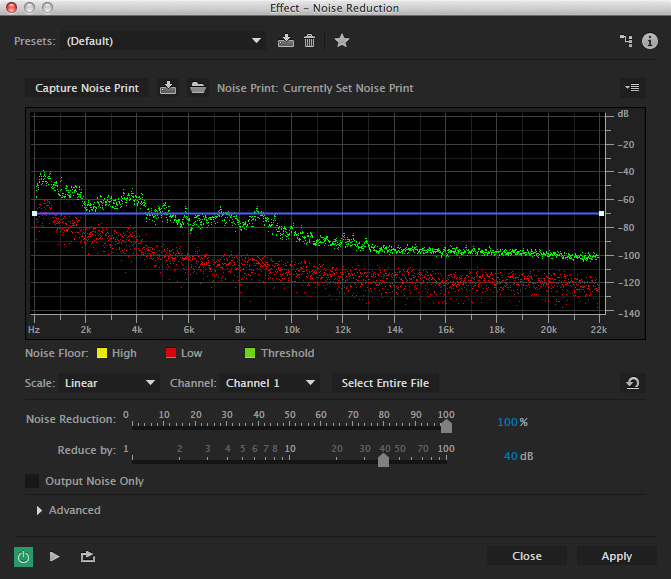
This displays the noise reduction graph. There are a LOT of settings here that can be tweaked. However, here’s a technique that works for me.
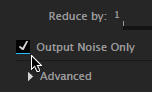
In the lower left corner, check Output Noise Only. This allows me to hear the noise I’m removing. My goal is to make the noise as loud as possible, while including the least amount of voice as possible.
NOTE: Each clip is different, as are the settings. I’m describing a process, not specific settings.

Click the Toggle Loop button (the hooky arrow thingy) in the lower left corner so that it turns green, This plays the selection over and over. Then, click Play button immediately next to it and listen to the playback.

With the clip playing, adjust Noise Reduction and Reduce by so that the noise is as loud as possible and the voice is as soft as possible.

Then, uncheck Output Noise Only and listen to the results. If the voice sounds too “electronic” or degraded, adjust the same two sliders until the voice sounds as rich as possible, while reducing the amount of the noise as much as you can.
In almost all cases, you won’t be able to get rid of all the noise and the voice will always degrade a bit. You can’t achieve perfection, simply make the clip sound as good as you can.

When you are happy with the results, click Apply in the lower right corner.

In the waveform, notice the difference in the thinness of the waveform in the selected area, vs. the thickness of the waveform in the noisy, or non-selected, area.
We can’t make bad audio sound perfect, but we can make it sound better.

2,000 Video Training Titles
Edit smarter with Larry Jordan. Available in our store.
Access over 2,000 on-demand video editing courses. Become a member of our Video Training Library today!
Subscribe to Larry's FREE weekly newsletter and
save 10%
on your first purchase.
One Response to Adobe Audition CC: Noise Reduction (Pt. 2)
Larry:
In general I find Audition CC to be pretty powerful and quick ; the combination of the two is excellent. One thing troubles me a bit, If I have multiple tracks, a mix, in the multitrack editor, and need to fix something like your noise example where I have to double click a given track into the waveform editor, unless I’m missing something, when I go back to the multitrack to render out the mix, my changes (noise removal) from the waveform editor are not carried over to the multitrack. It seems I have to first render the single file out of the waveform editor and then re-import that no noised file back into the multitrack session. Are they two separate worlds to themselves and not connected in my example above?
Any thoughts.
Thanks,
Lou
Lou Hemsey Music and Film