
![]() This article grew out of an email from Paula Slater who was asking about ways to automatically adjust levels between tracks. While we can use keyframes and envelopes to adjust music levels as actors speak, it would be REALLY cool to have the software automatically lower music levels whenever some is speaking.
This article grew out of an email from Paula Slater who was asking about ways to automatically adjust levels between tracks. While we can use keyframes and envelopes to adjust music levels as actors speak, it would be REALLY cool to have the software automatically lower music levels whenever some is speaking.
Starting with the CS6 release, Adobe Audition supports this with a process called “Side-Chain Ducking.” Effectively, side-chaining allows you to use the signal from one track to trigger an effect on another track.
Setting this up isn’t hard, but it certainly isn’t obvious. In this article, I’ll show three ways to create this effect:
The only difference between the first example and the last two are that the last two use buses. The process and effects are the same.
NOTE: I’m grateful to Durin Gleaves at Adobe for guidance on how to create this effect.
GET STARTED
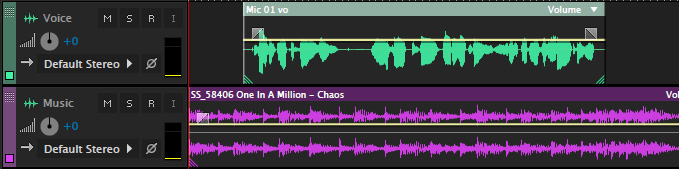
Here’s a simple project with narration on the top track, music on the second track.
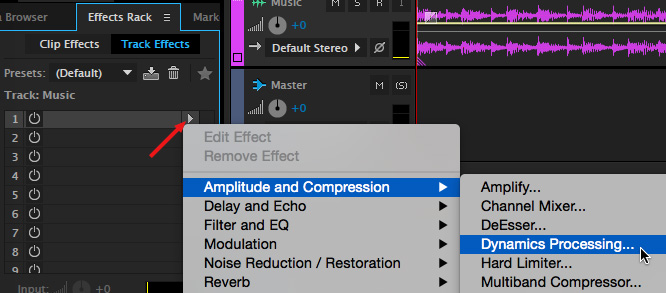
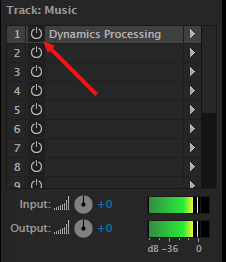
Select the music track then, in the Effects Rack, apply Amplification and Compression > Dynamics Processing.
NOTE: While this is the only native effect in Audition that supports side-chaining, any 3rd party VST or Audio Unit effect which supports side-chaining should work as well, so if you use Waves or FabFilter or some other plugin bundles, you can use this with your compressor or EQ of choice.
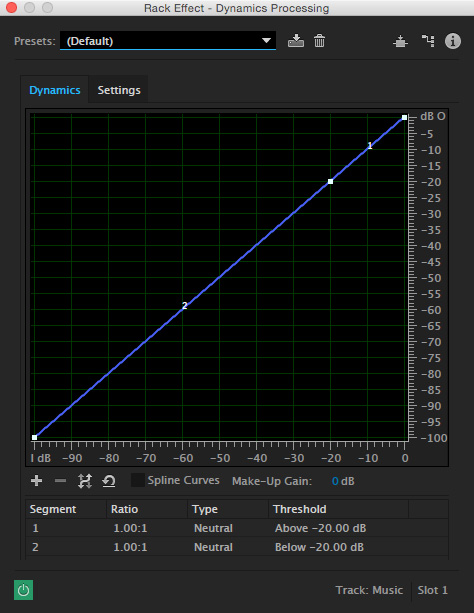
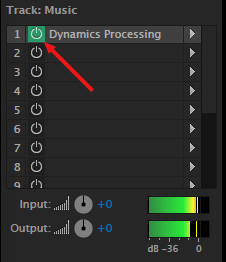
In the Effects Rack, double-click the name “Dynamics Processing” to display the interface.
NOTE: Don’t click the green square, that power switch turns the effect off (dark) or on (green).
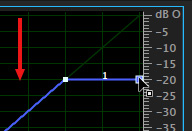
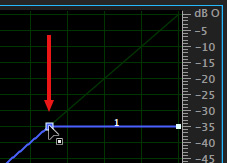
This effect is not the most intuitive because key controls are buried. So, here’s how you set this. Grab the white dot in the top right corner and drag it down to around -20 dB.
For lighter gain reduction, set this to -15 dB. For heavier gain reduction, set this to – 35 dB. Experiment to get the amount of level reduction you want for your music.
NOTE: If you move the right-hand dot to a different level than -20, adjust both white dots at the ends of this line to be level.
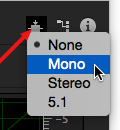
At the top of the Dynamics Processing window, click the square with arrows pointing into it to match the format of the track that holds your narration: Mono, Stereo, or 5.1 Surround. In our example, the voice-over track is Mono.
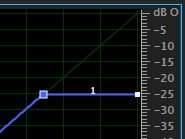
To make the audio differences more obvious for this example, I’ve changed the position of the two white dots to tell this effect that: “Whenever you hear audio coming in the mono side-chain, lower the level of the music on this track by 25 dB. When you don’t hear audio coming in the side-chain, raise the music back to its normal level.”
This sets the effect, now we need to change the routing.
USE THE MIXER FOR ROUTING
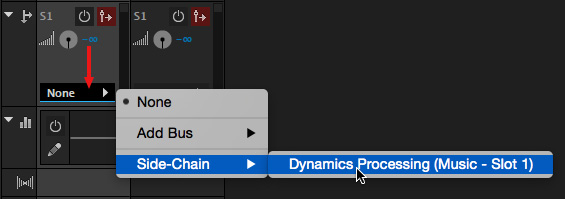
We need to create a new audio route – called a Send – that “sends” the voice-over into the side-chain of the Dynamics Processing effect.
NOTE: Make sure the volume for the send is set to 0; it’s next to the rotary “wheel.” The default setting is negative infinity (that means “off”) and is a good choice in general for this effect.
That’s it. We’re done. Now, let’s test the effect.
TESTING
Select the music track and turn off, by clicking the green button in the Effects Rack, the Dynamics Processing effect.
Play the project and notice that the levels of the music don’t change. (Indicated here by the fact the top and bottom level bars are the same length.) You can also hear that the music levels don’t change.
Now, turn the effect back on and play the project again. Notice that the music ducks whenever the narrator speaks.
If your mixing needs are simple and this is all you need for your project, you are done!
EXTRA CREDIT
Because this filter responds instantly to side-chain input, the music may seem to “pump,” get louder and softer between syllables. This can be reduced in two ways:
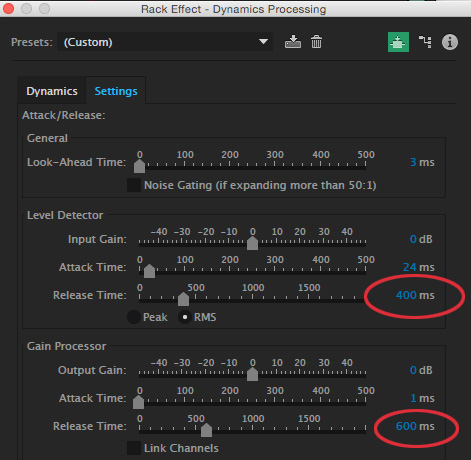
Play the project again. There will always be some variation in the level of the music, but these numbers should make the pumping go away.
EXTRA, EXTRA CREDIT
To make the voice stronger, with a more consistent level apply a Hard Limiter filter to the narration track. Here’s how.
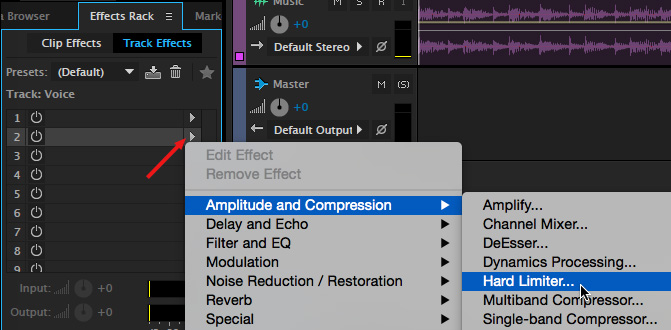
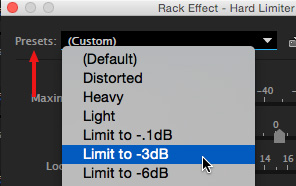
Now, when you play the project, the voice should be solid and loud, without distorting, while the music lowers itself automatically whenever the narrator speaks.
Very cool!
OPTION 1 – MULTIPLE MUSIC TRACKS
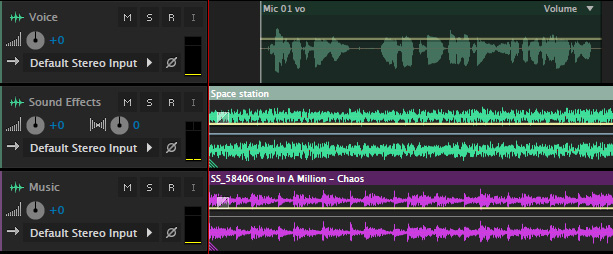
Here’s a modification of this, where music or effects are on multiple tracks, with a single narrator. While there is no limit to the number of tracks you can use, I’ll illustrate this using two: a sound effects track and a music track.
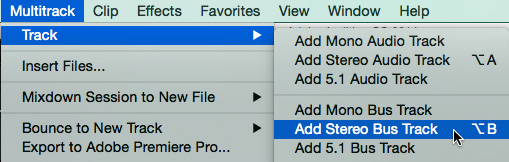
Assuming at least one of your music or effects tracks are stereo, go to Multitrack > Track > Add Stereo Bus Track. (Otherwise, if all tracks are mono, add a Mono Bus Track.)
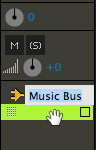
This next step isn’t required, but it makes your life a lot easier. Open the Mixer, double-click the name of the bus at the bottom of the channel strip and rename it to “Music Bus;” or any other name that makes sense to you, other than “Bus A.”
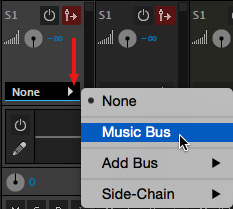
For each track in the mixer that you want to duck – in my example, I want to duck both sound effects and music – go to the S1 pop-up menu and Send it to the Music Bus.
NOTE: Only narration is sent to the side-chain. Music and effects are sent to the bus.
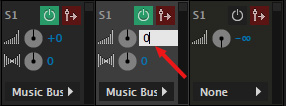
Next, change the send volume to 0. (It is set to off by default.) This sends the full volume of that track to the bus.
NOTE: There are LOTS of ways we use levels and buses in a mix. In this example, I’m simply showing how to use them with this side-chain effect. There will be times where you may not want to send the full volume of a track to a bus.
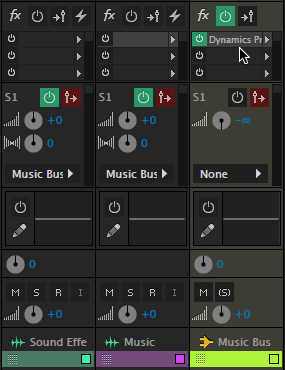
Then, apply the Dynamics Processing filter to the bus, not the individual music track. All the filter settings are exactly the same as we outlined earlier in this article. As with any mix, you’ll still need to adjust levels between all the tracks to get them to sound right, but the audio ducking will happen automatically, as before.
OPTION 2 – MULTIPLE MUSIC AND VOICE TRACKS
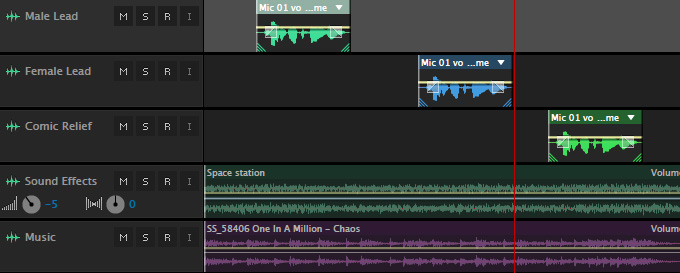
Here’s a second modification, where both music and narration on are multiple tracks.
As before, go to the mixer however, since all our narration is mono, choose Multitrack > Track > Add Mono Bus Track.
[ 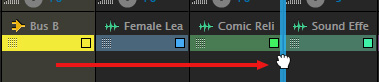
Grab the small thumb in the yellow bar at the bottom of the bus and drag it to the right of all existing voice tracks. This isn’t required, but I prefer to group tracks by function and have bus tracks immediately to the right of the tracks that are feeding it.
[ 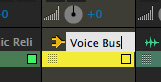
Again, optionally, rename the bus into something that makes sense to you; here I’m using “Voice Bus.”
[ 
From the Send popup menu for each channel track in the Mixer, send the audio from each voice track to the Voice Bus.
[ 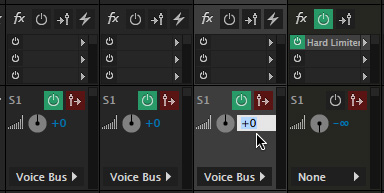
Make sure the Send volume (next to the “wheel”) is set to 0; this sends the full volume of that track to the bus; the default setting is off.
If you want to add the Hard Limiter effect, add it to the bus, not the individual tracks.
[ 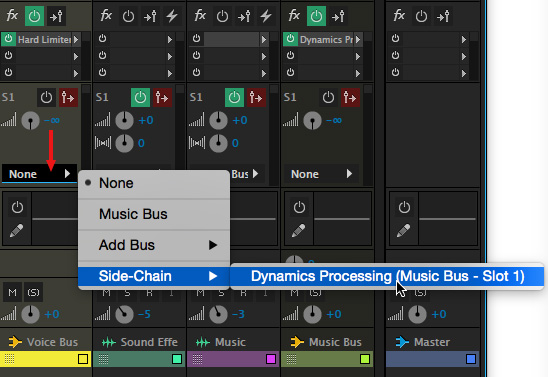
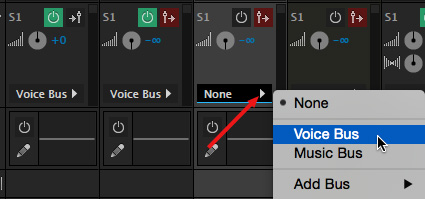
Finally, send the output of the voice bus to the Dynamics Processor side-chain. This send the sum of all voice tracks as a single input into the side-chain effect for the music bus.
Done.
SUMMARY
Because I covered three different examples, this process sounds really complex. But, actually, it isn’t. Start with a really simple mix so you can see how this works. Once you understand the basic idea, adding buses to automate the ducking process across an unlimited number of additional tracks becomes much easier.
This is an outstandingly fast technique to automatically duck music so that your actors and narrators can be clearly heard over the background; whether that background is music, sound effects or any combination of the two.
Remember, the key is to create one bus for the background, a second bus for the voice, then apply the Dynamics Processor to the background track as a side-chain effect.
Very, very cool.

2,000 Video Training Titles
Edit smarter with Larry Jordan. Available in our store.
Access over 2,000 on-demand video editing courses. Become a member of our Video Training Library today!
Subscribe to Larry's FREE weekly newsletter and
save 10%
on your first purchase.
4 Responses to Adobe Audition: Automatic Music Ducking
Thanks Larry. What a time saver. Are their any plugins native to FCPX or 3rd party that can do this in final cut? Also, I would be happy to pay for a complete tutorial for mixing in FCPX.
Richard:
I don’t know any way to do this in Final Cut.
Larry
Thanks for this. I’ve been using Adobe Audition for podcasting with a musical intro and outro and the ducking helps a lot.
That is awesome, very easily explained and the extras have very valuable info too!! I was searching for the multi-voice audio duck procedure, and thanks to you, it’s done! Thanks a lot.