
![]() Color Match is new in the April, 2018, update to Adobe Premiere Pro CC. What it does is allow you to compare two shots side by side, then automatically select color and gray-scale data from a reference image and apply it to the current shot.
Color Match is new in the April, 2018, update to Adobe Premiere Pro CC. What it does is allow you to compare two shots side by side, then automatically select color and gray-scale data from a reference image and apply it to the current shot.
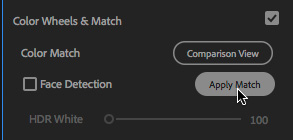
Additionally, the new Face Detection feature intelligently adjusts skin tones when matching shots that have a face prominently in the frame.
If you don’t understand how color correction works, this can make poor shots look great in a hurry. If you do understand color correction, this new feature can get you in the ballpark quickly, allowing you to concentrate on tweaking to make your shot look perfect.
The key benefit here is speed.
SPLIT THE VIEW
Train images courtesy of Model Railroad Builders (www.franandmileshale.com)
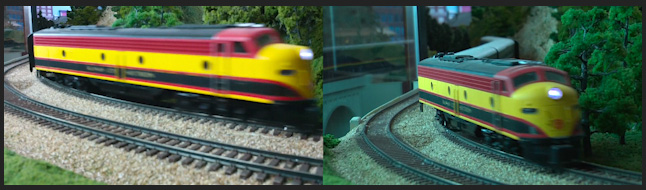
Here are two shots – the one on the left looks good, the one on the right looks both blue and green. Here’s how to make the off-color shot look better.
Edit both shots into the Timeline; this correction is done after clips are edited into a sequence.
Switch to the Color workspace by clicking Color at the top of the Premiere interface.
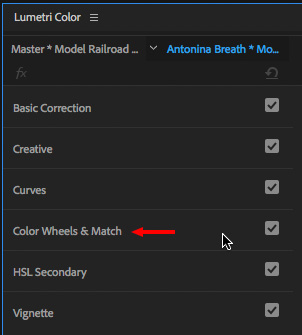
In the Lumetri Color panel, click Color Wheels & Match to reveal its contents.
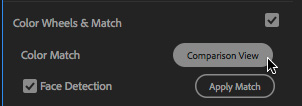
With the timeline panel selected, click Comparison View. This displays two side-by-side images in the Program Monitor.
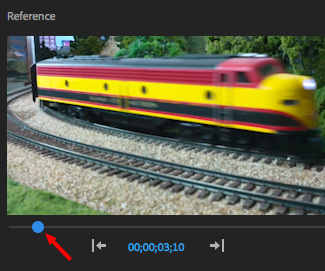
Grab the blue slider under the left-hand image and drag it to the frame you want to use as the color reference. The default frame is the first frame in your sequence, which is almost never the one you want.
Put the timeline playhead in the clip you want to correct, then:
The color and gray-scale settings in the reference frame (left-hand clip) will be applied to the current clip.
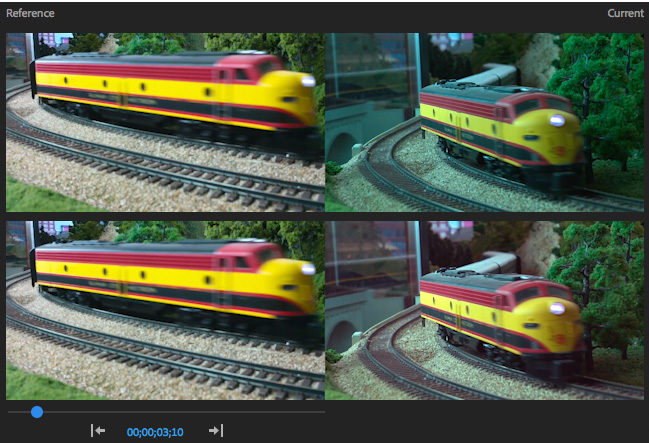
Here’s the before (top) and after.
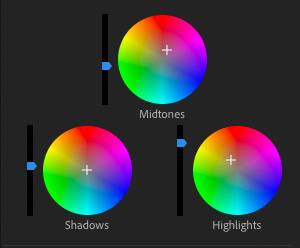
What this is doing under-the-hood is modifying the color wheel settings and, if necessary, the Saturation slider in the Creative section in the Lumetri Color panel.
If you like the corrections, you’re done. If you don’t, you have options. Because this has “simply” modified existing color wheel settings you can:
NOTE: While this feature uses the AI-powered Adobe Sensei, it still doesn’t yield results as good as manual color corrections from an experienced colorist. However, if there isn’t an experienced colorist hanging around your edit bay as the deadline looms, this is a fast and effective way to help make poor color quality clips look a lot better.
WORKING WITH FACES
We have another option when working with faces: Face Detection.
Adobe’s help files state:
“Face Detection is on by default, and if Auto Color detects faces in either the reference or current frame it gives higher weight to the colors in the facial region.
“This feature yields much higher quality matches of skin tone especially when there are distracting colors in the background, but you can disable it for situations where you want or need the whole frame to be evaluated equally.
“If you use face detection, there is a slight increase in the amount of time it takes to calculate the match. If you are working with footage that does not contain any faces, disable face detection to speed up the color matching.”
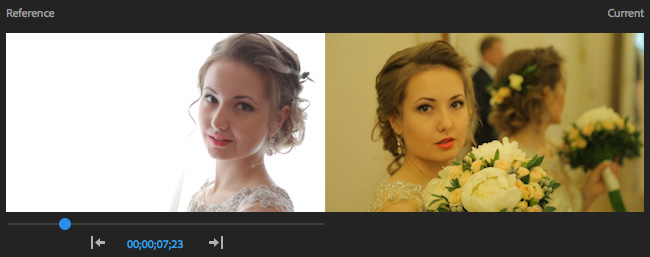
Bridal images courtesy of Yury Chumakov (facebook.com/YuryChumakov)
Here’s another before-and-after. Same bride, but the lighting and color conditions are much different due to quickly shifting from daylight to interior lighting.
Again, select the Timeline, click Comparison View, drag the blue dot under the Reference frame in the Program Monitor to display the frame you want to use as a reference, then move the playhead to display the clip you want to correct.
Because both these clips have a face prominently in the frame, turn on Face Detection, then click Apply Match.
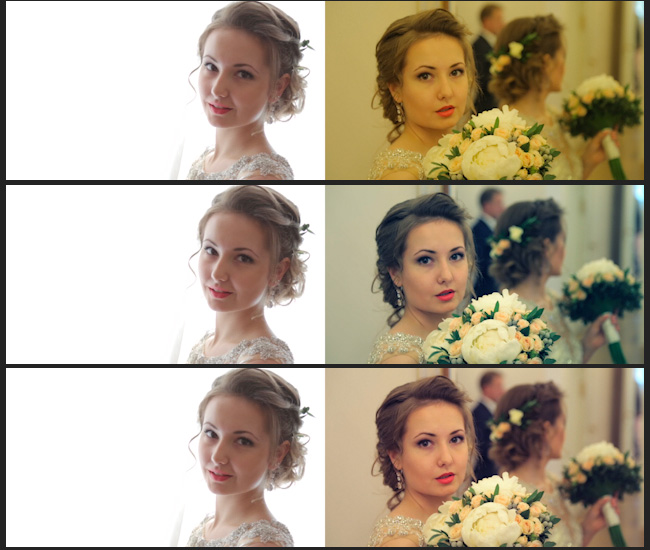
The top image is before any changes are made, the middle image is with Face Detection turned on, and the bottom image is with Face Detection turned off.
In my opinion, for this shot, I prefer the look with Face Detection turned off. But, the very nice thing about this feature is that you can quickly experiment – using a single click – to see which version looks the best to you.
And, even better, because all the changes are applied to the Color Wheels, you can continue tweaking after Color Match dials in the basic changes.
This is a win-win: high speed color correction, with the ability to make additional changes as time and skills permit.
Cool.

2,000 Video Training Titles
Edit smarter with Larry Jordan. Available in our store.
Access over 2,000 on-demand video editing courses. Become a member of our Video Training Library today!
Subscribe to Larry's FREE weekly newsletter and
save 10%
on your first purchase.
2 Responses to Premiere Pro CC: Automatically Color Match Shots
Is there an automatic technique to match two footage if both use X-Rite ColorChecker? How can make the ColorChecker to become similar to both, but auto?
Bacau:
An automatic technique? No. But a semi-automatic technique, yes.
You would need to determine which of the two clips is “accurate.” Put the frame from that clip containing the X-Rite Color Checker into the Comparison view.
Then, display a frame containing the X-Rite for the clip you want to correct into the Program Monitor.
Then, follow the steps outlined in this article to match them.
Larry
At that point,