
320: Exploring Affinity Photo
320: Exploring Affinity Photo
$9.97
In this session, Larry Jordan leads a detailed exploration of Affinity Photo and compares it to Adobe Photoshop from the perspective video editors looking to edit, composite and repair still images.
Presented: July 14, 2021
Several times each month, Larry Jordan presents a live, on-line, video training webinar discussing issues related to video editing and post-production. For a list of upcoming webinars, click here.
Duration: 47:49
Download file size: 725.7 MB (ZIP file)
Format: QuickTime movie (HD: 1280 x 720)
DOWNLOAD NOTE: After you complete the store checkout process, you will see a Download Link on the Order Confirmation page. This link allows you to download the product to your computer. You are given four attempts over ten days to download the file. Since this title is downloaded as a QuickTime movie, a CD/DVD will not be shipped.

(Click to view a larger image comparing these two fonts.)
SESSION DESCRIPTION
Almost all of us are familiar with Adobe Photoshop. But there are other high-quality image editing programs on the Mac. One of them is Affinity Photo, published by Serif. Based in Nottingham, England, they released their first software in 1987. The Affinity series of products was first released in 2014.
In this session, Larry Jordan leads a detailed exploration of Affinity Photo and compares it to Adobe Photoshop. His perspective is that of video editors looking to edit, composite and repair still images.
Subjects include:
- The Photo interface
- Image editing
- Image repair
- Image export
Photo, like Photoshop, is a vast program. This session provides a good idea of the similarities and differences between the two programs and how well Photo will fit into your own workflow.
AUDIENCE LEVEL
This is an introductory-level program. No knowledge of Affinity Photo or Adobe Photoshop is necessary to benefit from this session.
CHAPTER MARKERS
To help you quickly find the information you need, we include chapter markers in the QuickTime download to simplify navigation. Click here to learn how to display them in your download.
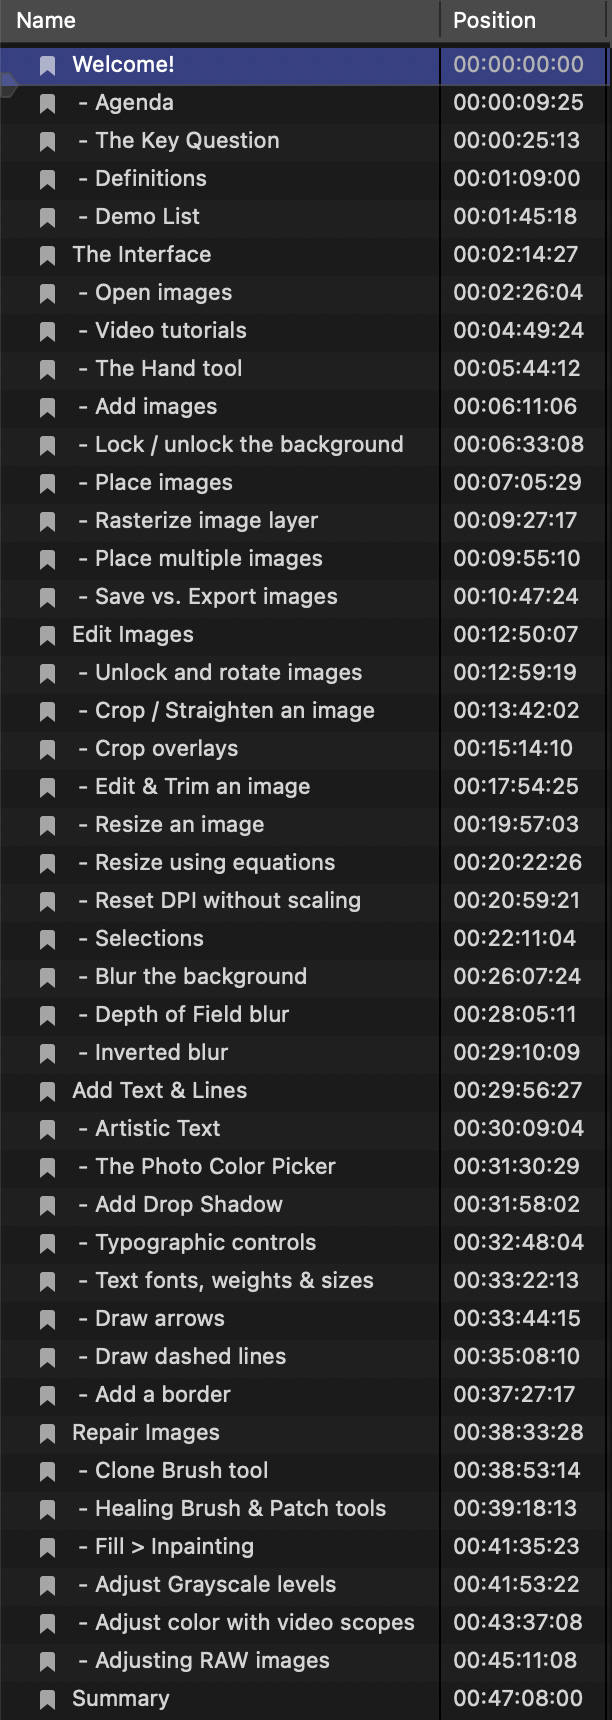
- Welcome!
- – Agenda
- – The Key Question
- – Definitions
- – Demo List
- The Interface
- – Open images
- – Video tutorials
- – The Hand tool
- – Add images
- – Lock / unlock the background
- – Place images
- – Rasterize image layer
- – Place multiple images
- – Save vs. Export images
- Edit Images
- – Unlock and rotate images
- – Crop / Straighten an image
- – Crop overlays
- – Edit & Trim an image
- – Resize an image
- – Resize using equations
- – Reset DPI without scaling
- – Selections
- – Blur the background
- – Depth of Field blur
- – Inverted blur
- Add Text & Lines
- – Artistic Text
- – The Photo Color Picker
- – Add Drop Shadow
- – Typographic controls
- – Text fonts, weights & sizes
- – Draw arrows
- – Draw dashed lines
- – Add a border
- Repair Images
- – Clone Brush tool
- – Healing Brush & Patch tools
- – Fill > Inpainting
- – Adjust Grayscale levels
- – Adjust color with video scopes
- – Adjusting RAW images
- Summary