 [I’ve been using Final Cut since it was first released and only when writing this tutorial did I discover a new way to create speed changes. There’s always something new to learn… ]
Changing the speed of a portion of a video clip during playback is called a “variable speed change.” It is commonly used to slow playback to create a dramatic effect, or faster to create a comic effect. Final Cut can create both.
There’s a wide variety of reasons to change the speed of a clip, so let me show you different ways to create and modify these.
NOTE: Changing the speed of the entire clip, by the same amount, is called a “constant speed change.” A variable speed change means that clip speed varies within the clip during playback.
A SIMPLE OPTION
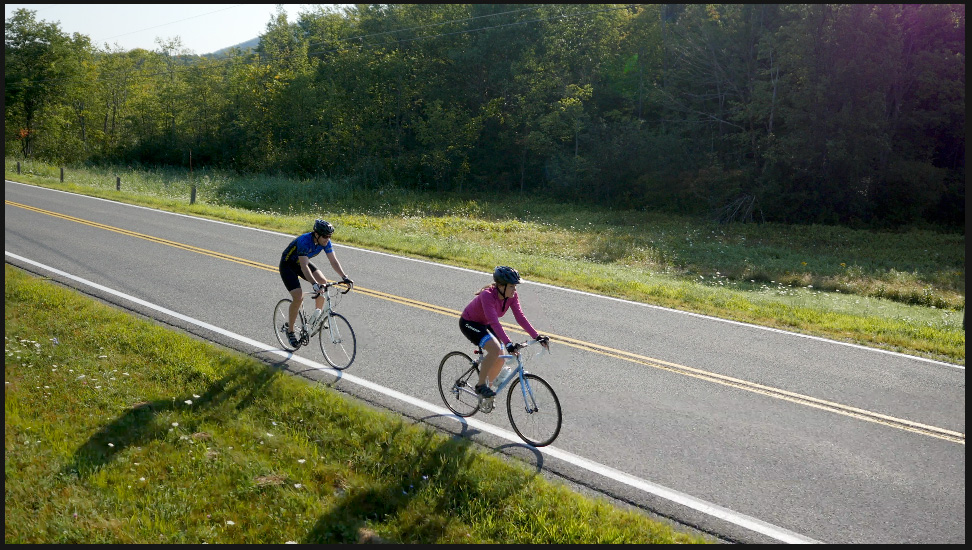
Drone footage courtesy of Terry Holland, Northeast Drone Video (www.NorthEastDroneVideo.com)
Here’s a drone shot tracking a couple bicycling in the Berkshires, in Massachusetts. The tracking itself is lovely, but what would make this shot even more interesting is to slow their movement as they get closer to the camera.
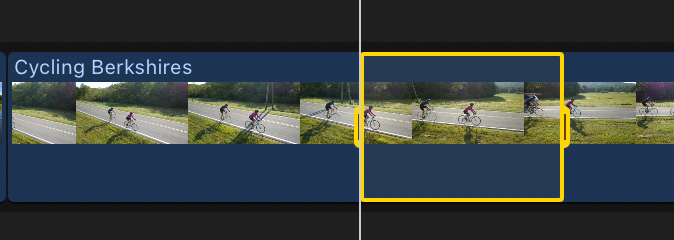
After adding the clip to the timeline, use the Range tool (Shortcut: R) to select the region of the clip that you want to slow.
Go to Modify > Retime > Slow > 50% to create slow motion or Fast > 2X to create fast motion. (You can easily change the speed later, which I’ll show you in a minute.)
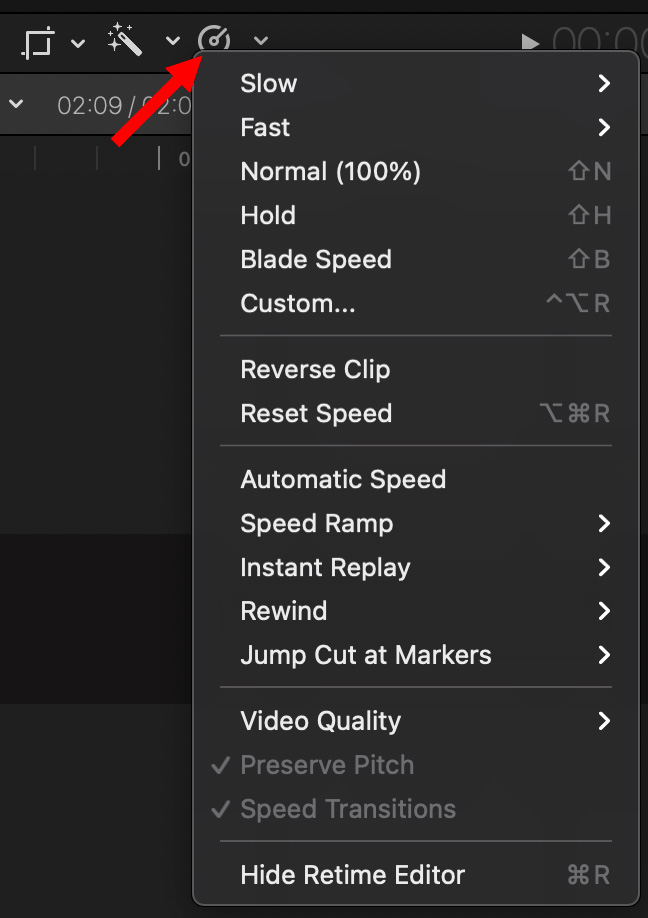
NOTE: Although this article references the Modify menu, I never use it in regular practice. Instead, I click the small “stopwatch” icon in the lower left corner of the Viewer. The menu of this shortcut is identical to the Modify > Retime menu, but faster to reach.
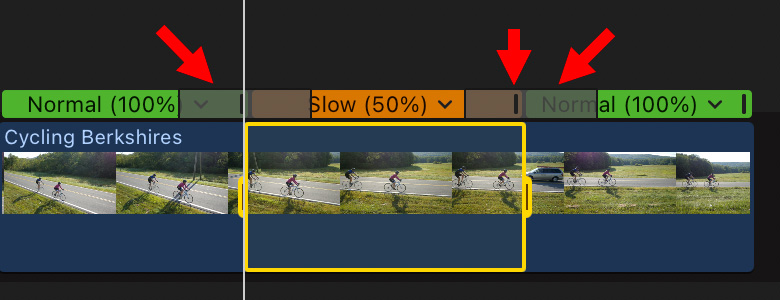
Several things happen at once:
When you play the clip, the cyclists start at full speed, gradually slow to 50%, travel at half speed for a bit, then speed back up to full speed.

To adjust the duration of a speed transition, drag one of the edges of the gray bar left or right. (In this screen shot, I made the right side shorter – it centers on the thumb.)

To change the speed of a slowed portion, drag the black vertical thumb (red arrow) at the right edge of the orange retiming bar left (to speed the section up) or right (to slow the section down).
The new speed is reflected in the percentage label in the bar: “Slow (60%)” in this screen shot.
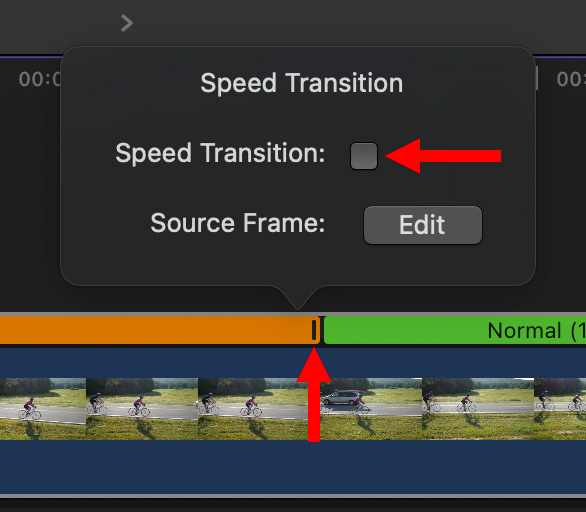
To remove a speed transition, so that the speed of a clip changes instantly, double-click the black thumb to display this window. Uncheck Speed Transition.
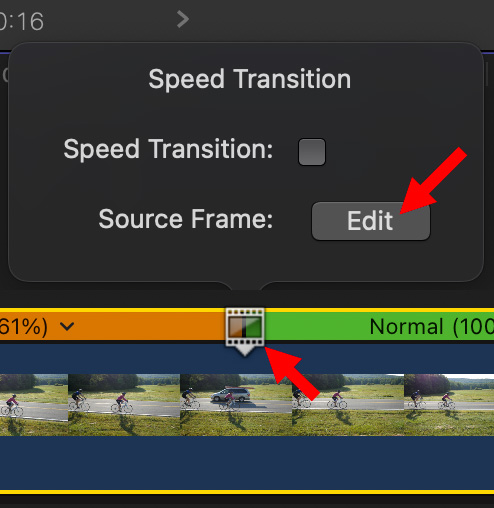
To change the location of where the speed change takes place, double-click the thumb and click the Edit button. This displays a small box slider in the Retiming bar. Drag this box slider left or right to change the portion of the clip that is affected by the speed change.
This type of speed change is easy to create and VERY flexible.
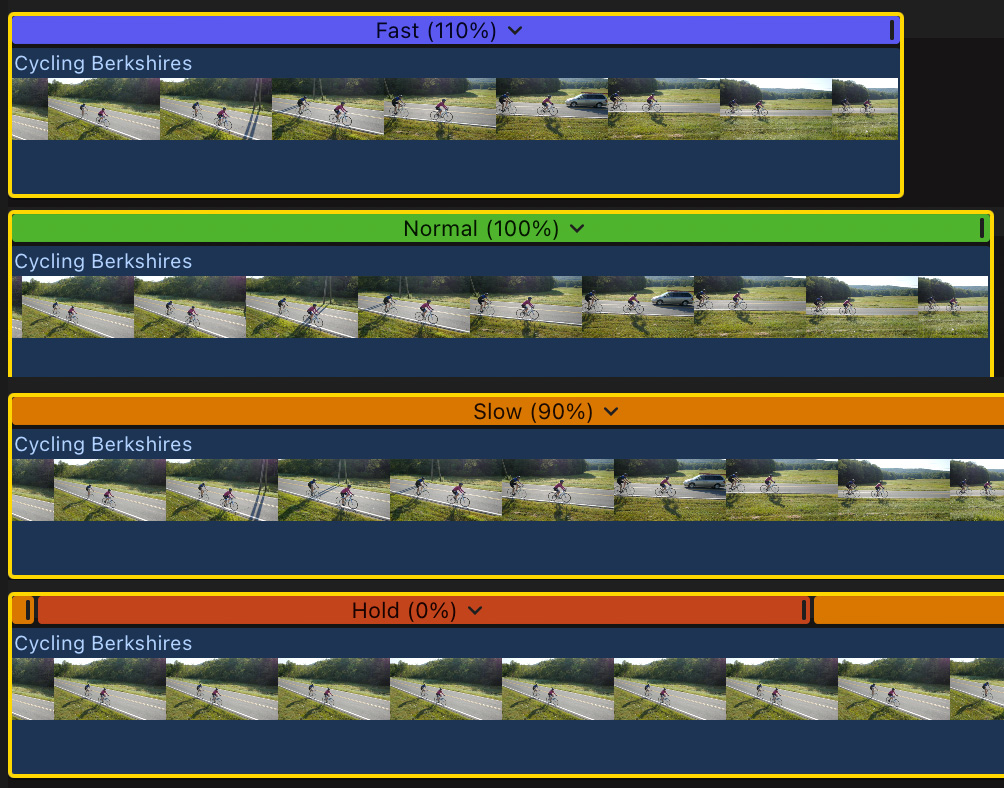
NOTE: The Retiming bar uses color to indicate the speed of a clip
To reset a clip back to normal, select the clip and type Shift + N (or select: Modify > Retime > Normal (100%)).
EASING INTO A SPEED CHANGE.
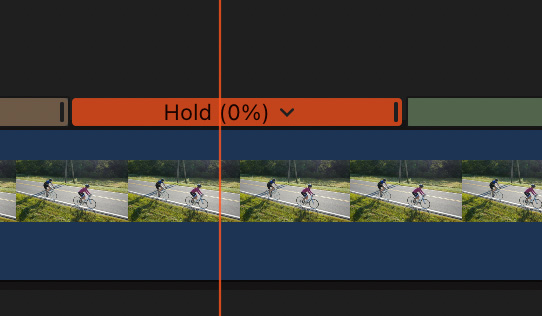
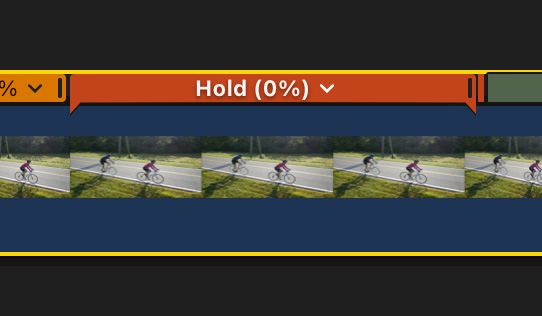
Normally, a speed transition is all you need to ease into a speed change. However, Final Cut provides a special transition called “Speed Ramps,” which allow for longer, more gradual speed transitions to or from a still frame. (Apple calls these stationary frames “Hold frames.”)
NOTE: The big advantage to speed ramps, vs. speed transitions, is that speed ramps are more adjustable; you can configure the speed of each section and tailor the duration of the speed transition blending between each segment.
The process is similar:

NOTE: Final Cut automatically puts a speed transition between every slowed segment. These can be adjusted the same as the speed transitions discussed earlier.
A COMPLEX VARIATION
A speed change can only be done inside a single clip. But, what if you want to slow a sequence of clips? You can, here’s how.


In the compound clip window, give the compound clip a name. You can accept the default, or enter whatever name you want. You can also specify which event the clip will be stored in. The default location is the same event that holds the project.
Click OK.

Again, select a range across the compound clip, then choose Modify > Retime > Slow (or) Fast along with the speed you want.

The speed change is applied to the compound clip, which affects all the clips inside it. Using compound clips makes it very easy to create smooth speed changes – include speed transitions – that apply to a collection of different clips. Adjusting thumbs and speed transitions works the same as for single clips.
Very, very cool.
2,000 Video Training Titles
Edit smarter with Larry Jordan. Available in our store.
Access over 2,000 on-demand video editing courses. Become a member of our Video Training Library today!
Subscribe to Larry's FREE weekly newsletter and
save 10%
on your first purchase.
11 Responses to Vary the Speed of Video Playback in Final Cut Pro
Excellent article Larry. I had occasionally played with changing the speed of a single clip only to remove the effect as I did not fully understand how to make the modifications outlined in your article. Thank you!
Jim:
Thanks for the kind words.
Larry
And I thought I knew it!
Thanks Larry for those little extra bits!
Barry:
Yeah, I learned something writing this, too.
Larry
That slow-motion benefit is on 25p storyline by using 50fps or 100fps footage? Is any difference if we do speed ramps on 50p storyline using 50fps or 100fps footage and deliver it on 25p file? (Use on both projects frame blend, optical flow etc).
Tops:
I haven’t played with high-frame-rate video and speed ramps. However, the process should be the same, except that you’ll end up with smoother slow motion. Play with this and let us know what you find out; I don’t have any 25 fps material to experiment with.
Larry
Thank you very much!
I did some slow motion testing … and I had smoother results from my 25p storyline than the 50p storyline (using 50fps and 100fps footage).
Thanks again, congrats for your great work.
Thank you for your very clear instructions. I am having an issue which I’m not sure is a bug or not. I want to gradually speed up a slide show. I’ve created a compound clip with 60 still images, each photo 1.5s in duration. So the compound clip is a minute and a half long. I want to gradually increase the compound clip speed from 100% to 800% over the entire duration of the clip. So this would be a much slower ramping up than the traditional use of this effect. Is there any reason why putting a speed ramp on a slide show should behave any differently than on a video clip? No matter how much I slide the gray bars left or right, the result is the same: an instantaneous change in speed to 800%. No ramping whatsoever.
Marc
You can’t do speed changes on still images. FCP doesn’t allow it.
What you could do, as a workaround, is export your stills to create a ProRes 4444 video (4444 because it retains all the color in your slides.)
Then, reimport that ProRes movie and do the speed change on that.
Larry
Great tips on varying the playback speed in Final Cut Pro! I especially appreciated the step-by-step instructions for adjusting the speed over time. This will really enhance my editing workflow. Thanks, Larry!
Glad you liked it. Happy to help.
Larry