 Dual-channel mono audio means that we are recording two, or more, different audio sources, generally people speaking, each into its own channel contained in one audio clip. There is no necessary relationship between the content of the two, or more, audio sources.
Audio clips are not limited to only two channels. They can easily contain 8 or more. Both Premiere and Final Cut support at least 32 audio channels per clip. If we use external audio recording devices, the number of supported channels in a clip can exceed 100. In other words, we can record and store lots of audio sources into a single clip, each in their own channel.
NOTE: A stereo clip is where the same piece of music is recorded into a single audio clip so that sounds coming from the left are stored in the left channel and sounds coming from the right are stored in the right channel. The contents of the two channels are related and, generally, we keep stereo audio channels together.
The reason we use dual-channel mono clips is that we want to easily maintain a sync relationship between all these channels, while at the same time have the ability adjust each channel separately for volume, pan and effects.
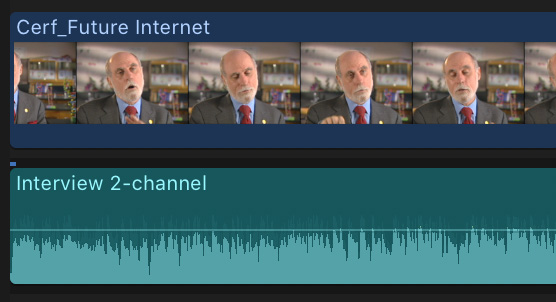
When we add a dual-channel mono clip to the Final Cut timeline, you can’t initially tell how many tracks it has. They are all blended into a single waveform and output as a stereo mix.
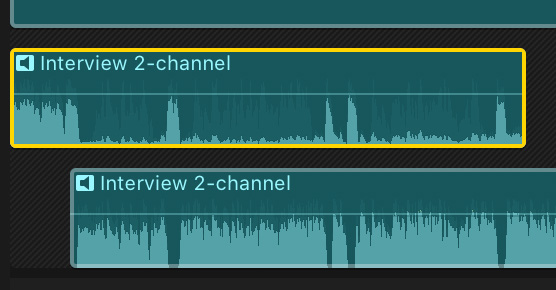
To see the individual channels for a clip in the timeline, select the clip and choose Clip > Expand Audio Components. This allows you to trim each channel separately, as well as set levels for each channel.
NOTE: If this doesn’t show separate channels, you will need to tell Final Cut that this is a dual-channel mono clip. Read the section below on “Change the audio format of a clip” to learn how.
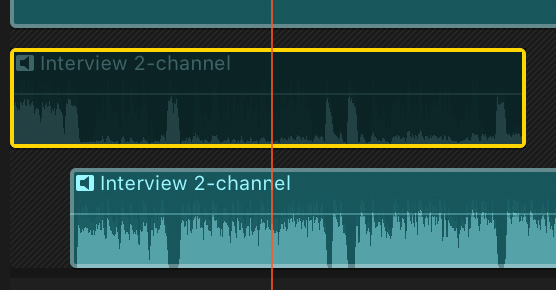
To make a channel inaudible, select it and type V (Type V again to make it audible.)
THE INSPECTOR
While you can adjust the volume of a single clip in the timeline using the volume “rubber band” inside the clip, if you need to adjust the levels of multiple timeline clips at once, use the Audio Inspector.
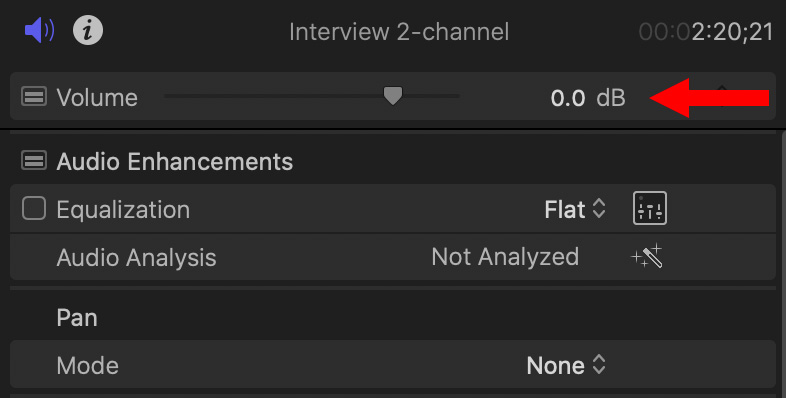
Select the clips you want to adjust in the timeline, then in the Audio Inspector, adjust the Volume slider. This changes the level of all selected clips by the same amount.
By default, every mono clip is panned center. So, if you want to move the sound of a channel more to the left or right, you also need to use the Audio Inspector.
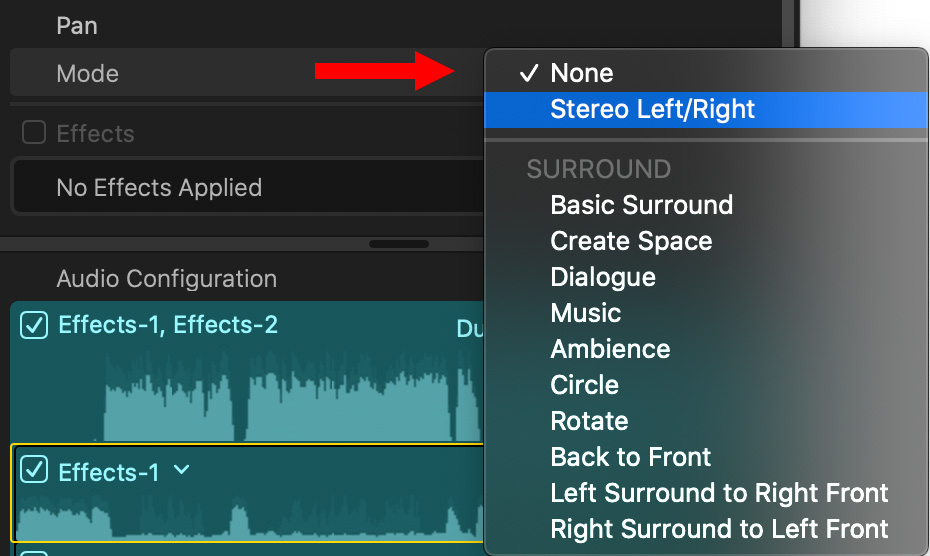
When the Pan mode is set to None, mono clips are panned center, while stereo clips are panned so channel 1 is panned all the way left and channel 2 is panned all the way right.
To adjust the pan, change Mode to Stereo Left/Right.

This displays a slider allowing you to change the pan of all selected channels or clips. -100 sets the pan fully to the left, while 100 sets the pan fully to the right. 0 centers it.
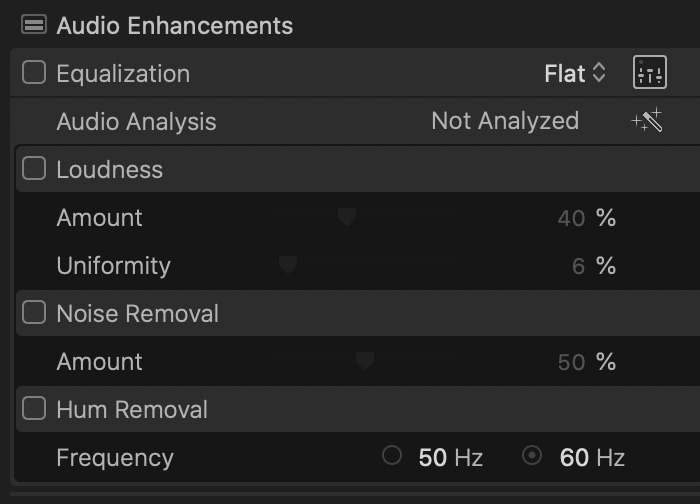
Audio Enhancements allow you to modify the frequencies in the clip to boost bass or treble, improve loudness, remove background noise or remove hum. Personally, I don’t tend to use these as almost all my projects go to a separate audio mix. However, I do like the hum remover.
NOTE: If you are planning to do a separate audio mix, don’t add any Audio Enhancements in Final Cut, it is better to fix problems during the audio mix.
To enable an effect, check it, then adjust it. The basic rule is that if it sounds good to you, as long as the audio meters stay below 0 dB during playback, the effect is good.
BIG NOTE: Never, ever let the audio meters exceed 0 dB during export. Doing so causes irreparable audio distortion. Before export, be sure to play your project and make SURE your audio level are safe.
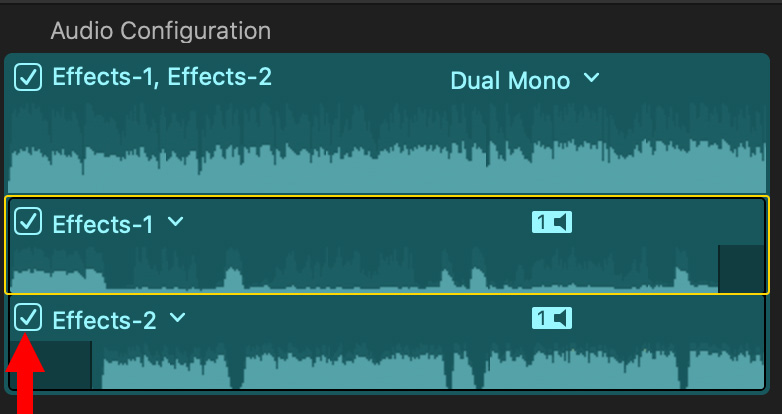
Audio Configuration allows you to see, preview, enable and disable the audio channels in a clip; provided audio skimming is turned on.
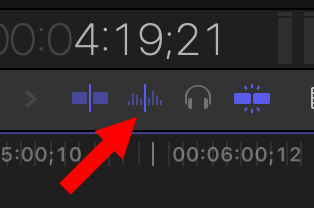
To enable audio skimming, click this icon. (See the screen shot above,.) This is located at the bottom of the Viewer, just under the timecode display. Once audio skimming is enabled, you can hear the contents of a single channel by skimming over it in the Audio Inspector.
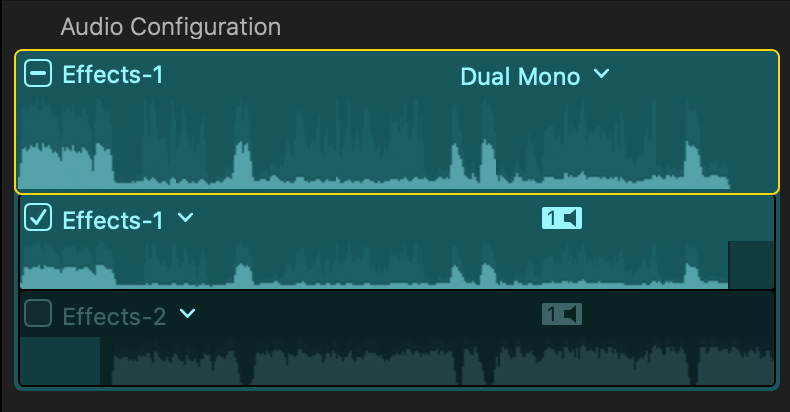
Mute a channel by unchecking it. This also hides its display in the Timeline.
CHANGE THE AUDIO FORMAT OF A CLIP
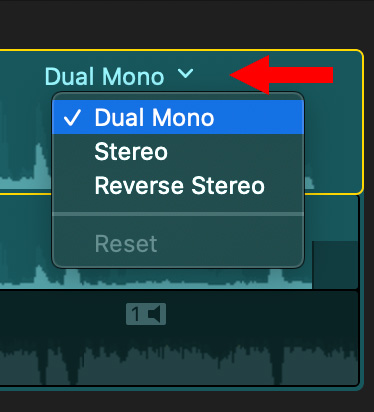
You can change the format of a clip using the popup menu in the top right corner of Audio Configuration in the Audio Inspector. Many times, dual channel mono clips will be imported as stereo. Select all the clips you need to change, then select Dual Mono from this menu. Even if there are more than two audio channels, each audio channel will appear separately in both the timeline and the Audio Inspector.
You can change the format of multiple clips at once by selecting them all in the Browser, or timeline, then changing this menu. The change will apply to all selected clips.
SUMMARY
Working with multi-channel mono audio is a very flexible way to manage all your audio channels quickly and easily. I’ve used this technique for years and recommend it highly.
2,000 Video Training Titles
Edit smarter with Larry Jordan. Available in our store.
Access over 2,000 on-demand video editing courses. Become a member of our Video Training Library today!
Subscribe to Larry's FREE weekly newsletter and
save 10%
on your first purchase.
9 Responses to Final Cut Pro X: How to Use Dual-Channel Mono Audio
Nice overview Larry!
I often want to change the default audio Equalization from “Flat” to “Voice Enhance” or “Music Enhance,” depending on the type of program I’m editing. However, when I change stereo clips to Dual Mono, or I select more than one angle’s audio in the Audio Inspector for a multicam clip, Equalization no longer displays in the Audio Inspector. Other Audio Enhancements such as Loudness and Noise Removal are still displayed.
Why does Equalization disappear with multiple audio channels?
Bill:
It works for me – I’m running FCP X 10.4.7. When I select a channel in the timeline – remember, I Expanded Clip Components, the EQ options are available in the Audio Inspector.
Larry
Once I set my channels to dual mono, should I mute one of them?
I see dialogue 1 and dialogue 2
Andres:
That depends upon what is recorded on them. The good news is that you can, if you need to. Muting is done using the Audio Inspector > Audio Configuration. Simply uncheck the checkbox to mute a track.
Larry
I have situation were I am editing in Avid and the template we use have track 1 left and track 2 right. How would you set this up in FCP?
Brian:
This is a typical audio layout. As the article outlines, select the two-channel audio clip and switch it to dual-channel mono.
Larry
Great article!
I am using 2 wireless mics (7RYMS) to record an interview. I upgraded from RODE Wireless GO (1st generation).
I recorded my interview in stereo. I followed the steps outlined here (for FCP X) but whether I set the audio configuration to stereo or dual mono, I can’t separate the 2 channels to mute one. It’s as if each mic recorded 2 mono channels.
I used the TRS to TRRS patch cable to Lightning cable for my iPhone 14 Pro. Any advice would be appreciated.
Thanks!
Jon:
If, when you split the audio into dual mono, the two waveform channels look identical, it means that the mics recorded the same audio to each channel.
For some reason, if the waveforms match, your mics were not configured to record to separate channels, but instead each recorded to both.
Larry