[ Updated Feb. 23, 2019, to reflect new interface behaviors.]
Reader Eric Merklein wrote asking whether it is possible to use two monitors with Adobe Premiere Pro CC. And the answer is “Yes,” but… it depends upon what you mean by the question.
Let me explain. There are two ways we could use a second computer monitor: to display program video or display more of the interface.
NOTE: Here’s an article to using two monitors in Final Cut Pro X.
DISPLAY VIDEO TO SECOND MONITOR
In the CC release, Adobe changed how we view the output of the Program Monitor. If you want to display program monitor output to a second computer monitor, all you need to do is change one preference setting.
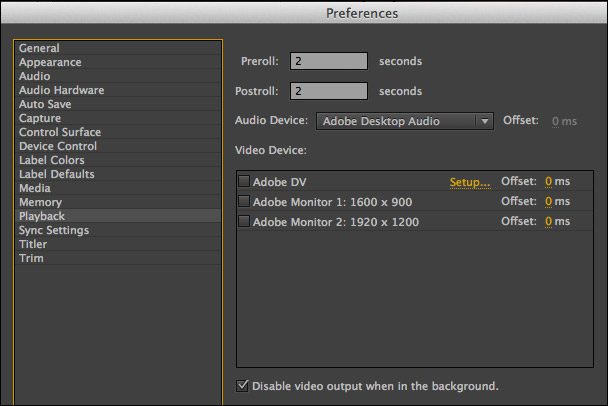
(Note: This screen is from Premiere Pro CC 2014.)
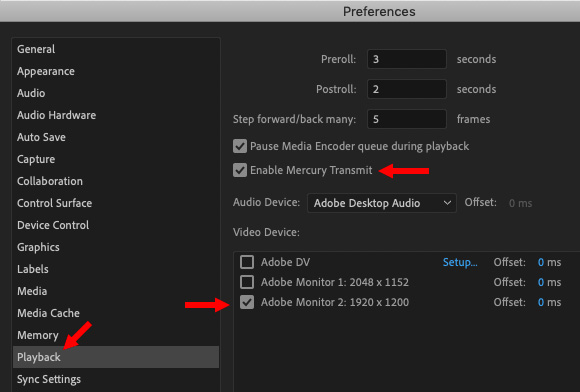
(This screen is from Premiere Pro CC 2019.)
Go to Premiere Pro > Preferences > Playback. In later versions, first click Enable Mercury Transmit. This enables sending video to a second monitor. Then, check the monitor on which you want program video to appear. And that’s it.
(In the earlier interface, the option to enable Mercury Transmit did not appear.)
BIG NOTE: Most computer monitors are not calibrated to display accurate color during video playback. Be very, very cautious about using a computer monitor for critical color correction or client approvals.
If accurate color is important to you or your clients, spend the money and buy a video monitor for your Premiere system. (This also entails purchasing a video interface to sit between the monitor and your computer.) Or, at the very least, make sure your second computer monitor is calibrated for video display.
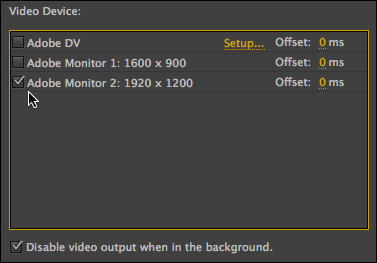
Check the monitor you want to use for video playback. In this case, I checked “Adobe Monitor 2”.
Now, when you playback a project, the second monitor will automatically switch to video playback, allowing you to watch program video on a separate monitor. (The checkbox at the bottom means that when you switch out of Premiere into another application, the second monitor reverts back to displaying the computer screen.)

NOTE: If the audio is out of sync with the video, add an offset correction to compensate. To determine the offset, estimate how many frames out of sync the audio is, then divide the program frame rate into that number.

For example, if the audio is 3 frames out of sync with video, and the Timeline frame rate is 60 frames per second: 3 ÷ 60 = 0.05. Multiply this result by 1,000 to convert to milliseconds: 50. Then, enter the number of milliseconds into the Offset for that monitor.
Play back the clip and adjust this value until the audio and video are in sync.
DISPLAY THE INTERFACE TO A SECOND MONITOR
However, what Eric MIGHT have been asking is whether elements of the Premiere Pro interface can be displayed to a second monitor. Here, again, the answer is “Yes,” but… you need to create it manually.

If you look REALLY closely to the left of the title of any tab, you’ll see a small, “bumply” place. This is called the “thumb.” Drag the thumb from where it is into the second monitor and let go. In this example, I’m moving the Media Browser to the second monitor.
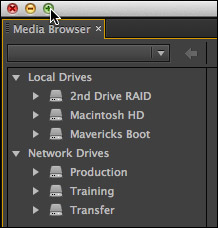
Click the green button at the top left of the window to expand this pane to fill the monitor.
Next, select the next element you want to add to the second monitor. In my case, I’m adding the Reference monitor to the second monitor so I can see a much larger view of my video scopes.
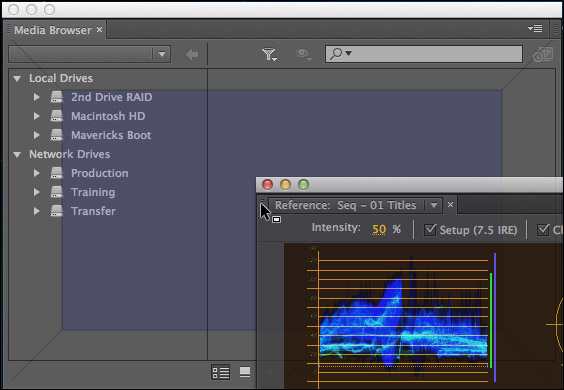
When dragging one panel into another panel, if the blue square in the center lights up, the two panel tabs will be next to each other at the top of the window.
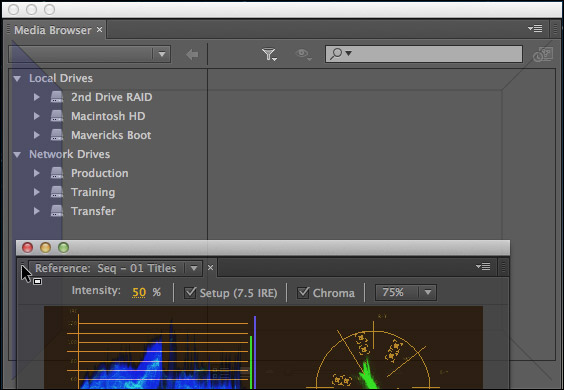
If the blue panel is to the left, the two panels will be side-by-side, with the new addition on the left.
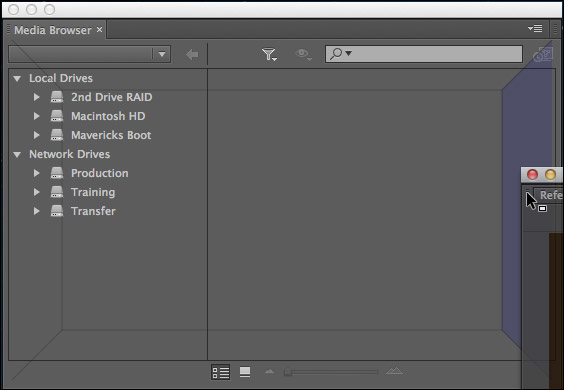
If the blue panel is to the right, the two panels will be side-by-side, with the new addition on the right.

If you drag the panel name into the same level as other panel names, so that the line of names turns blue, it will join that panel group. (You can also use this technique to change the order of panels within a panel group.) In other words, drag a panel name somewhere else and watch what happens.
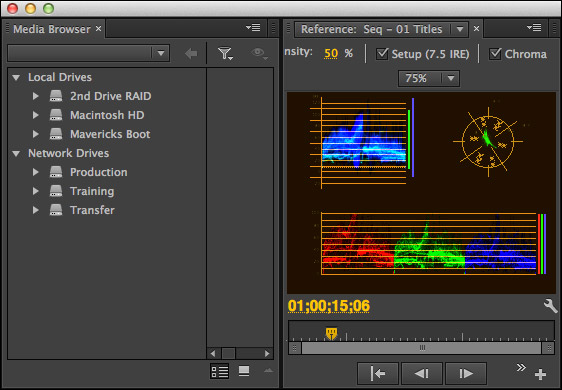
In my case, I placed the scopes on the right and the Media Browser on the left.
NOTE: Video scopes are displayed by clicking the “wrench” icon in the lower right corner of the Reference, Program, or Source monitors.
Continue adding panels until you have everything arranged to your satisfaction.
SAVE YOUR WORK
At this point, you could simply stop. Premiere will remember the last window layout you used the next time it starts up. But, this is not a good idea, because changing workspaces or trashing preferences will destroy all your hard work at creating the perfect, two-monitor, customized workspace.
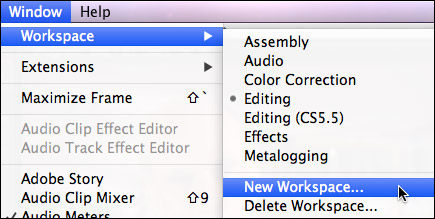
Instead, choose Window > Workspace > New Workspace to save your new layout.
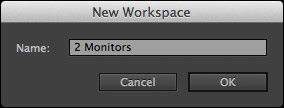
Give it a name, for instance, here, I called it “2 Monitors.”
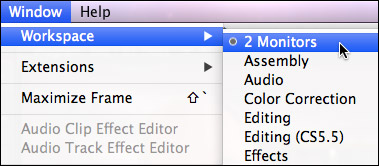
The next time you need to switch to this layout, simply select it from the Window > Workspace menu; or use the keyboard shortcut, which is displayed to the right of the workspace name.
Cool.
UPDATE – Feb. 23, 2019

Sometime between when I wrote this article and today, Adobe changed the interface. The “small bumply place” is now to the right of the name of each panel.

However, to move a panel, all you really need to do is grab the panel name with the cursor and drag it. The name is underlined in blue, indicating you can drag it elsewhere in the interface. At which point, the rules of where it will appear, illustrated above, still apply.
2,000 Video Training Titles
Edit smarter with Larry Jordan. Available in our store.
Access over 2,000 on-demand video editing courses. Become a member of our Video Training Library today!
Subscribe to Larry's FREE weekly newsletter and
save 10%
on your first purchase.
43 Responses to Premiere Pro CC: Use Two Monitors [u]
← Older Comments-
 moshin says:
February 21, 2022 at 12:24 am
-
 Dave D says:
July 12, 2023 at 4:46 pm
-
 Larry says:
July 12, 2023 at 5:28 pm
← Older Commentsthanks
If you’re on a Mac, and the edit display feed is not showing on the second monitor even though Enable Mercury Transmit is ticked (activated), and you have your second monitor checked as the Transmit Device Playback, check that your main screen is set to Enter Full Screen.
That is, the little green top left button that makes your program enter full screen in your monitor – check that.
Dave:
Thanks for the tip.
Larry