
 It hasn’t drawn the attention of the new Morph Cut, or the new Lumetri Looks, but the recent addition of project consolidation and transcoding to Premiere Pro CC is a big deal. This is because it simplifies our ability to archive projects, or allows us to optimize existing projects for better playback.
Project consolidation is the easiest way to gather all our project assets into one location for archiving or long-term storage. These archives are stored in a folder that you select, in standard media and Premiere formats. No data compressing or file zipping is involved. (Though you can do that after consolidation, if you wish.)
Transcoding allows us to take all the different video formats that we expect to use, or are currently using in a project, and convert them all to the same format. This can speed playback, decrease export times and assure that all our clips meet the same technical specs.
Let me illustrate, using my latest project – Totally Spaced – as an example. This stunning romantic horror space western is gonna win awards in the future, so I want to preserve it. You know, just in case…
CONSOLIDATE A PROJECT
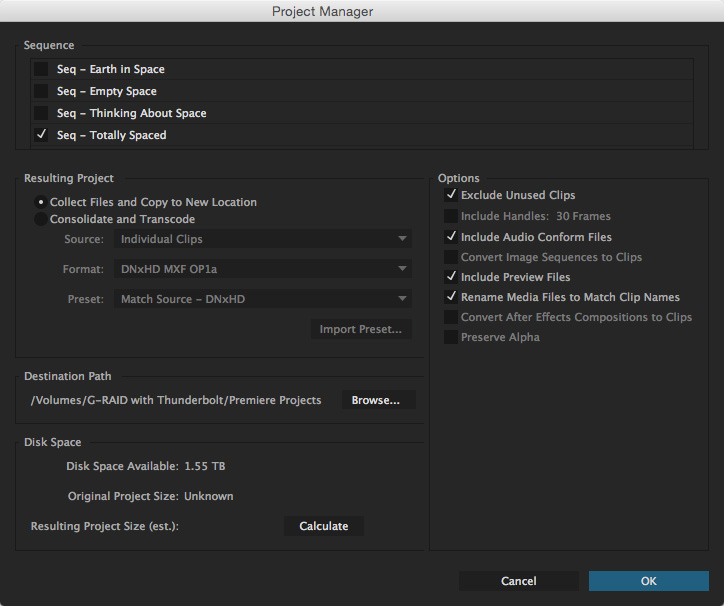
With my project file open in Premiere Pro CC, choose File > Project Manager. This opens the Project Manager window.
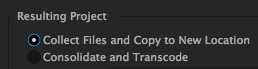
Here, we can do two things:
In both cases, sources files are not altered or moved.
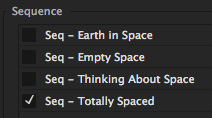
To start, select the sequences you want to archive. (Shift-click any checkbox to select all sequences.)
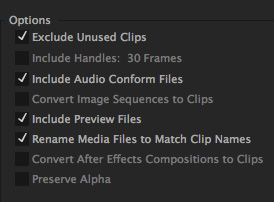
Next, determine which of these options you want to include:
Renaming is an organizational issue. It has zero effect on image quality.
NOTE: Consolidating copies entire clips. Even if Exclude Unused Clips is selected, if a portion of a clip is used in the project, the archive will contain the entire source clip. Copying the entire clip prevents image degradation which might be caused by copying a portion of a clip.
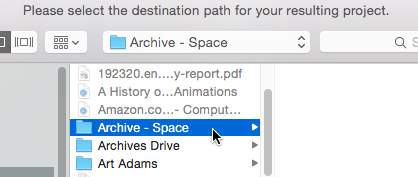
After setting the Options, click the Browse button to pick, or create, a new folder to store the archive in. In this example, I’m using the Archive – Space folder. Archive folders can be named anything and stored anywhere; assuming you have enough storage space on that location.
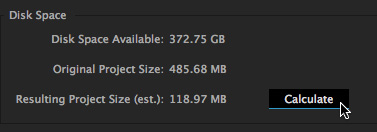
To see how much storage space you need, click the Calculate button. In my example, the archive will take about 118 MB of space. (Um, yeah, there are not a lot of clips in my project…)
Click the OK button to create the archive.
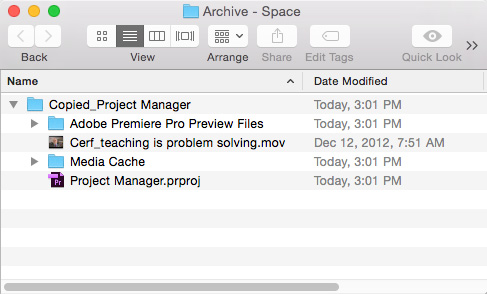
The archive was created in the selected folder, containing all used media files, a new Project file which is linked to the new media locations, plus all preview and cache files.
NOTE: Project Manager does not collect and copy After Effects compositions that are dynamically linked to an Adobe Premiere Pro project. Project Manager does save the Dynamic Link clip in the trimmed project as an offline clip, however.
CONSOLIDATE AND TRANDSCODE
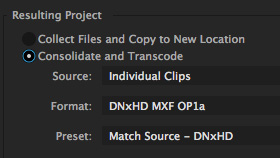
Both Collect Files and Consolidate and Transcode gather your clips from wherever they are and store them in a new location of your choosing. However, the Transcode option allows you to easily convert the files into a “mezzanine” codec which is often a better choice for editing than the camera native file.
NOTE: Transcode means to “convert.” You transcode clips to convert them into a different video or audio codec/format.
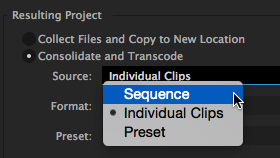
When Transcode is selected, you can specify which format you want the clips converted into.
Sequence is the best choice if your sequence settings exactly match your final deliverable.
Individual clips is the best choice to convert a variety of clips into a common codec, without altering other clip settings in each clip.
Preset is the best choice if you have a wide variety of clip formats and you want to convert them into a high-quality mezzanine format to preserve as much image quality and editing flexibility as possible.
There is no one “right” choice that works for all, but my general preference is to use the Presets option.
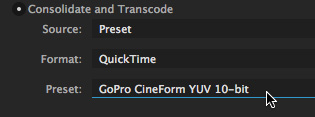
If you are struggling to figure out which Preset to select, here are my recommendations:
If you are on a Mac:
If you are on Windows:
The GoPro Cineform codecs are excellent and are designed for transcoding.
NOTE: Using the GoPro … at Maximum Bit Depth setting will create the largest files with potentially the highest image quality. However, unless you are using high-end cameras with professional film lenses, you probably won’t see a difference between the two Go-Pro settings.
TRANSCODE OPTIONS
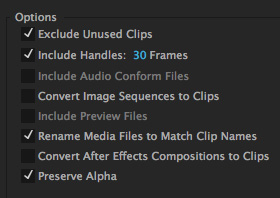
NOTE: The only preset that supports alpha channels is the GoPro CineForm With Alpha preset. All other presets flatten (remove) any alpha channel.
As with Consolidation, select a storage location and click OK.
NOTE: As with Consolidate, when transcoding, entire clips are transcoded, even if you are only using a portion of the clip in the selected sequence.
SUMMARY
The Project Manager is a powerful tool to gather all the different project elements into one place for final archiving. And the ability to quickly and easily transcode media into a single unified format from within Premiere is a huge benefit over having to use a separate utility for file conversion.
For both these cases, Project Manager is worth learning about.

2,000 Video Training Titles
Edit smarter with Larry Jordan. Available in our store.
Access over 2,000 on-demand video editing courses. Become a member of our Video Training Library today!
Subscribe to Larry's FREE weekly newsletter and
save 10%
on your first purchase.

44 Responses to Premiere Pro CC: Understand Project Manager
← Older Comments-
 Larry says:
August 12, 2019 at 8:44 pm
-
 brett hansen says:
August 13, 2019 at 9:05 am
-
 Larry says:
August 13, 2019 at 9:21 am
-
 brett hansen says:
August 13, 2019 at 10:52 am
← Older CommentsBrett:
Yes, but not easily. Premiere does the safe thing and COPIES media to a new location.
To locate the source, right-click (or Control-click) on each clip and choose Reveal in Finder.
Larry
Thanks Larry, allow me to elaborate on my issue that I am trying to resolve…
I have a large documentary piece completed and I am looking for a simple way to archive it in its own fully self contained folder. In genera, the project along with all of its assets are organized within a large master folder, but over time some assets are linked to the project from outside of the main folder in various places (locally, on network space and on external hard drives).
Aside from right clicking each clip and revealing each file in Finder from Premiere, because that would take a very long time. Is there a way to force Premiere to only look for media assets to link to within a specific folder i.e. the Main Project folder? This would result in a number of media files that are unlinked within the project, but that way I can determine which media assets are linked to files located outside of the Main Folder and subsequently move them into it.
Or is there a different method that you might suggest?
Thanks again Larry
Brett:
Hmm… What just occurred to me is, AFTER you consolidate all your media into a new folder and drive, RENAME the old master folder.
This will unlink all clips inside it. Only those clips that are OUTSIDE the master folder will still be linked in your project. This will make it much easier to find the outliers without having to review all your content.
Larry
LARRY I LOVE THIS SUGGESTION!!
But Alas, it appears that Premiere has become far too smart for such a simple (yet genius) trick.
I changed the name of the master folder and then (just to be extra tricky) I created a folder inside of that where I placed the contents of the project. Then opened the project and despite it taking extra long to load up, It opens flawlessly without any unlinked media. Premiere you are too good.
Do you have any other suggestions by chance, Larry?