
 I’ve written and recorded a lot about color correction and multicam editing in Final Cut Pro X. In fact, one of the big advantages to editing multicam clips in Final Cut Pro X is that you can color correct the master clip before you start editing. This saves a ton of time by making one change, rather than changing each individual edited clip in the Timeline.
But there’s a really important step you need to know to make this work. And I just realized I’ve never written about this before now.
NOTE: For a step-by-step guide to creating multicam clips, read this article.
SECOND NOTE: For an introduction to color correction in Final Cut, view this webinar.
BACKGROUND
Most of the time, color correction is the last step in the editorial process, just prior to final output. However, with multicam clips, you may save time by color correcting before beginning editing.
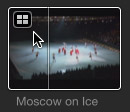
After the multicam clip is created, it is indicated by a special icon in the top left corner of the multicam clip displayed in the Browser.
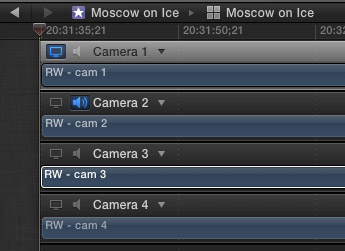
Double-click the multicam clip in the Browser to open it into a special form of the Timeline called the “Multicam Editor.”
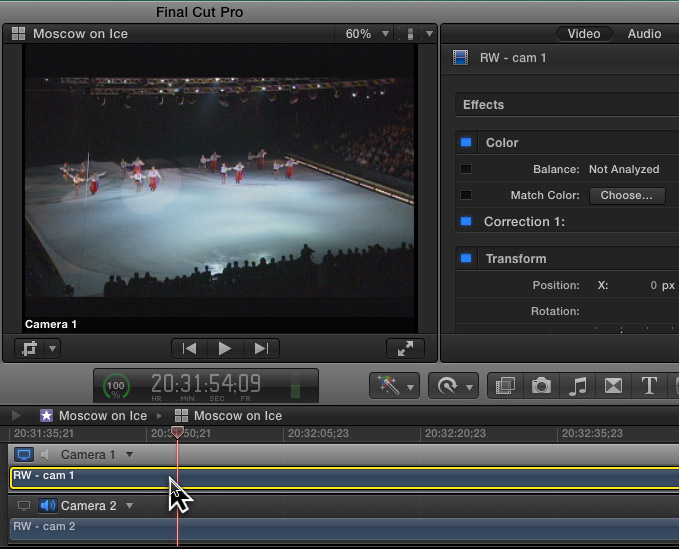
Select the top track, which loads it into the Inspector. From there you can make color changes using the Color Board or any effects filter. (By the way, thanks to Ed Greene and Greene HD Productions (www.greenehdtv.com) for sharing their footage with us.)
However, there’s a problem when you try to color correct any other clip except the top one. When you select the clip, as soon as you move the cursor into the Inspector, the image in the Viewer reverts to the top track.
Sigh… This could drive you nuts.
Here’s the quick tip:
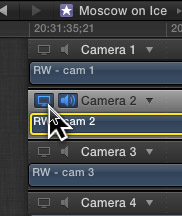
When you select the camera angle you want to color correct, ALSO check the “Video Monitor” checkbox in the top left corner, so that it goes blue. (Only one track at a time can be monitored and, by default, it is always the top track.)
This checkbox determines which angle you will see in the Viewer when the cursor moves out of the Multicam Editor. Whenever you need to see a different angle, simply change the monitor checkbox.
It’s a simple trick, but one I’ve never written up before. And it makes color correction of multicam clips SO much easier.
EXTRA CREDIT
The speaker icon just to the right of the video monitor determines the audio monitor. This selects which track you’ll hear prior to editing the multicam clip.

2,000 Video Training Titles
Edit smarter with Larry Jordan. Available in our store.
Access over 2,000 on-demand video editing courses. Become a member of our Video Training Library today!
Subscribe to Larry's FREE weekly newsletter and
save 10%
on your first purchase.

18 Responses to FCP X: Color Correct Multicam Clips
← Older Comments-
 Peter Wilcox says:
May 26, 2015 at 5:35 pm
-
 Larry Jordan says:
May 26, 2015 at 5:41 pm
-
 Michael West says:
September 29, 2015 at 3:31 pm
-
 Larry says:
September 29, 2015 at 3:55 pm
-
 Michael West says:
October 1, 2015 at 2:55 pm
-
 Billy J. Macintosh, M-Squared Video, LLC says:
January 14, 2016 at 3:25 pm
-
 Larry says:
January 14, 2016 at 3:40 pm
-
 Vladimir says:
December 16, 2017 at 4:57 am
← Older CommentsHow do you apply color correction to one complete angle after you have done the editing?
Peter:
Double-click the angle to open it in the Angle Editor. Color correct and all your changes will be reflected back into the edited Multicam clip.
Larry
Larry, et al:
I just shot West Side Story with 5 cameras.
I am editing using FCPX (loving it!)
4 of the cameras ran continuously for about 2 hours (unmanned).
I will be multicam editing all 5 cameras.
Of course, there are lighting changes between, and sometimes during, each scene.
What process should I use to color correct each scene (for example the song “America”) without that correction affecting the whole sequence?
Perhaps multicam each scene individually, color correct, then string them together at the end for export?
Naturally, I am seeking the easy path, if one exists.
Thanks.
Michael
Michael:
If you need to color correct each camera differently, and within each song, there is not easy path. You’ll need to color correct each shot on the Timeline individually.
However, if you only need to color correct all the clips for each song or scene, read this article about how to add an adjustment layer to FCP X, then add your color adjustments to the adjustment layer:
https://larryjordan.com/articles/fcp-x-create-an-adjustment-layer/
Larry
Thanks for the quick reply.
Hi Larry!
I have been searching for a seminar/presentation video you led which (I believe) examined color correction; I believe you discussed using copy/share attributes OR presets–but what I really enjoyed was the “use [either attributes or presets] from previous angle/clip”, or even “use [either attributes or presets] from angle/clip 2 clips back”, etc.. I believe this was specific to multicam editing and its goal was increasing efficiency in your workflow…
Billy:
This was a feature in FCP 7’s color correction, but I haven’t seen it in FCP X.
Larry
Thanks!