 My appreciation for the magnetic Timeline in Final Cut Pro X continues to grow.
Since it always snaps one clip to the next, it guarantees that there are no gaps in my Timeline. This also makes it much faster to move a clip from Point A to Point B, because I only need to drag a clip “close enough,” then the magnetic Timeline will take it the rest of the way.
To my way of thinking, anything that speeds me up is a good thing. However, all this speed comes at a price – it is impossible to leave a gap between two clips.

For instance, here, when I try to move these two clips, the blue highlight indicates the magnetic Timeline is in force. This means that when I let go of the clips, they snap back into place, with no gap between the clips before and the clips I was moving. (This is why the small, black timecode box shows 00:00, indicating nothing is really moving.)
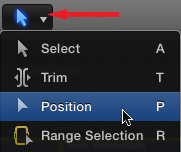
However, there are times when you WANT gaps in the Timeline. That’s where the Position tool comes in. You select it from the Tool menu, or type “P“.

When you use the Position tool to move clips, they stay MOVED! Here, for instance, I am moving these selected clips 2:03. And, because I am using the Position tool, when I let go of the mouse, the clips move right and stay put.
NOTE: If you move a clip with the Position tool, but don’t select any of the clips to the right of the clip you are moving, FCP X will do a ripple trim to the In of the next clip to the right of the clip being moved.
The best rule to follow is to select all clips to the right of the clip you want to move before moving the clip.

This black clip is called a “gap.” This provides TV-safe black and you can trim it the same way you would trim any other clip:
PENULTIMATE SUMMARY
MORE POSITION TOOL TRICKS
The ability to put a gap between two clips is an essential element of editing. However, there is more to the Position tool than you might suspect. Specifically, you can use the Position tool with keyboard shortcuts and timecode, without ever touching the mouse!
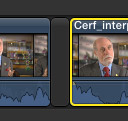
Here are some other Position tool tricks that you may not know. All of these examples start the same way:
Movement Option 1
Movement Option 2
A PRACTICAL EXAMPLE
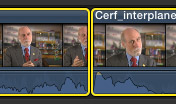
I was editing an interview recently and discovered that I needed to trim the audio REALLY tight. So much so that the timing of his speech sounded forced; there was about one frame between the end of one sentence and the start of the next.
NOTE: I’ve found that for most speakers in normal conversation, there is a six to ten frame space between the end of one sentence and the start of the next of the next. Human speech is rhythmic, and it is important to find and maintain that rhythm for each speaker. Don’t edit the audio of two clips too tight.
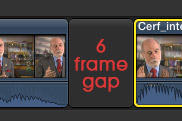
So, I selected all the clips to the right, selected the Position tool, then, typed period [ . ] six times to move all the selected clips six frames to the right. Now when I played the Timeline, the timing between the two clips sounded perfect.
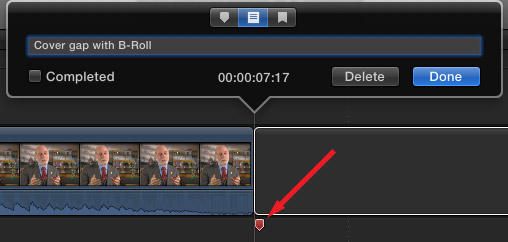
Since I was planning on using B-roll to cover other portions of the interview, I left myself a To-Do reminding me to cover this gap with B-roll. (Sometimes, when I zoom out on a Timeline, it becomes very hard to see very short gaps. The To-Do will remind me I need to cover this.)
SUMMARY
Now, I can use the Arrow tool and magnetic Timeline to snap clips together, or the Position tool to keep them apart. Cool.
2,000 Video Training Titles
Edit smarter with Larry Jordan. Available in our store.
Access over 2,000 on-demand video editing courses. Become a member of our Video Training Library today!
Subscribe to Larry's FREE weekly newsletter and
save 10%
on your first purchase.
16 Responses to Final Cut Pro X: Position Tool
Very useful info, thank you.
I have yet to find a way to select all clips forward of a point on the storyline (or back) as we could in FCP7…is there a way without dragging around all of them?
Seconded. What is the replacement for Shift+T??
GREAT question!
And, so far, I haven’t found it.
Larry
My workaround so far, is to insert a gap (Opt-W) then trim it. Nicely, the gap is only inserted in the primary and everything else is rippled.
I too really miss the old “T” tool.
Just wondering why insert the gap?
What advantage over just selecting everything you need without the gap?
Thanks
jac
The Timeline Index gives you many functions, some of which could replace the old T tool. You can easily select a range of clips in this index.
[…] http://www.larryjordan.biz/fcpx-position-tool/ […]
I seem to have a recurring need to lay a clip under the timeline at an exact location. Typically it is fixed cam footage without sound that needs to use the sound from the timeline. Is there a way to put a clip under / over the timeline as an attached clip starting at an exact location, without zooming in, dragging until the location is finally perfect (tedious manual process)
Thanks Larry!
Michael:
The easiest way is to put the clip at the start of the timeline, then type + [plus] followed by the timecode you want the clip to move to. As far as I can see, FCP X only allows relative timecode movements, not placing a clip using an absolute timecode.
Larry
Thank you Larry, I’ll try it! On a similar vein, we have clips from three different types of cameras, and it appears none of them had the same timecode during the shoot. So when I go to line up different clips from the same scene to make sure the sound is synced, it is challenging to do the math every time to the frame to use the relative adjustment to get them all lined up.
I tried the audio based sync feature, but I don’t want the audio to be combined, I just want the clips lined up. Also, a few of the cameras recorded with no sound, and they need to be lined up. Any additional ideas to reduce the effort?
It sure would be nice to be able to select a clip and hit some command, type in the exact timecode for the clip’s start time and hit return!
Michael:
The easiest way to do this, since you don’t have audio on every video clip, is to set a marker at the sync point of each clip. Then, align your multicam clips using markers.
Very fast and works every time.
Larry
In the primary storyline, I am option + clicking and dragging a clip above the primary storyline. Is there a way to have this secondary clip snap left automatically? I am using the “nudge left” shortcut key but wondering if there is a quicker way.
Eric:
I’m unclear what you mean by “snap left” automatically. If snapping is on, you can quickly align a connected clip with any edit point in the Primary Storyline.
Larry
In Logic Pro X, (and every previous version I have owned)…there is an option to return to zero by hitting Enter. Does such an option even exist in this program. It has literally driven me around the bend trying to get an answer…anywhere. How does one conveniently return to zero?
If someone has the answer here, I would consider that a small miracle. The keyboard shortcut option doesn’t work either. I honestly don’t mind being shown up for being an idiot if someone can point out the obvious.
Cheers.
Chris:
Don’t go nuts. A keyboard shortcut exists, but it isn’t assigned to a key.
Open Final Cut Commands. Search for “Reset” – one of the options will be to Reset to 0 dB. Assign that to your favorite key and you are good to go.
Check out this article: https://larryjordan.com/articles/fcp-x-hidden-audio-keyboard-shortcut/
I wrote it with you in mind.
Larry