 Final Cut doesn’t create reflections, but Motion does. We can create a simple template in Motion that can be quickly applied to any clip as an animated effect in Final Cut to create reflections.
This process isn’t hard, though it does require using Motion. The real benefit, though, is that you end up with an animated template you can use for multiple projects.
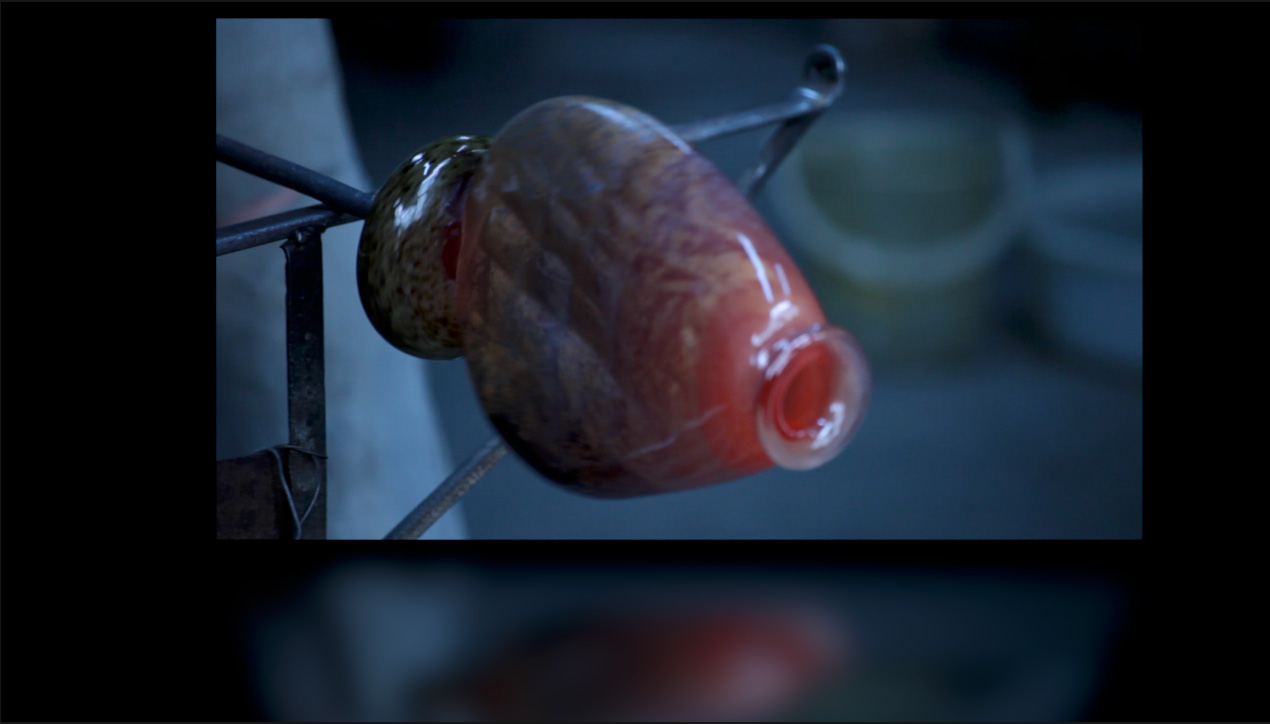
Before we start, here’s where we are going.
ANIMATE THE SOURCE IMAGE IN MOTION
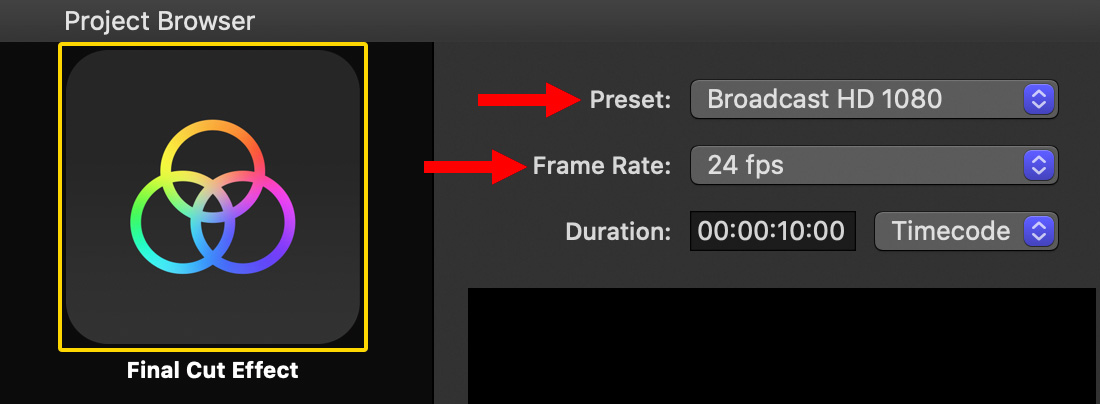
Create a new project in Motion that matches the frame size and frame rate of your project.
Then, in the Project Browser, click Final Cut Effect to create an effects template.

Select Effect Source in the Layers pane.
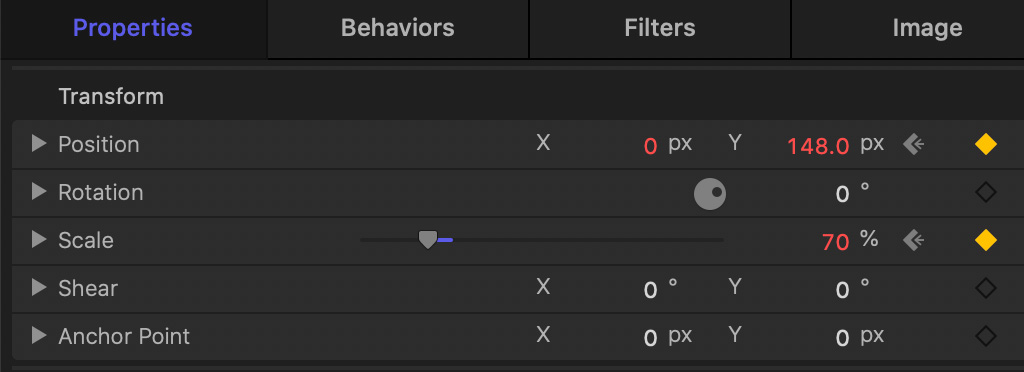
In Inspector > Properties, set keyframes for Position and Scale at the beginning of the effect to display Effect Source full screen, then fly it back to 70% size in the top center of the frame.
NOTE: This animation is not required to create a reflection. But, as long as we are creating something, I thought it would also be fun to animate it.
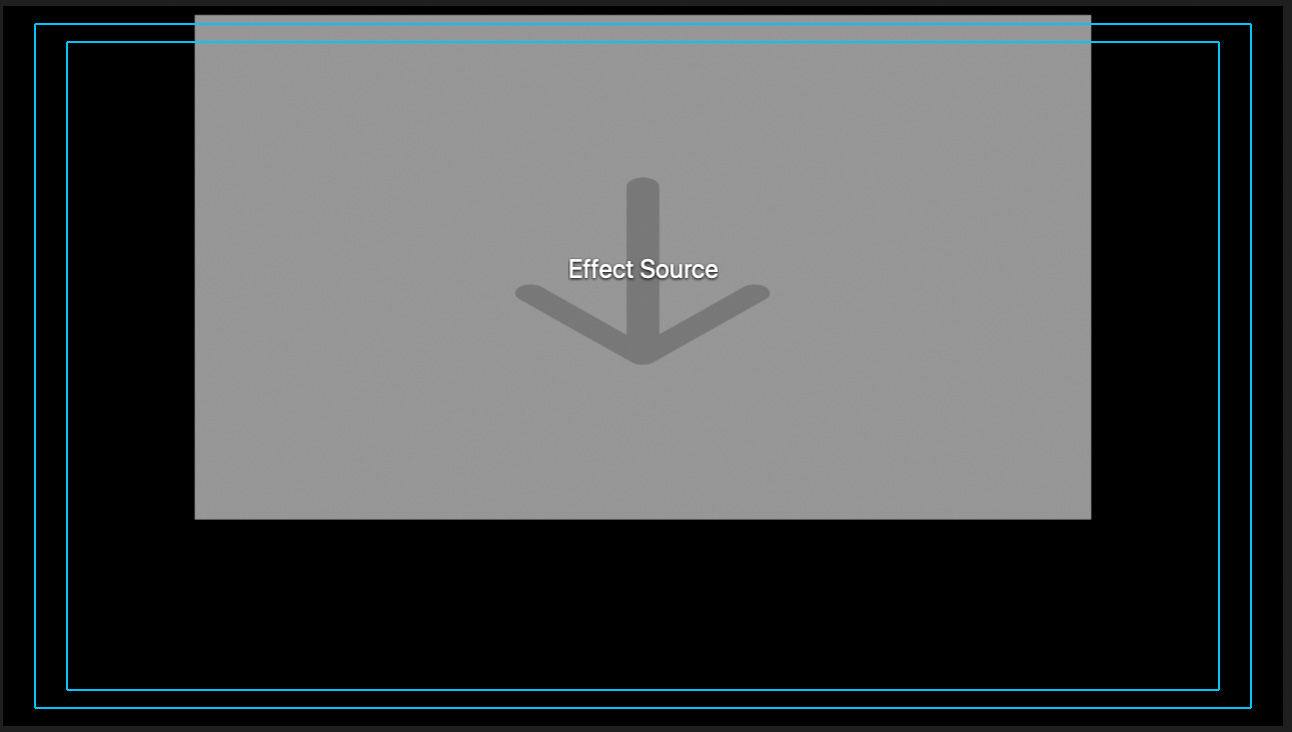
This is what the finished Effect Source position looks like.
NOTE: If you use keyframes to animate the Effect Source flying back from full-screen to reveal the reflection, you may also need to adjust the Y position of the reflection – which we are about to create – to make sure it starts out of frame at the bottom, then flies up as the Effect Source image flies back. That’s what I did for the video at the end of this tutorial.
CREATE THE REFLECTION
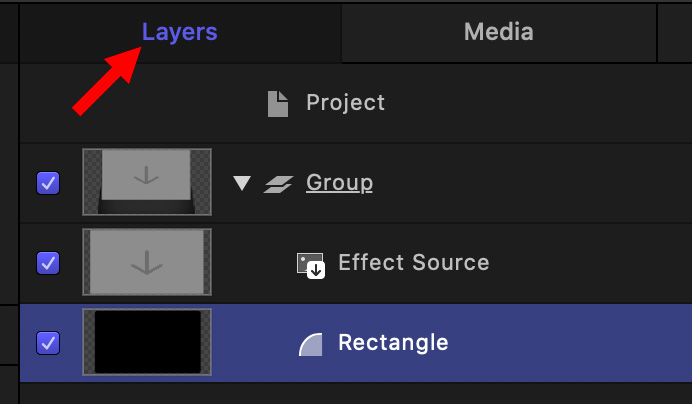
Draw a rectangle that fully fills the frame. Drag it below the Effect Source in the Layers pane and color it black.
NOTE: You can use any color for the rectangle, but black works best.
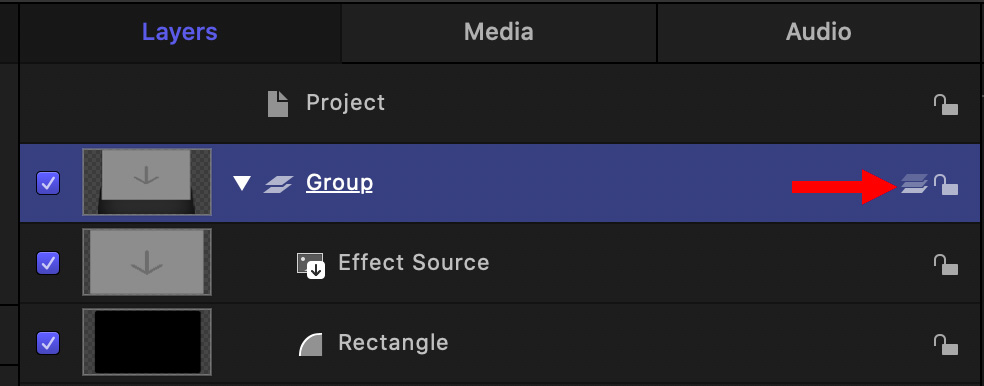
To enable reflections, change the Group from 2D to 3D by clicking the icon indicated by the red arrow in the screen shot above.
NOTE: By default, all groups are only 2D, which does not support reflections.

Select the Rectangle in the Layers pane, then, in Inspector > Properties, enable Reflection.
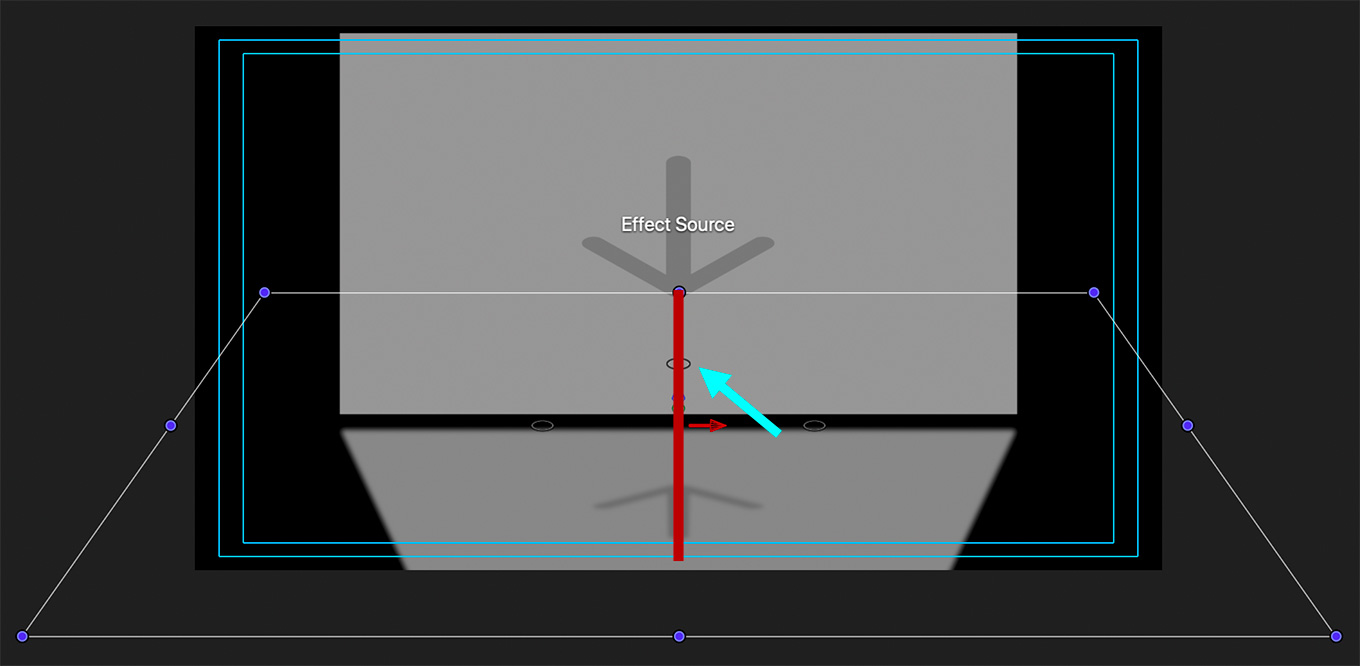
Select the 3D Transform tool (Shortcut: Q) and, using the small white circle at the top, (blue arrow in screen shot) lean the rectangle back until you see a reflected image from the Effect Source.

Once you see the reflection, go back to Inspector > Properties and modify the Reflection settings till the reflection looks good to you.
NOTE: I like boosting the Blur amount and adding Falloff, as indicated by the numbers in this screen shot.
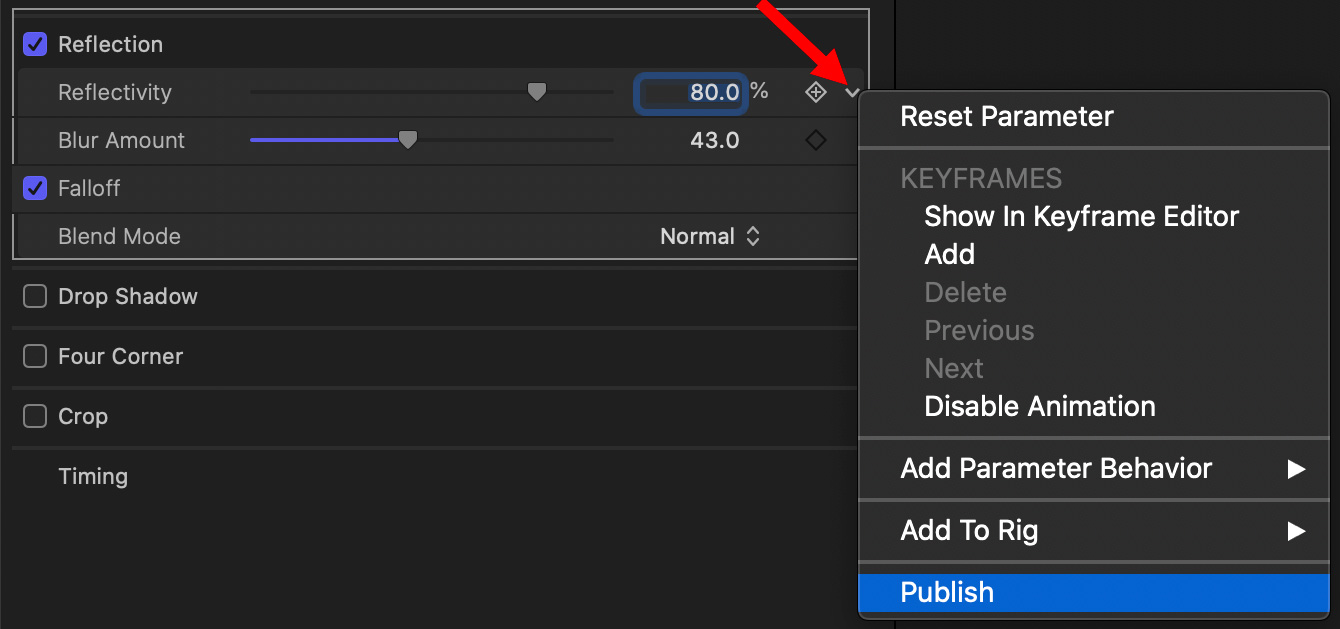
Finally, to provide additional control in Final Cut, click the small arrow to the right of Reflectivity and choose Publish. This adds this parameter as a control setting in Final Cut.
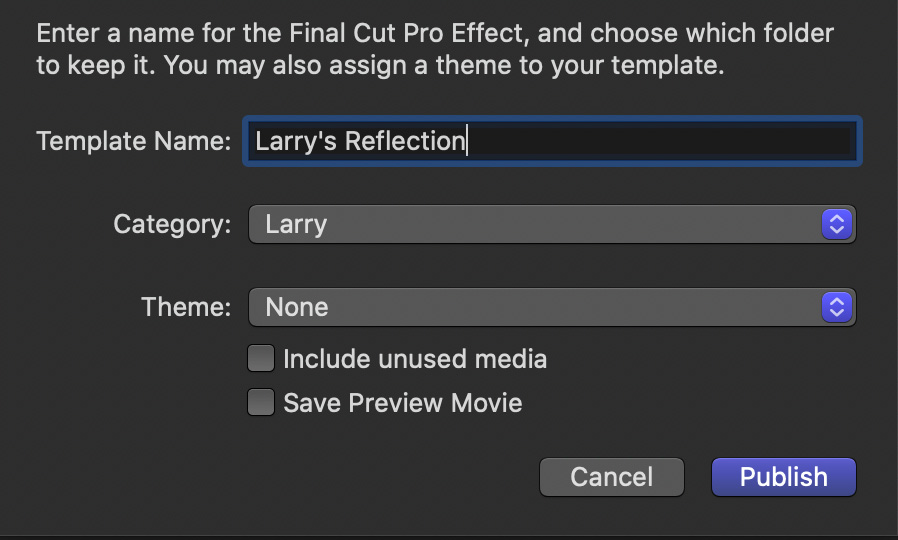
Choose File > Save, give the effect a name, and pick a category in which to store it.
NOTE: I store all my custom effects in a folder called “Larry.”
APPLY THE EFFECT
The next time you open Final Cut, you’ll find this new custom effect available to you in the Effects browser; stored in the category you picked when you saved it. You apply custom effects the same as any other effect.

In the Video Inspector, you’ll find the Reflectivity slider to make adjustments to the final version of the reflection in Final Cut. I used 45% for the finished effect.
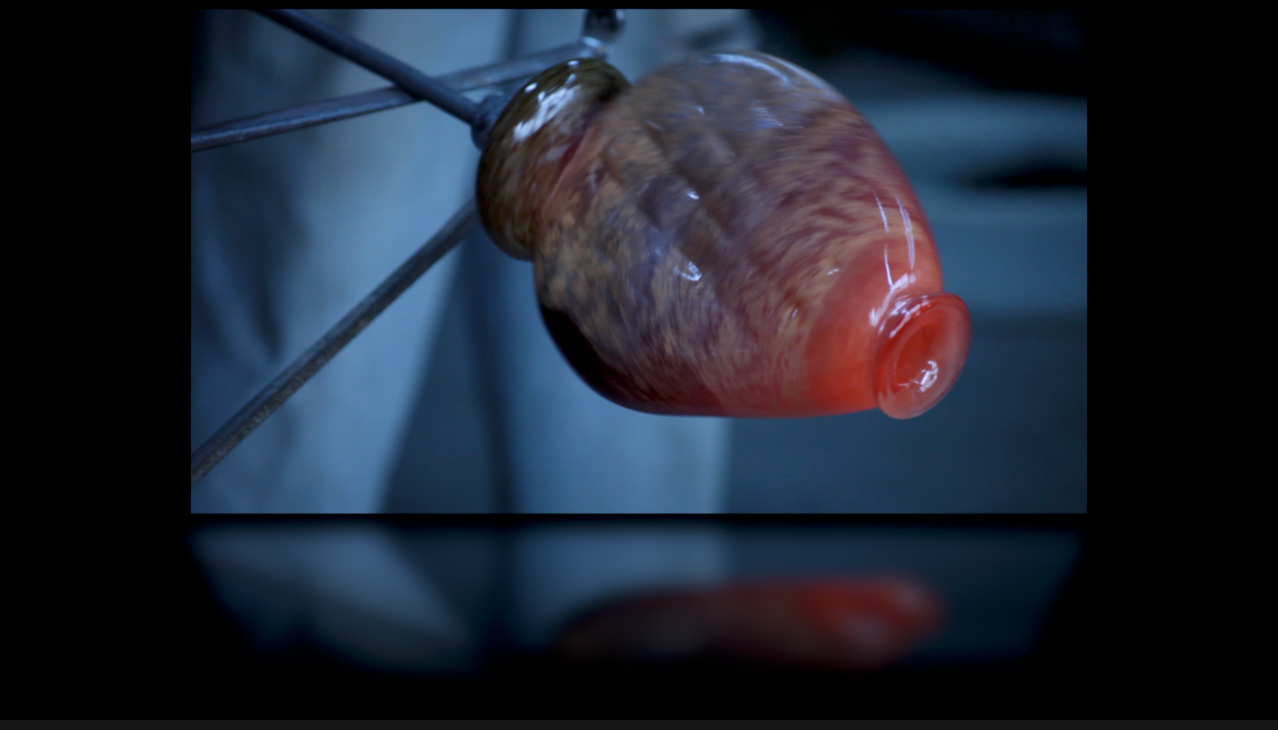
Here’s the finished result.
EXTRA CREDIT
Here’s a two second video of the finished effect, with reflectivity set to 45%.
An Animated Reflection Created in Motion as an FCP Effects Template
TRT: 0:03 — MPEG-4 HD movie
2,000 Video Training Titles
Edit smarter with Larry Jordan. Available in our store.
Access over 2,000 on-demand video editing courses. Become a member of our Video Training Library today!
Subscribe to Larry's FREE weekly newsletter and
save 10%
on your first purchase.
2 Responses to Create Reflections in Apple Motion for Use in Final Cut Pro
Dear Larry and team:
I am continuously amazed at the volume of knowledge that you are passing on to us.
I do not know were you find all that time and input. Maybe a video on how this all
comes together so flawlessly.
Thank you for everything you do.
Best Wishes
Dirk Baumann
Dirk:
Thank you for your very kind words!
Like everything creative, this all comes from staring endlessly at a blank wall, hoping for an idea. After that, it’s all execution. I have no idea how that could be turned into a video.
Smile. It’s a mystery.
Larry