 One of the new features in the 10.4.9 update to Final Cut is Smart Conform. This takes an existing clip or clips and “crops” them to fit into a different aspect ratio. A typical example is taking media shot 16:9, then converting it for a trailer on Instagram at 1:1 or an iPhone at 9:16.
Smart Conform is Apple’s answer to Auto Reframe, introduced in Adobe Premiere Pro in September, 2019. A key difference between the two is that Smart Conform applies to clips, while Auto Reframe works on sequences. There are other differences which will appear during this tutorial.
NOTE: If you know you are creating a vertical media project before production starts, then turn your camera 90° and shoot a vertical image. Smart Conform is needed when you need to create a vertical project after all media was shot.
Here’s how Smart Conform works.
CREATE A NEW PROJECT
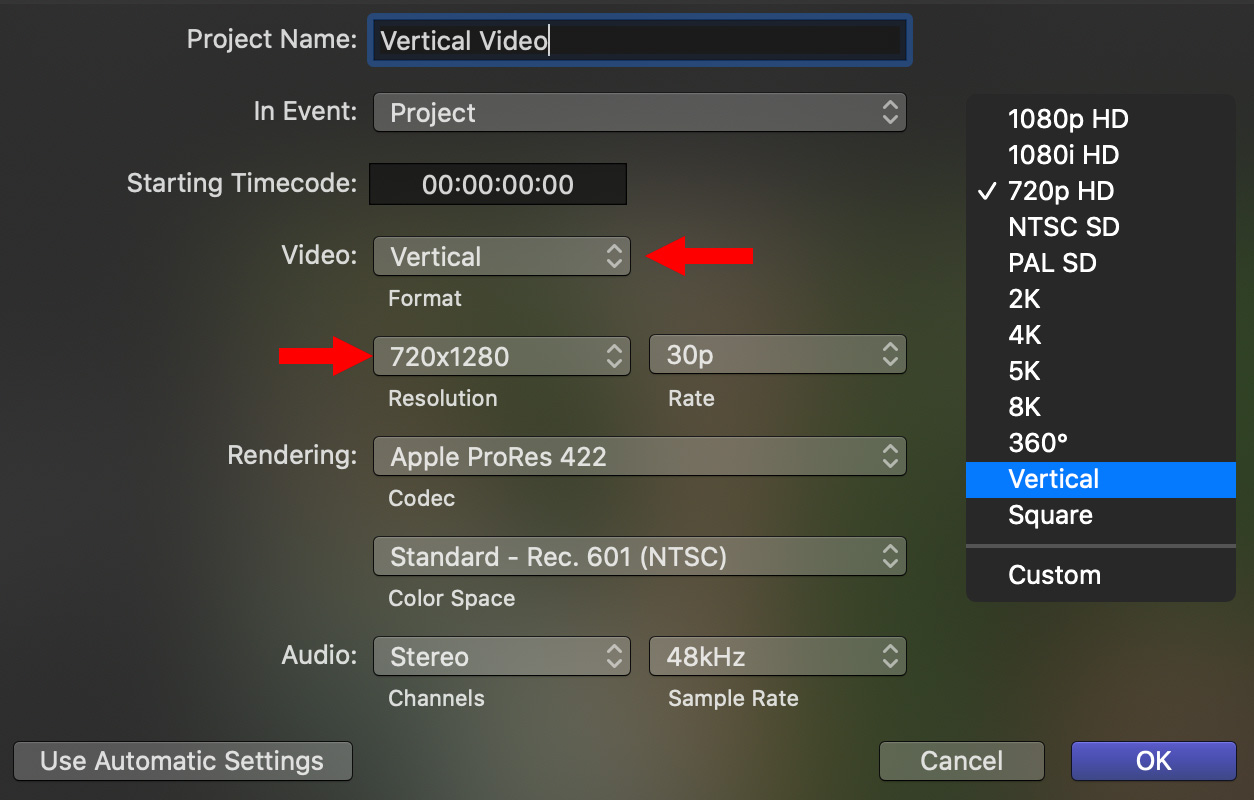
(I pasted the contents of the Video menu to the side so you can see the changes. Note, also, that FCP X now supports 8K media! )
Create a new project with the aspect ratio you need. For this example, I’ll create a vertical video project for the iPhone. In this screen shot, you see another new feature in Final Cut: internal dialogs have a new background color and new Video options.
To preserve image quality when converting aspect ratios, always pick a frame size for a project that fits within the existing media frame size or requires the least amount of scaling. For example, the table below illustrates maximum project sizes when reframing existing media for a new aspect ratio to maximize image quality.
Frame Size Maximums When Re-Framing Aspect Ratios
| Source | Square | Vertical |
|---|---|---|
| 720 x 480 | Max: 480 x 480 | Max: 270 x 480 |
| 1280 x 720 | Max: 720 x 720 | Max: 405 x 720 |
| 1920 x 1080 | Max: 1080 x 1080 | Max: 608 x 1080 |
| 3840 x 2160 | Max: 2160 x 2160 | Max: 1080 x 1920 |
As you can see from this table, lots of pixels get lost when changing the aspect ratio from horizontal to vertical. This is true of all NLEs, not just FCP X. For 1080p media, you can scale this up to 720 x 1280, just know that the image will get a bit soft.
NOTE: These numbers get confusing. Remember, you are NOT rotating the image, you are trimming the left and right edges to fit within the new frame size. So the maximum vertical height is determined by the vertical height of the source media.
A SIMPLE EXAMPLE

(Footage courtesy: Amy “Catfox” Campion (www.AnticsPerformance.com))
Open the new project into the timeline, then either copy/paste media from an existing project or edit clips in from the Browser. When you do, the default setting of Fit in Spatial Conform squeezes the entire image to fit into the much smaller horizontal width of the project. Don’t panic, we’ll fix this next.
In this example, notice that the subject is essentially in the center of the frame.
Select the clip(s) you want to adjust and choose Modify > Smart Conform.

After a brief time analyzing the clip, which will vary depending upon the speed of your system, as well as the duration and complexity of your clips, the image is reframed.
In this example, I’m using 1920 x 1080 source material and scaling it to fit into a 720 x 1280 frame. This causes some image blurring because the image is enlarged about 18%.

NOTE: As part of the reframing process, Final Cut also changes Spatial Conform from Fit to Fill. This expands, or shrinks, the clip to fill the frame vertically. However, and this is an important note, there is no indicator in the Inspector of how much the clip has changed in size. Scale is always set to 100%, which is deceptive.
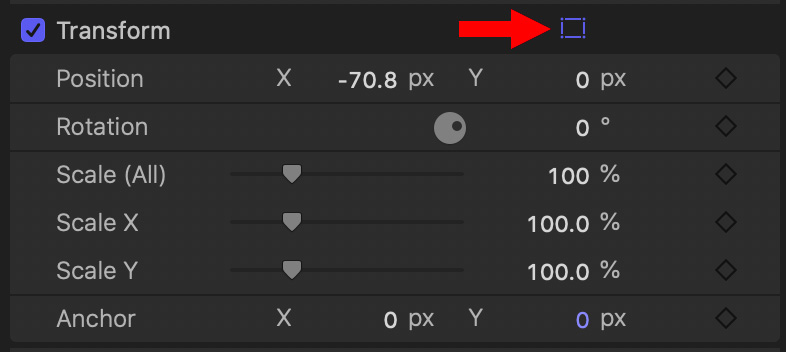
To see what Final Cut did, click the on-screen Transform controls (red arrow) in the Video Inspector.
NOTE: Looking at the X-Position setting, Smart Conform moved the image 70.8 pixels to the left.
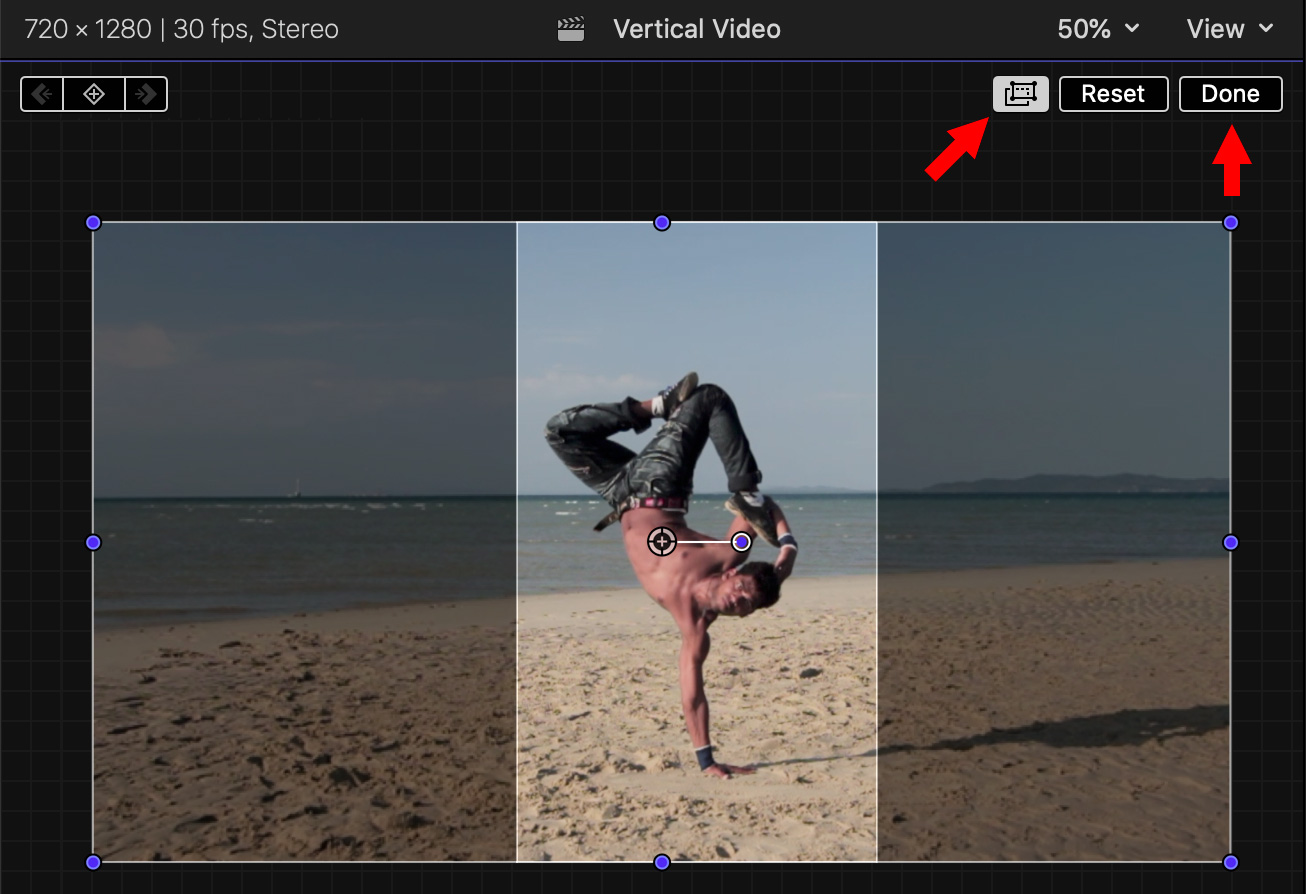
Then click the “double-box” icon (left red arrow) in the top-right corner of the viewer. This displays the full image dimmed behind the selected area.
You can change the framing of the selected area by dragging left or right in the Viewer.
To hide this display, click the Done button (right red arrow) in the top right corner.
A MORE COMPLEX EXAMPLE
Here’s a more complex example that illustrates one of the limitations of Smart Conform.
(Footage courtesy: Model Railroad Builders (www.franandmileshale.com))
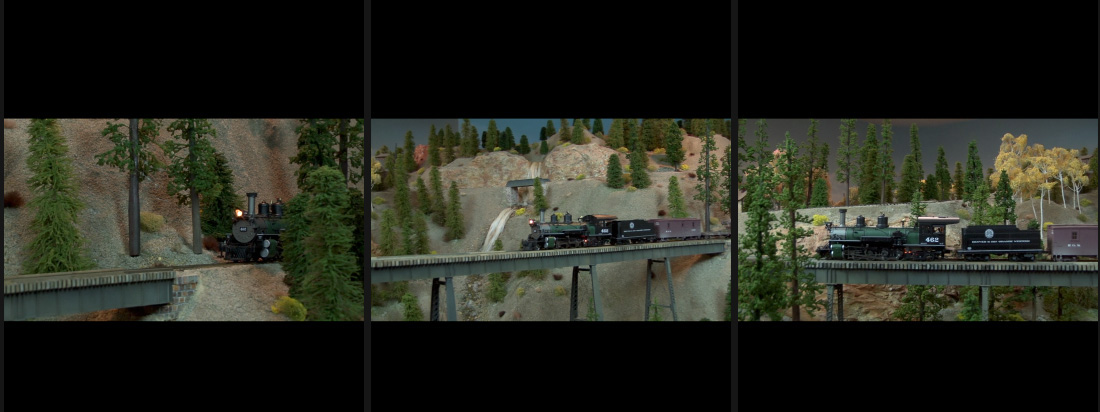
In this series of three screen shots, the train starts on the right, moves center, then exits left.
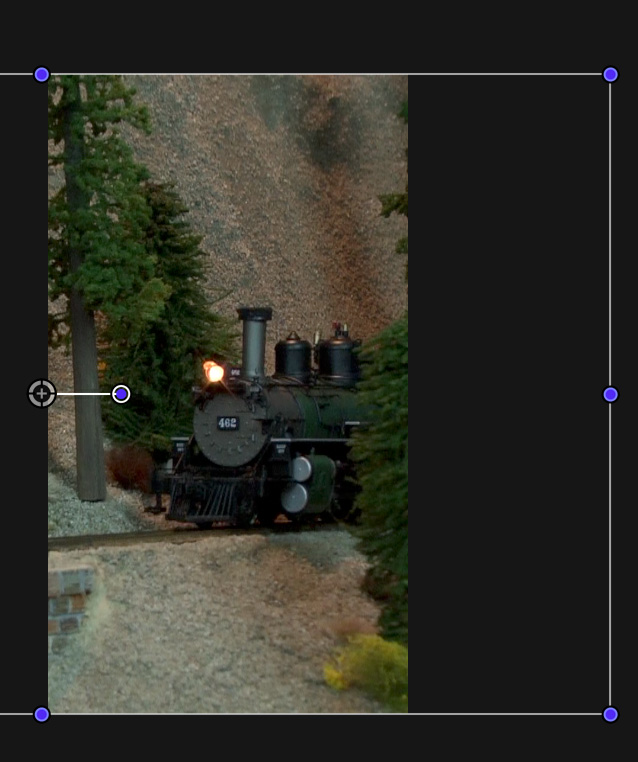
When we apply Modify > Smart Conform, Final Cut correctly determines the starting position…
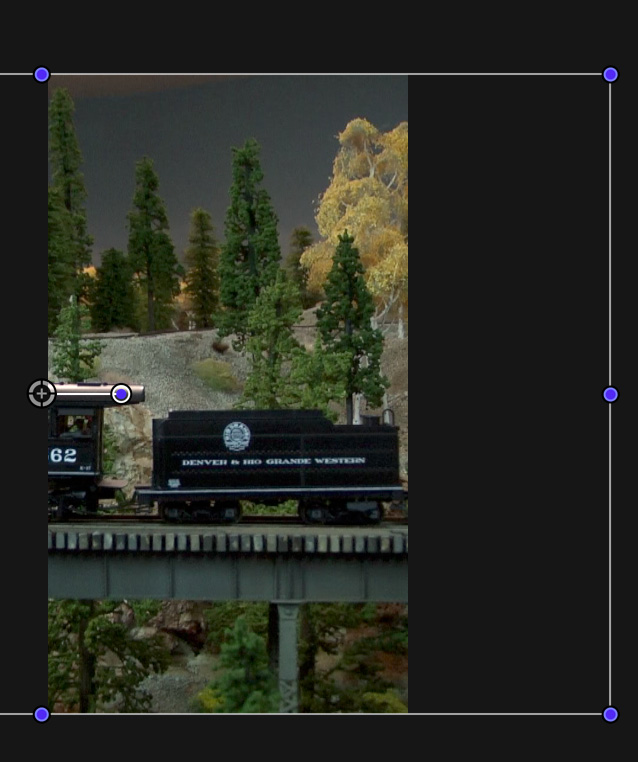
But as the train travels across the frame, the Smart Conform position does not change.
This is a major difference between Auto Reframe in Premiere and Smart Conform. Auto Reframe tracks the key subject, Smart Conform does not.
THE WORKAROUND
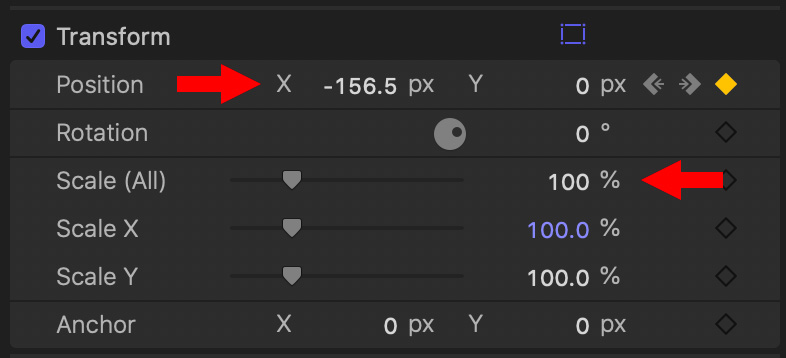
To correct framing, go to the Video Inspector > Transform and set keyframes for the X-Position (horizontal) parameter. This creates the effect of the camera panning as the subject is moving.
NOTE: As mentioned earlier, even though the image was scaled larger to fill the frame using Spatial Conform, the Scale value remains at 100%.
LIMITATIONS
Smart Conform is a good start, but it has significant limitations:
For these reasons it is better to use Smart Conform at the beginning of the edit, rather than doing a quick framing adjustment pass when the edit is complete.
Auto Reframe in Premiere, on the other hand, adjusts entire projects, including titles, and will track moving objects; due to the built-in motion tracking in Premiere, which Final Cut Pro still lacks.
NOTE: Something I like, though, is that Smart Conform always requires a new project. It never changes any existing projects. Like Smart Conform, Auto Reframe in Premiere also creates a new project when changing aspect ratios.
SUMMARY
Smart Conform is a welcome new feature, but it is important to understand its limitations. The earlier you use it in your editing workflow, the more successful you will be with it. However, while fine for starting a new edit with existing media, this feature still has a ways to go before becoming truly useful for existing projects.
2,000 Video Training Titles
Edit smarter with Larry Jordan. Available in our store.
Access over 2,000 on-demand video editing courses. Become a member of our Video Training Library today!
Subscribe to Larry's FREE weekly newsletter and
save 10%
on your first purchase.
2 Responses to New! Smart Conform in Final Cut Pro X
Thank you, Larry. This is very helpful. I’m okay with Smart Conform not fully tracking moving objects and don’t mind adjusting that on my own if needed. Premiere’s Auto Reframe is good, but if the results aren’t to my liking, it seems to take longer to fix than doing it manually from scratch.
Mark:
Yeah, sometimes the automatic method doesn’t really save time.
Larry