
 David Doob pointed this out to me — you can change the shape of the line between two keyframes to add ease-in/ease-out behavior to the transition between two keyframes.
This is new to FCP X – in FCP 7, we needed to manipulate Beziér control points attached to each clip. No longer.
Here’s how this works.
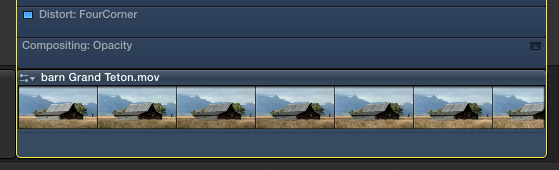
1. Select the clip to which you want to add keyframes and type Control+V. This displays the video animation bars above the clip. These bars include a variety of parameters.
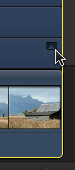
2. Click the small dark box on the right side of the Compositing: Opacity bar to enlarge it. I am using Opacity to illustrate this, however, this technique works on many different settings within FCP X – as long as they can be keyframed. (Not all parameters have this dark box, which means the bar containing their settings can’t be expanded.)
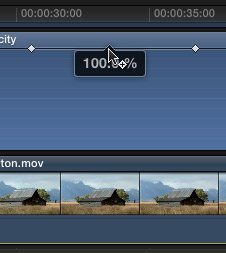
3. Press the Option key and click the thin horizontal black line where you want to set keyframes. In this screen shot, I’ve already set two keyframes and am getting ready to set a third between them.
To move a keyframe in time, drag it horizontally. To change the value of a keyframe setting, drag the keyframe vertically. Once you start dragging a keyframe in one direction, say, horizontally, you can’t change direction to vertical until you release the mouse.
NOTE: To move a keyframe, or line, in smaller increments, hold the Command key while dragging.
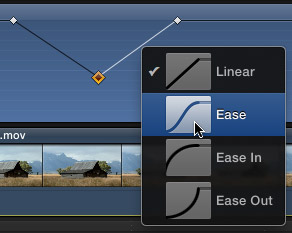
Now the magic starts. Right-click the line BETWEEN two keyframes to reveal four line shapes and select the timing adjustment you want to make:
Linear. This is the default setting, which provides a constant speed between two keyframes.
Ease. Starts and ends slowly, accelerates in the middle.
Ease In. Starts quickly, slows as movement approaches the ending keyframe.
Ease Out. Starts slowly, speeds as movement approaches the ending keyframe.
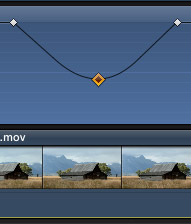 Notice that the shape of the keyframe curve now illustrates your selection. In this screen shot, the keyframe line on the left illustrates Ease In (slows on approach), while the line on the right illustrates Ease Out (slow on leaving).To reset a line back to its default setting, right-click on the line and select “Linear.”EXTRA CREDIT
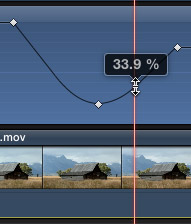 The easiest way to move a pair of keyframes is to click the line between them. Dragging the entire line up or down resets both the starting and ending keyframe values.
WRAPPING UP
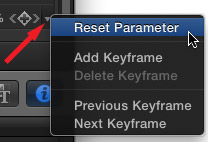
To delete all keyframes associated with a specific parameter of a clip, select the clip, go to the Inspector, and click the small, downward-pointing triangle next to the keyframe diamond at the far right side of the parameter control.
To hide the Video Animation bars, select the clip and type Control+V again.

2,000 Video Training Titles
Edit smarter with Larry Jordan. Available in our store.
Access over 2,000 on-demand video editing courses. Become a member of our Video Training Library today!
Subscribe to Larry's FREE weekly newsletter and
save 10%
on your first purchase.

22 Responses to FCP X: Keyframes and Curves
← Older Comments-
 Anthony says:
September 3, 2020 at 10:15 am
-
 Larry says:
September 3, 2020 at 10:40 am
← Older CommentsPlease help. I’m trying to curve the scale. I want the object to slowly get larger and over time it gets larger quicker. I can’t seem to curve the scale ?????
Anthony:
I just checked, you can’t add curves to scale values. You’ll need to slow the speed manually by adding multiple keyframes.
Larry