[This step-by-step tutorial provides an in-depth look at creating multicam clips. Once you understand how a multicam clip works, using this simple checklist will be faster. To see a video tutorial on multicams, click here.]
Adobe continues making improvements to multi-camera editing with the CC release, which they enhanced even further in the recent 7.1 update. An angle – think of an “angle” as a track – can contain audio, video or stills. In fact, a single angle can contain multiple clips. (This is a very cool way to use multicam editing to create a montage of stills.) A multicam clip can contain as many video streams as your system can support.
NOTE: The phrase: “that your system can support,” is very hard to pin down. Things that limit the number of video angles you can edit include: the complexity of the video codec, the data transfer speed of your hard disk, the speed of your CPU, the capability of your graphics processor, and whether all camera angles are the same image size, frame rate and codec.
As a general guide, you should be able to edit four streams of video using a single FireWire hard drive. A two-drive Thunderbolt RAID should allow you to edit up to eight streams. A five-drive, or greater, Thunderbolt RAID should allow you to edit more than 16 streams. (As always, these are estimates and reality has an ugly way of changing the situation. Experiment to see what works best with your system BEFORE you get on deadline.)
GET IN SYNC
Clips that go into a multicam clip (which Adobe calls a “multi-camera sequence”) need to have a common sync point. The sync point provides a common starting point so that all the clips play back together, in “sync.”
We can sync using five different sync points:
Syncing using Timecode is the fastest. If you use clapper slates, it is easiest to mark the clap with an In. If you use markers, all markers used to indicate a sync point must have the same name. Syncing on audio is easy, but requires all cameras to have audio recorded on them, which rules out syncing still images.
NOTE: I don’t sync still images. I drag them into the multicam clip after it is built and position them manually, using Open in Timeline which I talk about below.
Whichever one of these options you pick, all the clips need to use the same method of syncing. I tend to use markers and I name the marker “Start” to indicate the sync point.
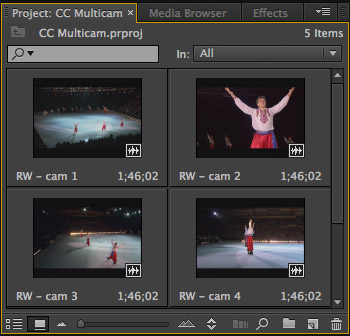
Here I’ve imported four clips of ice dancers that I want to edit. (This is from a show called “Moscow on Ice,” and is courtesy of Greene HD Productions (www.greenehdtv.com)).
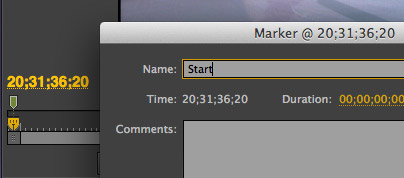
I marked the sync point for each clip manually, using a marker that I named “Start.” I could just as easily have used an In or Out, but the benefit to using markers is that I don’t lose access to media before the In or after the Out.
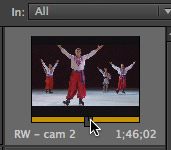
While you can set Ins and Outs using the mini-Timeline in the Project panel, you can only set clip markers using the Source monitor. Double-click a clip to load it into the Source monitor, position the playhead where you want to place a marker, then type the letter “M“.
To assign a name to a marker, make sure the playhead is parked on the marker, then right-click the marker itself and select Edit Marker (or, choose Marker > Edit Marker).
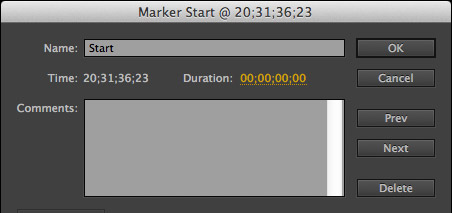
Give the marker a name in the Name field – in this example, I used “Start” – but as long as all clips use the same name for their marker, you can call the marker anything you want. Then, click OK.
NOTE: Unlike earlier versions of Premiere, the marker track is hidden if there are no markers in a clip. Once you add a marker, the marker track is displayed above the playhead in the Source monitor.
When syncing using clapper slates, it is often easier to sync by looking at the audio waveform than the picture. To see waveforms, right-click the clip name in the Source tab and select Audio Waveform. To switch back to viewing images, right-click the tab, again, to display the same pop-up menu and choose Composite Video.
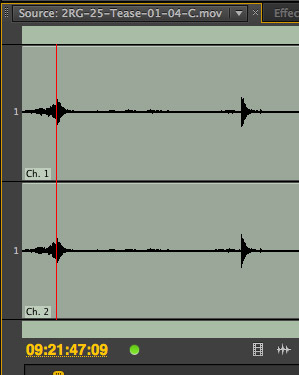
As an example from a different show, the playhead is parked on the clap from the first of two clapper slates. I was using the waveform because the camera wasn’t able to see the slate, but I still needed to sync the camera.
BUILD THE MULTICLIP
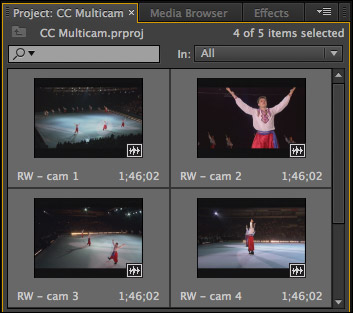
Once you have sync points set for all your clips, select them in the Project panel by either Shift-clicking, or Command+clicking, the clips you want to include.
NOTE: The order in which you select your clips is the order they will be displayed in the Program monitor, though a new feature in Premiere now allows you to change this display order. I’ll illustrate that in a minute.
With your clips selected, choose Clip > Create Multi-camera Source Sequence. (You can also access this menu by right-clicking one of the selected clips.)
NOTE: You must select at least two media sources (audio, video, or stills) to create a multiclip.
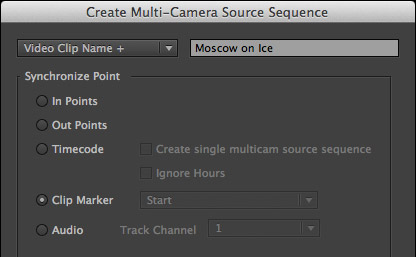
This displays the “Create Multicam” window. Give your multiclip a name and select how you want to sync your clips. Because all the clips have markers and all the markers have the same name, Marker is automatically selected. The default selection is to sync on the In.
NOTE: A new feature with the update is the ability to change how cameras are named. These three choices appear at the bottom of the Create Multicam window. There’s no correct answer in selecting these. Try all three and see which seems to work the best for you.
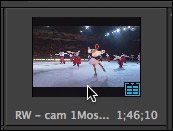
A new clip, representing your newly-created multi-camera sequence, appears in the Project panel. Notice that now we can hover-scrub it, with a new badge – indicating it is a multicam clip – displayed in the lower-right corner.
TWEAKING THE CLIP
Another new feature now allows us to adjust the display order and active angles in the clip. Double-click the multicam clip to load it into the Source monitor. Click the Wrench icon in the lower right and select Edit Cameras.
NOTE: This adjustment can only be made when the multicam clip is loaded into the Source monitor.
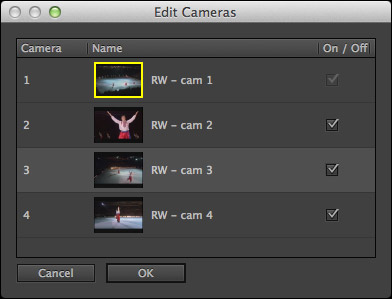
This displays the Edit Cameras panel. Drag the name of a clip up or down to change the order in which angles are displayed. Uncheck a check-box to make an angle inactive (invisible). Check it again to make the angle visible. When you are happy, click OK.
This new window makes modifying multicam clips a lot faster and easier.
SET THE AUDIO
A multi-camera sequence is just that – a special sequence designed to contain multiple clips for editing. By default, a multi-camera sequence (which I’ll go back to calling a multicam clip in just a minute) only enables the audio on track Audio 1. This means that if you want to hear audio from any other track, you need to turn it on before you start editing the multiclip.
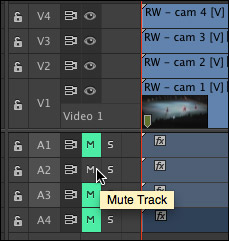
To do this, right-click the multicam clip icon in the Projects panel and select Open In Timeline. This opens the multicam clip into the Timeline and displays all the source files on separate tracks. This allows us to change which audio tracks are audible, add effects to individual clips in the multicam clip, or add additional clips to an existing track; for instance to add stills to existing clips.
In my case, I want to only use the audio from the second camera, so I mute the audio for track A1, and unmute the audio for track A2.
NOTE: In addition to changing the active audio track, opening a multicam clip in the Timeline allows us to color correct a specific angle before it gets edited; for example, to correct a camera that was improperly color-balanced.

Once we’ve made all our adjustments to the master multicam clip, we can close the multicam tab at the top of the Timeline (this is optional, but decreases confusion).
EDIT THE MULTI-CAMERA SEQUENCE
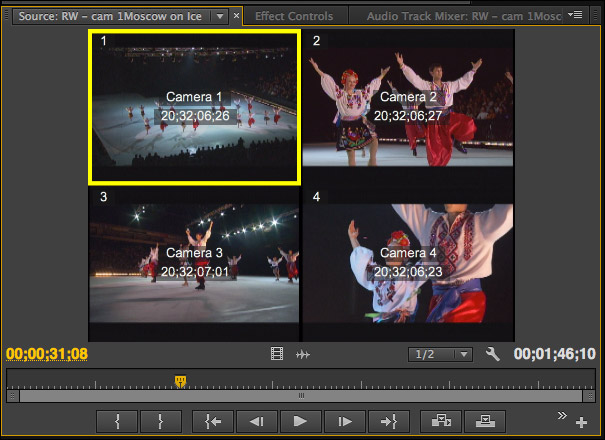
Double-click the Multicam clip in the Project panel to load it into the Source window.
Set an In and an Out, as you would for any clip, and edit it into the Timeline. A multicam clip can be a sequence by itself, or part of a larger project. From the point of view of editing, it acts just like any other clip.

A multicam clip in the Timeline has a different color than other media clips.
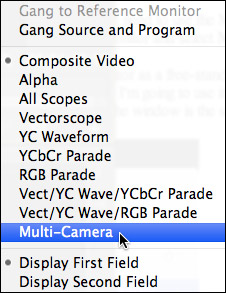
In order to edit a multicam clip, we need to use the Multi-camera Monitor. To display this, click the Wrench icon in the Program monitor and select Multi-camera.
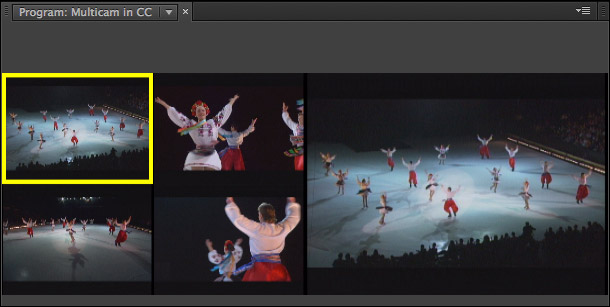
This opens a new view next to the Program monitor, where all the individual angles are displayed.

From the fly-out menu in the top right corner of the Program monitor, you can select whether audio will follow video; it is off by default. If you choose this option, the audio will change each time you change camera angles. For most of my editing, I don’t want this. Instead, I want the audio to stay with a single mixed audio track that I set when I opened the multicam clip into the Timeline.
NOTE: You can also find this option by right-clicking the multicam images themselves in the Program monitor.
Editing a multicam clip is easy. Position the playhead at the beginning of the clip, then, press the spacebar. As the video plays, click the image in the Program monitor to which you want to switch.
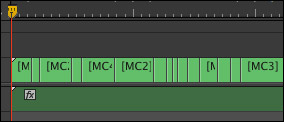
That cut is reflected immediately in the multicam clip in the Timeline.
NOTE: You can also switch shots by pressing the Control key and typing a number from 1 to 9 on the main keyboard.
TRIMMING

We trim edits in a multicam clip in the Timeline just like any other edit. Here, for instance, I was late in cutting back to the wide shot, so I am rolling the edit point to correct this.
To replace an angle in the edited multicam clip with another angle, put the Timeline playhead in the shot you want to replace and click the new angle in the Program monitor.
To create an edit in an existing shot in the multicam clip in the Timeline, put the Timeline playhead at the point you want to create the edit and Command-click the new shot. An edit point is created at the position of the playhead and the downstream shot will be replaced by the shot you click in the Multi-camera Monitor.
WHEN YOU ARE DONE
Because Adobe is playing all streams at the same time as you edit a multicam clip, this can be very taxing on your storage.

When you are done editing, select the entire multicam clip in the Timeline and choose: Clip > Multicam > Flatten. This disconnects all the clips in the multicam clip, so that Premiere only needs to play the actual clips in the Timeline. This significantly reduces the wear and tear on your hard disks.
Keep in mind that once you flatten a clip, you can’t reconstruct the multicam clip. So, save this step until you are sure you are satisfied with the edit.
2,000 Video Training Titles
Edit smarter with Larry Jordan. Available in our store.
Access over 2,000 on-demand video editing courses. Become a member of our Video Training Library today!
Subscribe to Larry's FREE weekly newsletter and
save 10%
on your first purchase.
42 Responses to Premiere Pro CC: Multicam Step-by-Step
Newer Comments →-
 Jakob Peterhänsel says:
November 11, 2013 at 11:09 am
-
 Reg Wrench says:
April 24, 2014 at 1:17 am
-
 Jamie Caterham-Ashford says:
October 22, 2015 at 8:25 am
-
 Jack Crombie says:
August 1, 2014 at 12:15 am
-
 Michael Rosen says:
September 24, 2014 at 10:24 am
-
 DonP says:
May 20, 2015 at 7:29 pm
-
 Tim Kane says:
July 1, 2015 at 10:42 am
-
 Daniel Zana says:
November 11, 2015 at 9:34 am
-
 Larry says:
November 11, 2015 at 12:43 pm
-
 Daniel Zana says:
November 11, 2015 at 1:58 pm
-
 Yonatan Lehman says:
September 5, 2016 at 4:22 am
-
 Larry says:
September 5, 2016 at 6:51 am
-
 Rich Kaelin says:
November 18, 2015 at 9:07 am
-
 Larry says:
November 20, 2015 at 4:32 pm
-
 Craig Smith says:
May 3, 2016 at 3:26 am
-
 Larry says:
May 3, 2016 at 7:52 pm
-
 Eileen says:
June 9, 2016 at 12:51 pm
-
 Larry says:
June 9, 2016 at 5:00 pm
-
 Michael Fasman says:
July 4, 2016 at 4:26 pm
-
 Larry says:
July 4, 2016 at 10:26 pm
Newer Comments →Is it just me, or does MC editing in Premiere still seem like a dinosaur compared to FCPX??
Yes it does still lack a few essential features that fcpx has before it is useable on a professional job.
The undoable flattening assumes clients will never make late changes – even Fcp 7 was able to uncollapse a multiclip so this omission renders this feature unuseable.
The edit cameras feature only works on the multiclip before any edits are made in your timeline. After that every edit will need the adjustment made to individually, as in fcp7. Fcpx allows you to make adjustments (colour corrections, new angles, angle order changes etc) once which affect every edit in your timeline. So when you have say 18 cameras, you can cut the first 9 and then switch the view to the next nine rather than try to see all the tiny thumbnails in an 18 way split. Premiere really needs to implement these features before it is useable for large multicamera jobs.
The rest of the software however is fantastic so let’s hope they update the multicam functionality.
Even the legends use the step by step guides! I’m sure Adobe will get to it at some point.. I think they’ve spent more time on morph cut than they have delving in to multicam..
One way to get around the problem of not being able to reverse a flattened timeline is to duplicate your timeline before you flatten. so when the customer comes back with changes, you can go back to your multicam clip EDIT timeline Duplicate it so you have a new itteration of your edit (you know, i case the client changes their mind and wants to go back to something you had 3 edit versions ago.) and flatten on a new duplicate of your current edit version. I’ll lay it out below a bit clearer:
Edit v1 – Multicam edit sequence – (you’ve done your edits and camera selections here and you’re about to flatten.)
Flat edit v1 – Flattened edit sequence (created by duplicating the sequence above and then selecting flatten in the timeline.)
Edit v2 – Multicam edit sequence – (you’ve duplicated Edit v1, then you’ve come here to make the client change requests.)
Flat edit v2 – Flattened edit sequence (ready for effects and the like)
I can’t speak to 18 camera multicam clips, but I’m sure it sucks. The best way I can think to work with those is to move your program monitor onto monitor on it’s own to give each the most space and switch off the “Show Multi-camera Preview Monitor” function. If you want to see your output full screen, use a video device like another external monitor or a video interface like the Blackmagic Design UltraStudio Mini Monitor. http://www.bhphotovideo.com/c/product/892451-REG/Blackmagic_Design_bdlkulsdzminmon_Ultrastudio_Mini_Monitor.html
https://www.dropbox.com/s/f735pxiysy423e8/Screen%20Shot%202014-08-01%20at%205.07.42%20pm.png
I have 3 monitors on my 15″ MBP retina and the option for the external playback via the thunderbolt mini monitor.
I have a question about Multi cam clips (and binning) in premier pro:
When I have a regular piece of footage, cut it up on the timeline, and move those chunks into a bin, then, later pull them into another sequence, they are still references to the same original footage. I want to use multicam clips this way.
What currently happens with multicam clips is: the process of putting cut pieces into a bin creates a new individual clip that is no longer connected or referencing the original.
This could be really helpful for color correction, or adding a new camera later. if you reference a single muticam clip, you only have to make the change once inside that seq and the rest would change accordingly.
Any thoughts
Hi Larry. I am going to be shooting a 5 camera project and want shoot 1 camera in 4K
and the others in 2K or 1080. I have found that when I experimented with
this than in the multi-cam mode the 4K window is much larger than the 1080
windows. Is there a way to make all the windows the same size in multi-cam?
Thanks so much.
Don
Extremely disappointing you can’t see audio waveforms when logging multi cam clips in viewer. How’d they miss that? I’ve read reasons why but they don’t make a lot of sense and this is something that early versions of final cut could do. They need to fix this.
Is there any way to make a multigroup similar to Avid Media Composer where I have two cameras (one with one clip and a DSLR with many 12 minute clips) and an ext audio source? I’d love to get one multgroup chunk with all that together.
Daniel:
Yes, you can create a multicam clip where one track contains a single clip, a second track contains multiple clips and a third track contains your audio.
Keep in mind that you can only CUT between audio channels in a multicam clip; you can’t mix them. To do a mix, edit your multicam, then move the audio into an audio app like Audition or ProTools for final audio mixing.
Larry
Would i just select them all and sync by mark ins? not sure how to do that in premiere cc
Larry – you *can* mix the audio tracks (v 2015.4) …
When I created the Multicam source sequence I set the “Sequence Settings” in the “Audio” section to “All cameras” as opposed to “Camera1 ” or “Switch Audio”
And then I can see all 4 tracks in the Audio track mixer and mix to my hearts content (or am I missing something ?)
Yonatan:
Very cool. Thanks for letting me know.
Larry
Hi, we shot some footage that encountered the 4GB file size limit, so the long sessions span multiple 4gb clips (Cam1_01, Cam1_02, etc.). If you string these clips together they play back seamlessly…but we would have to make a separate multi cam for each, and as each cam did not start on the exact same frame, there would be gaps. All footage has timecode (NDF). Can the clips be loaded into sequences first and those sequences nested into a multicam? Is there any other work-around, especially one that preserves time code so we can refer the notes? I actually handed all footage to the client, who,is now having difficulties…I could figure out a workaround, as I have 10 different applications I could attack it with. They have only Premiere Pro. I believe if he outputs a new movie for each cam, it will re-compress everything, unlike FCP. Is there anyway to export clips as “not self-contained” in premiere…or any other method that may help them?
Rich:
Actually, its easier than this.
Create a new multicam using the first clip in each angle.
Double-click the multicam clip from the Browser to open it into the Timeline – DON’T edit it, double-click it.
You are now in the Angle Editor.
Drag each of the spanned clips so that it immediately follows the first so that you have all segments of each angle on the same track – you can have multiple clips on the same track.
As long as the clip ends are touching, there will be no break in timecode or media.
Repeat until all spans are added to each track.
Click the right-pointing arrow in the top left corner of the Timeline to return to normal editing mode.
Now you can edit the Multicam clip containing all spans with matching timecode with no problem.
larry
Larry,
What if the spanned clips are not continuous? Using the above technique, I now know how to drag them manually about the ‘Angle Editor’ screen but can Premiere automate the process using audio etc?
I was thinking of creating sequences for each angle (including gaps) then trying to create a multicam sequence using these sequences??
Thanks
Craig:
For more complex multicam sequences, I recommend you use PluralEyes from Red Giant Software. It aligns clips based upon their audio content.
Larry
I might be missing something Larry. I have a 2camera shoot, 2 on 1 interview. Audio was fed directly to each camera. So camera 1 has a 2 shot, one individual recorded on A1 the other on A2. Camera 2 is the main interview, Audio on A1. When I create the multicam sequence, all the audio ends up on A1. So either I can have audio from the interviewer clean or from the interviewees clean. Is there a way to get the audio to switch like the video does. Did I miss a step in my set up?
Eileen:
Read the middle of my article more closely, specifically the section that says: “From the fly-out menu in the top right corner of the Program monitor, you can select whether audio will follow video; it is off by default. If you choose this option, the audio will change each time you change camera angles.”
By enabling this option, your audio will change every time you change shots.
Larry
Can I adjust the video levels of each camera in multicam mode? Used 3 different cameras and even w/ white balancing they don’t match.
Michael:
Yes, once the multicam clip is built you can still adjust the cameras inside the clip.
Larry