
![]() As I was recording my Adobe Premiere Pro CS6 video training, I came across a number of interesting interface tips that I wanted to share with you. (These are listed in no particular order.)
As I was recording my Adobe Premiere Pro CS6 video training, I came across a number of interesting interface tips that I wanted to share with you. (These are listed in no particular order.)
NOTE: For all my Adobe Training, become a subscriber. More than 200 movies, and almost ten hours of training.
EXPAND A PANEL FULL SCREEN
I love this feature!
Select any panel; a selected panel is indicated by a gold box around the panel.
Type Shift+` (the key in the top left corner of the keyboard – its called the tilde or accent key) to expand the selected panel to fill the window. Press ` to shrink the panel back down to size.
For something faster, roll your mouse into any panel and type ` (that same key in the upper left corner) to expand whatever panel your mouse is in to fill the window. Press ` to toggle back to size.
Still wilder, select either the Source monitor or the Program monitor and press Control+` — this expands the Source or Program monitor to fill your entire computer screen. Press ` to toggle back to size.
RAMP PLAYBACK SPEED
With playback stopped, press and hold Shift+L in the Timeline or Source monitor and playback will start in slow motion and accelerate to fast forward.
Press and hold Shift+J and playback will start in slow motion and accelerate to fast reverse.
With a clip playing, press Shift+L to speed it up, or press Shift+J to slow it down.
CHECK FOR DROPPED FRAMES
In the lower right corner of the Source or Playback monitors, click the Wrench icon – Adobe calls it the Settings menu – and check “Show Dropped Frame Indicator.”
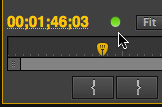
A green light appears next to the timecode display in the lower left corner of the monitor. During playback, green means playback is good. Yellow means playback is dropping frames.
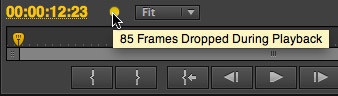
Hover your mouse over the yellow light to see how many frames were dropped during playback.
This indicator resets the next time you start to play a clip or sequence.
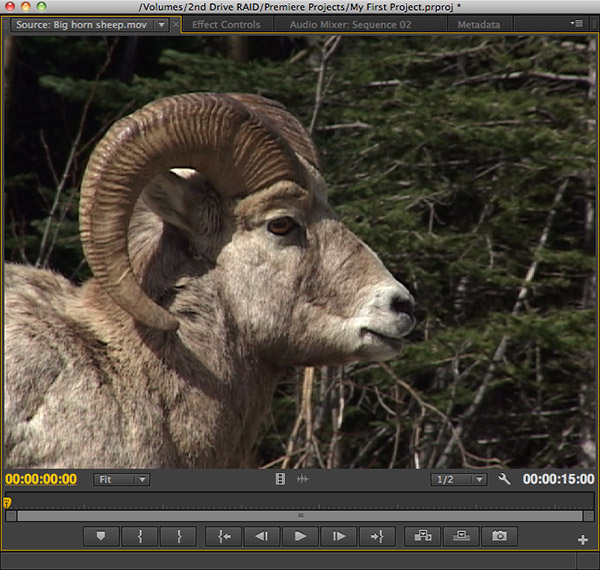
ADDING CLIP MARKERS
You can’t add markers to clips in the Timeline… but you CAN in the Source monitor:
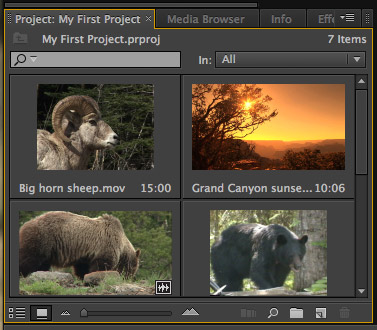
MARK CLIPS DIRECTLY IN THE PROJECT PANEL
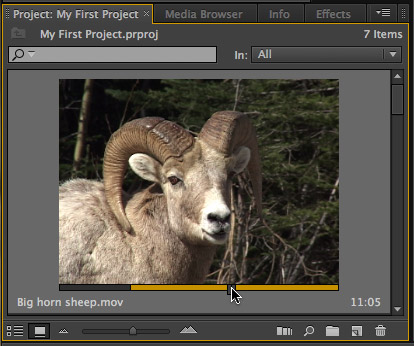
The Project panel stores all the media for your project, similar to the Browser in Final Cut Pro 7.
HIDDEN MARKER PLAYGROUND
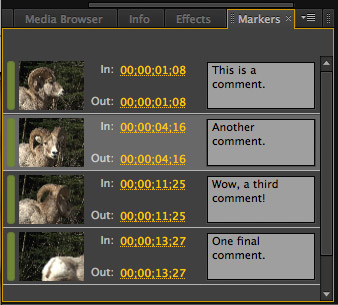
Ever wonder where markers go to hang-out? In the new Marker panel. This lists all markers in currently open sequences.
Click a marker to jump to it. View the frame under the marker. Change the In or the Out. Add or read a comment.
This is a really fast way to navigate to any marker without needed to step from marker to marker.
Oh, and the keyboard shortcuts to jump between markers are Shift+M and Shift+Command+M.
IMPORTING SEQUENCES
Premiere only allows one project to be open at a time, though each project can contain an unlimited number of sequences. Here’s a very quick way to import a sequence from one project into another:
Select File > Import.
Navigate to the project containing the sequence you want to import on your hard disk.
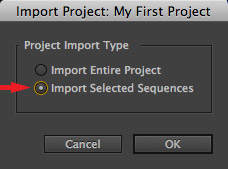
Select whether you want to import the entire project into its own Bin, or just a few sequences. In this case, I just want to import sequences.
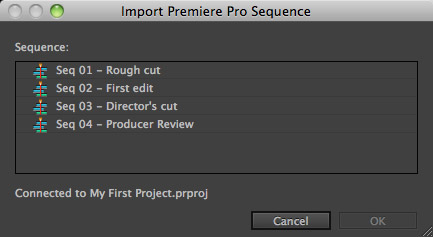
In the next dialog, select the sequences you want to import.
Poof! Done.
REORGANIZE WORKSPACES
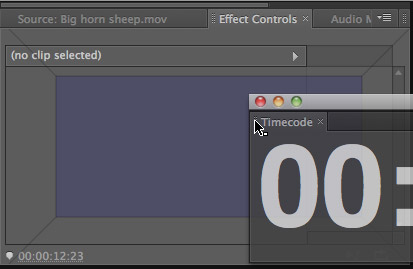
To add a tab to any frame (which is a collection of panels, each labeled with a tab), go to the Window menu and select the panel you want to use.
Drag the panel into any frame. The purple shape indicates where the tab will be placed:
TO REMOVE A TAB FROM A FRAME
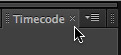
Click the small “x” to the right of the tab name.
RESET WORKSPACES
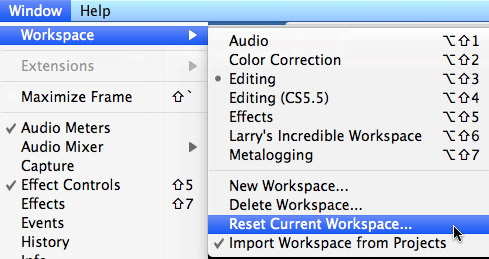
If, in your enthusiasm to create the perfect workspace you have so hopelessly messed things up that life is over as you know it, simply select Window > Workspace > Reset Current Workspace.
The workspace is reset back to its default settings for Adobe workspaces, or the last time you saved it, for custom workspaces.
SUMMARY
There are some very cool interface secrets hidden in the CS 6 release of Premiere Pro. I’ll explore more of these in coming weeks as I continue creating my new Adobe training.

2,000 Video Training Titles
Edit smarter with Larry Jordan. Available in our store.
Access over 2,000 on-demand video editing courses. Become a member of our Video Training Library today!
Subscribe to Larry's FREE weekly newsletter and
save 10%
on your first purchase.
10 Responses to Premiere Pro CS6: Interface Secrets
Very cool, Larry. Thanks for doing this!
“You can’t add markers to clips in the Timeline”
sure you can but for some reason adobe left the feature idle with no assigned key to activate it.
in keyboard shortcuts –> timeline panel –> “add clip marker” I give it the same after effects ” * ” hotkey for consistency.
Hi Larry, thanks a lot, great stuff, very well presented. @Dominic: Thanks a lot for th clip marker advice. I really missed that option!
Any idea how to get the little comment to show up in the timeline?
I have comments set with markers but it only shows in the marker panel or when i double clip, not above the clip as shown your example
thanks
You can give the marker duration in the Marker dialog box. Then your comment will display in the Timeline. More questions? If you bring questions and issues to the Premiere Pro forum, we can help you there: http://adobe.ly/4LhNPW
Hey Larry,
I just bought Premiere Cs6 and I will be transitioning over from FCP 7. One feature or shortcut I always use is the control “B” enable toggle or disable toggle. Does Premiere have such a shortcut or feature?
Hi Tom,
You can enable/disable a clip with a keyboard shortcut in Premiere Pro CS6. You do have to set it up in the Keyboard Shortcuts dialog box first, though. Control + B can definitely be used.
Thanks,
Kevin
Hi Larry,
I am wondering if you know the location of the Saved Workspace files? I would like to be able to move my custom workspaces to other machines I work on, but I cannot find the workspace layout file.
Any ideas?
Thanks in advance,
Gene
When you import sequences from one project into another, and you modify anything, does that then update into the other project as well? I am asking because that is what happens to titles within a project. I have noticed that if you copy and paste a title from one project to another, you can modify it in the new project without affecting the title in the other project. Did I just answer my own question??
[…] Effects Tips and Presets | Boost and Smooth Audio Levels | Warm Dialogue and Improve Diction | Interface Tips and Tricks […]