
![]() Last week, Adobe released the latest version of Adobe Audition, along with updates to the rest of their Creative Cloud software.
Last week, Adobe released the latest version of Adobe Audition, along with updates to the rest of their Creative Cloud software.
New features include:
Also, in the last version, Audition added two features that I use everyday that are also worth mentioning here:
Here’s an Adobe blog that has more details on Audition: www.adobe.com/products/audition/features.html
And here’s an article that covers the latest features in Adobe Premiere Pro CC.
Let’s take a quick look at each of these.
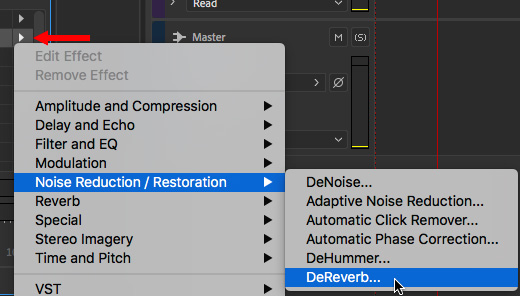
DEREVERB EFFECT
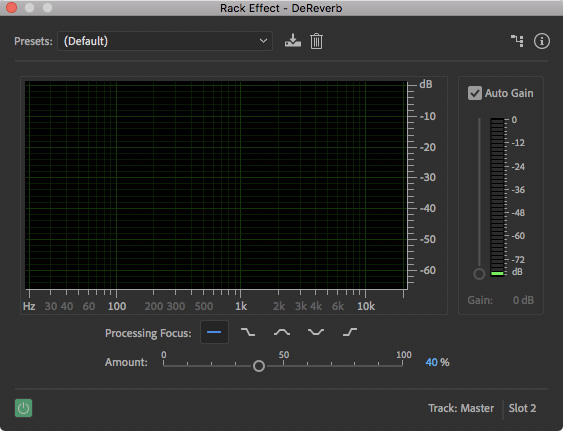
DeReverb: This effect estimates the reverberation profile and helps adjust the reverberation amount. The effect enables you to smooth out recordings with lots of reverb or short echoes, and includes a very simple interface. You can adjust the amount of DeReverb applied, control using processing focus buttons, and also adjust gain automatically or manually. (Source: Adobe Help)
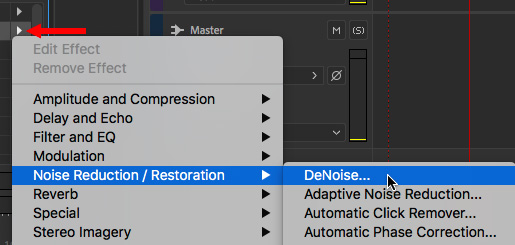
DeReverb can be applied to an individual clip or a track. I generally prefer to apply effects to a track. All effects are applied the same way: using the Effects Rack.
DENOISE
DeNoise: This effect offers real-time, zero-latency noise reduction without noise prints or complicated parameters. Use this feature to remove unwanted hiss and hum. You can control the amount of noise reduced and adjust gain. Audition also lets you listen to the removed noise in isolation. (Source: Adobe Help)
Audition has long been known for the quality of its noise-reduction software. But, it wasn’t easy to understand or use. With this release, Adobe has made noise reduction much easier.
NOTE: Noise reduction is NOT the same as noise elimination. This filter does an excellent job at removing hum and air conditioner noise, its reasonably good at reducing the general hubbub of background noise at a trade show, and didn’t remove a siren behind a speaker’s voice at all. The best way to get clean audio is to re-record it. This new tool, like other noise reducers, can help clean up bad audio, but it won’t make it perfect.
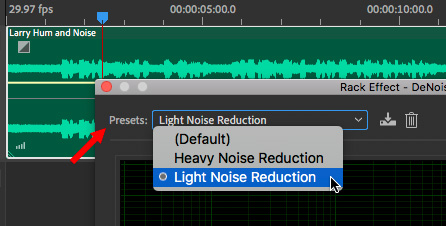
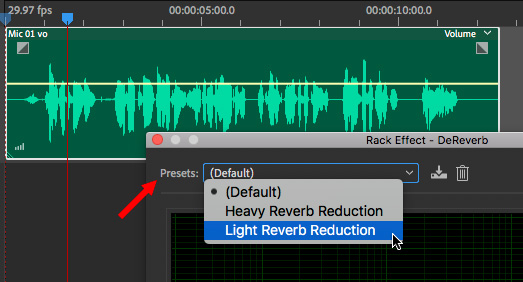
In many cases, that’s all you need to do, the Default setting is pretty darn good. However, you can change the amount of noise reduction from the Presets menu.
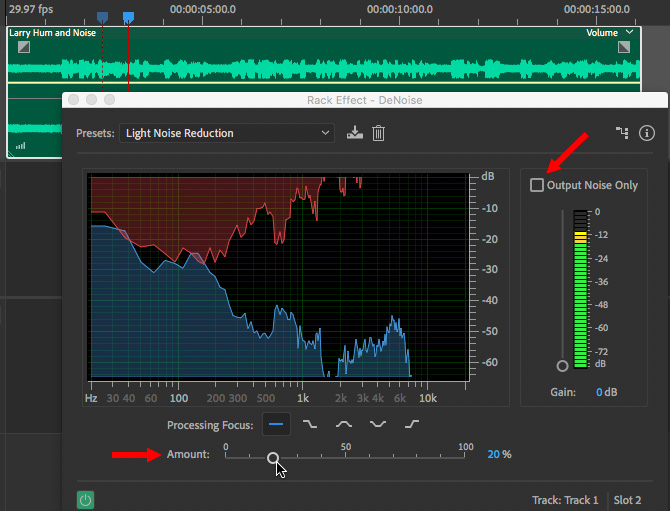
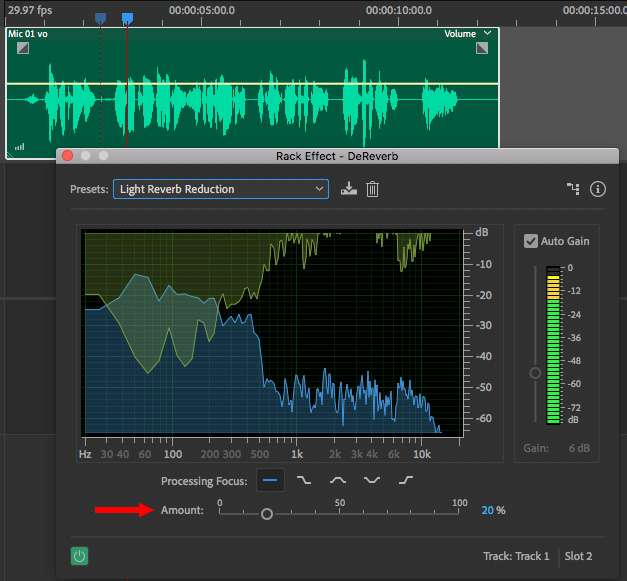
Adjust the amount of noise reduction by using the Amount slider at the bottom.
NOTE: It is often easiest to adjust this effect by checking the Output Noise Only checkbox in the top right. Adjust Amount while listening for the maximum noise containing the least amount of voice bleed-through.
IMPROVED PLAYBACK PERFORMANCE
This release of Audition enhances performance when recording or playing tracks in the Multitrack environment. Audition can comfortably playback over 128 audio tracks and record over 32 tracks at low latencies without dropped samples on most standard hardware configurations. (Source: Adobe blog)
Since I’ve never worked on an audio mix with more than 30 tracks, I don’t have an easy way to test this. But the faster export speeds are something I can benefit from each week for the Digital Production Buzz.
IMPROVED MULTITRACK USER INTERFACE
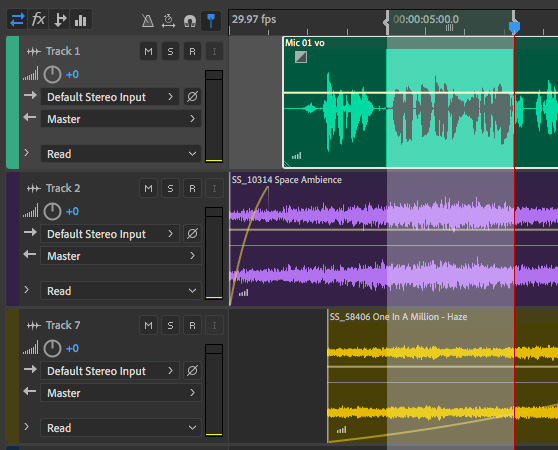
Selections are bolder with inverted waveforms, and selected clips stand out with white borders. Track headers are updated with cleaner interfaces.
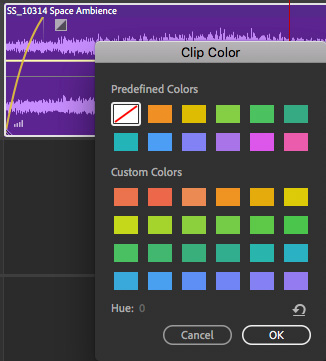
Clip waveforms are now brighter, with improved contrast and an updated color palette. Color picker has been updated to include a standard palette as well as plenty of swatches for custom-color choices.
ON-CLIP GAIN AND WAVEFORM SCALING
This is a feature that I REALLY like!

In the bottom left corner of each clip is a small Gain icon. Click and drag it to set the gain (up or down) for the entire clip. This is MUCH faster than dragging the volume envelope, without running the risk of setting a keyframe by accident.
As you drag the gain, the waveforms automatically resize so you can quickly see the results of your work.
NOTE: We could do this earlier using the Properties panel, but this is much faster and more direct; and the waveform scaling is a big plus.
Even better, clip gain now goes up to +96 dB, rather than the earlier limit of +15 dB!
Additionally:
As someone who does a lot of interviews in a variety of settings, this is a feature I will use constantly.
IMPROVED INTERFACE FOR ADDING OR DELETING TRACKS

A new menu item – Multitrack > Tracks > Add Tracks – allows us to quickly add:
We can also set the format for each of these tracks, or let Audition set them automatically as we add clips. I generally prefer to let Audition set them automatically.
NEW ZOOM TO FIT TIMELINE
We’ve always been able to zoom the multitrack timeline:
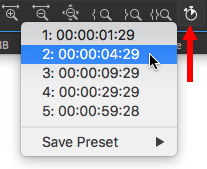
Now, click the Timer icon in the extreme lower right corner of the multitrack or waveform editor to expand or shrink the Timeline to one of five presets, or create and save a preset that works best for you.
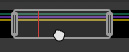
The zoomed range always includes the playhead. You can move the range by dragging the white rectangle in the global view at the top of the multitrack editor window.
OLDER FEATURE: JUMP TO TIME

Thinking about time, here is an existing feature you may not know:
NOTE: When entering time, be sure to include colons, entering only numbers or periods won’t work.
OLDER FEATURE: OPEN PREMIERE PROJECTS DIRECTLY
It used to be, in the long-distant past of last year, we need to Send a project from Premiere to Audition. Sigh… hard to imagine such primitive behavior.
Today, we can directly open a Premiere project in Audition (File > Open). This opens all audio clips and places them into a multitrack edit for editing.
I use this feature every week to mix The Buzz podcast. To get the final mix back to Premiere, export a stereo pair (48k sample rate, 16-bit depth), import that file into Premiere, add it to its own track in the Timeline, then, mute all other tracks.
SUMMARY
The new features in Audition continue to make it even more helpful in mixing, especially mixing video projects. I’m looking forward to working with them each week in my own projects.

2,000 Video Training Titles
Edit smarter with Larry Jordan. Available in our store.
Access over 2,000 on-demand video editing courses. Become a member of our Video Training Library today!
Subscribe to Larry's FREE weekly newsletter and
save 10%
on your first purchase.
4 Responses to New Features in Adobe Audition CC 2019
First thanks for all your work over the years…
How can I apply Audition Essential Sound panel adjustments “effects” permanently to a clip. I have to switch out of Waveform mode to accsss Essential Sound Panel controls and it makes a multitrack…grr
thanks again!
Mark:
Essential Sound panel effects are, by definition, non-destructive. I am always very nervous making permanent changes to the source file – I have far too much experience changing my mind.
Instead, change how you create these.
Create a new multitrack session, add the clip you want to modify, apply the effects you need and export. This creates a new sound clip which you can use in place of the old one.
OR, if speed is of the essence, don’t use the Essential Sound panel – all effects that can be applied without mixing can be applied to a clip using the Effects Rack. When you save the clip, the effects are saved into it as well.
Larry
Am happy Adobe finally added a DeNoise effect within the Audition.
it is good im happy for this