
![]() [ Read my product review disclosure statement here. ]
[ Read my product review disclosure statement here. ]
FilmoraPro, from Wondershare, is new video editing software which is geared toward the professional user. The latest version – 1.4 – was released recently and included a rebranding of the product. It joins their consumer-level editing tool: Filmora9.
NOTE: Here’s my Filmora9 review.
The big difference between the two is “control.” Filmora9 emphasizes simplicity combined with literally hundreds of pre-built effects. FilmoraPro allows you to customize those effects, plus adds more advanced editing, key framing, and color correction; all at a very affordable price.
NOTE: Here’s a comparison between Filmora9 and FilmoraPro.
EXECUTIVE SUMMARY
FilmoraPro fills the middle ground between simple video editors and professional video editors. Relying on a drag-and-drop interface, it provides an easy-to-use editing platform combined with hundreds of adjustable effects to create videos which are easily optimized for social media.
It does have a few key limitations: Trimming is weak, keyboard shortcuts are limited, there’s no way to set – or even determine – the codecs used for rendering, and exports require logging into the user’s Wondershare account which limits using the software in an off-line environment.
If you are already happily using Avid, Adobe or Apple media software, FilmoraPro won’t make you switch, it doesn’t have the same level of features. However, if your main job is not full-time video editing, or you find current media editors too complex to use, or you don’t have a lot of money to spend, or you need access to more effects that your mind can imagine then FilmoraPro can fill the bill.
FilmoraPro supports both Windows and Mac.
Product: FilmoraPro
Developer: Wondershare
Website: filmora.wondershare.com/filmorapro-video-editor/
Price: $149.99 (US) purchase, $89.99 (US) Annual subscription
A free trial is available.
COMPANY BACKGROUND
Founded in 2003 and based in Shenzhen, China, Wondershare’s first products focused on image processing, DVD creation and audio/video conversion tools. They released their first Mac product in 2007. They’ve won “Best Enterprise” awards from Forbes, Deloitte, and others. They now have offices in China, Japan, Canada, and Europe. It became a public company in 2018.
Filmora was first released in 2015, though it was then called the “Wondershare Video Editor.” It was renamed with the current version and a pro version was released at the same time.
INSTALLATION
While Filmora 8.x is available on the Mac App Store, FilmoraPro is not. You’ll need to download it from the Wondershare website. However, the installation process is as easy as any other Mac software.
EDITING BASICS
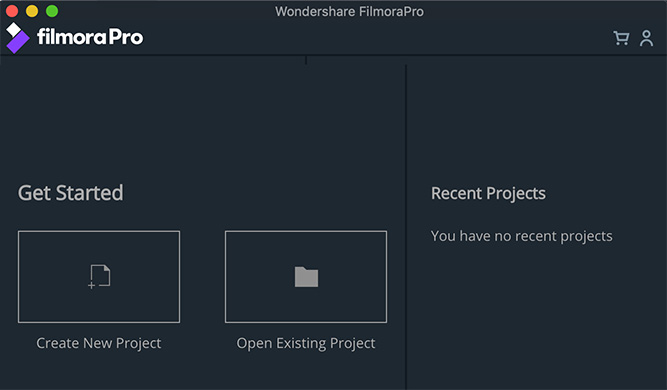
This is the opening screen. It is typical of the application – a clean look and simple choices on how to get started.
 (Click to see a larger image.)
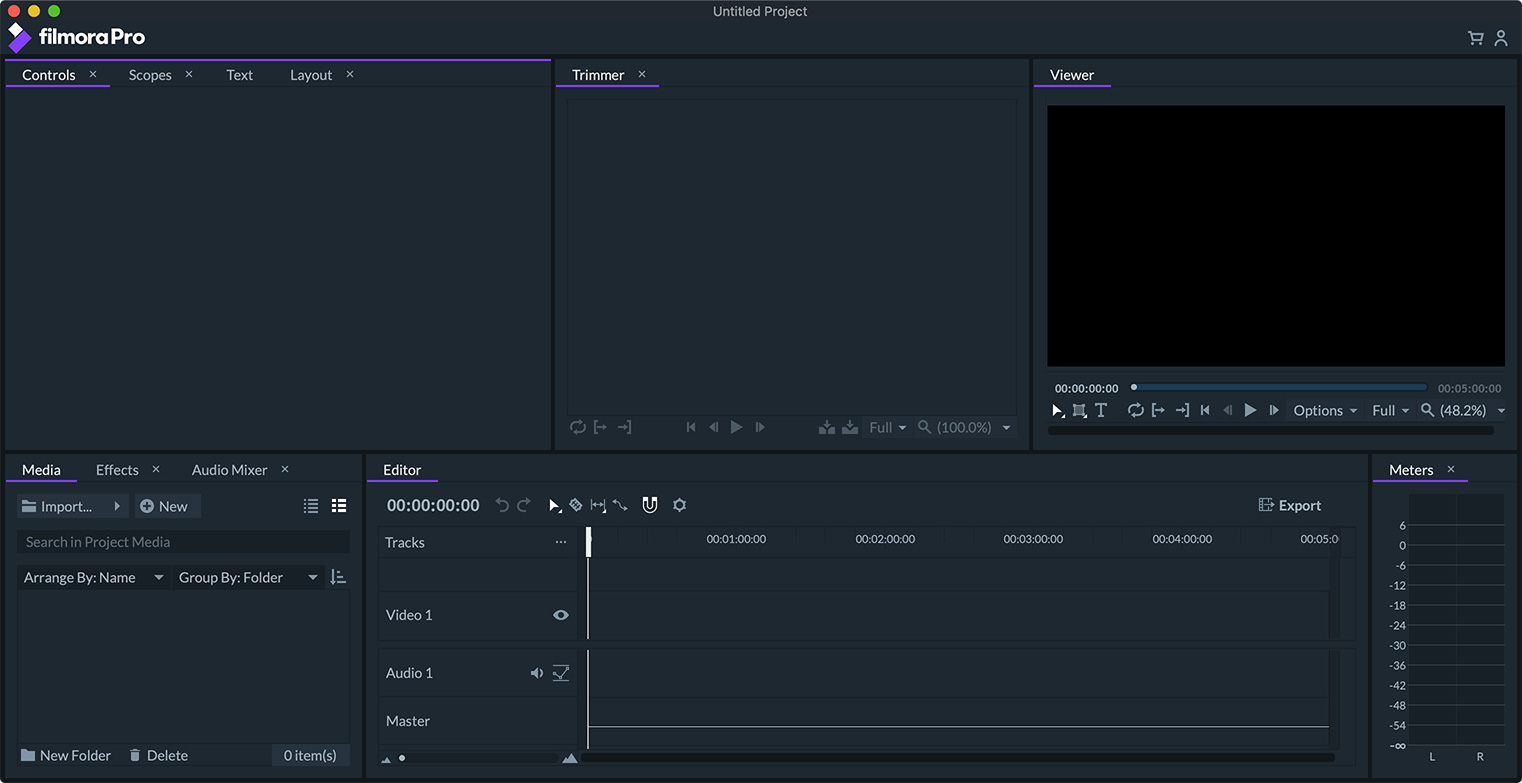
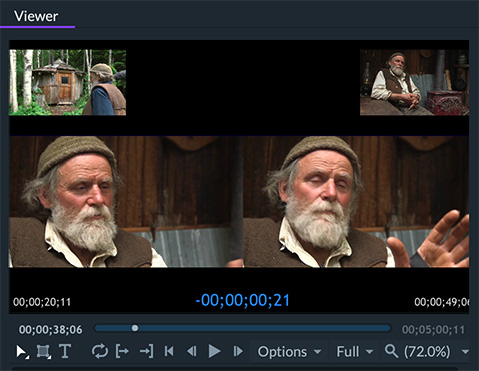
This is the main editing screen. The Viewer, Editor (Timeline), Trimmer (Preview) and Meters will be familiar ground to anyone who has edited before. The other windows are reminiscent of Adobe Premiere Pro CC.

NOTE: The interface is fully customizable. Just as with Premiere, drag the name of any panel wherever you want it to appear. However, you can’t drag panels out of the main interface or to a second monitor. There are six pre-built workspaces to get you started. You can create and save an unlimited number of custom workspaces.
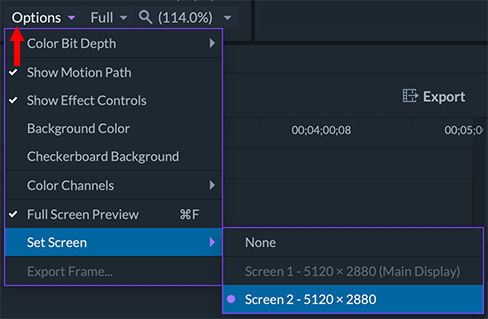
While you can’t drag a tab onto a second monitor, you can use a pop-up menu under the Viewer to display the image in the Viewer full-screen on a second monitor.

The menus at the top are not extensive. Everything you need to do is done from within the interface. And, if you are comfortable with Final Cut Pro 7 or Premiere Pro CC, you will see a lot that looks similar.
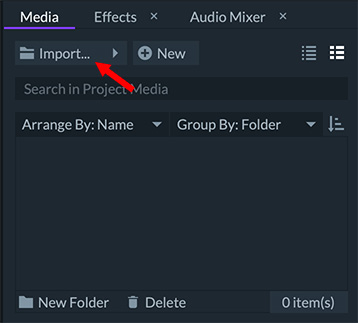
To import media, either drag it into the Media panel or click the import button. You can import a wide variety of codecs, but you can’t import a folder, you need to import the files inside the folder.
(Footage courtesy: EditStock (www.editstock.com)
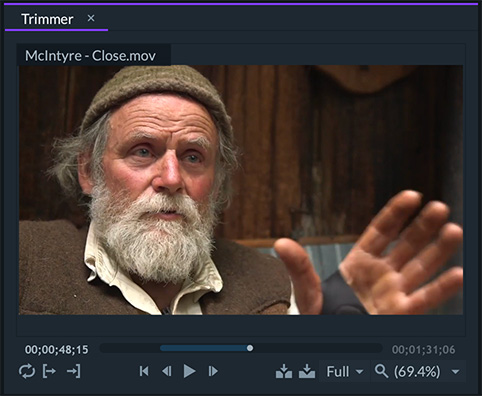
View clips in the Trimmer window (a different name for Preview). Mark In’s and Out’s, (“I” and “O“) then edit a clip into the timeline using an Overlay (Overwrite – shortcut “N“) or Insert (shortcut: B) edit. The Trimmer panel must be selected for the keyboard shortcuts to work.
Edits are always performed at the position of the playhead in the timeline.
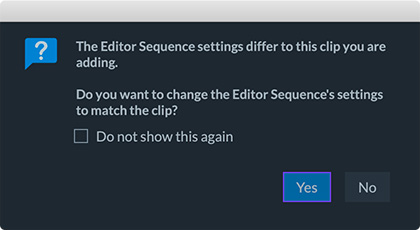
If the settings of the project don’t match the first clip you edit, you can change them. However, I have not found a way to determine or change the codec FilmoraPro uses for rendering.
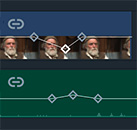
You can quickly set opacity and audio level keyframes directly in the clip in the timeline by pressing the Command key and clicking where you want to place keyframes. To reset a clip to normal, select it and type Cmd + R. This can also be done from several different contextual menus, but the shortcut is faster.
NOTE: The maximum you can increase audio levels is +12 dB, the same as FCP X.
Another cool thing is that the timeline has a master audio level track. This allows you to make global changes without needing to adjust the level of every clip.
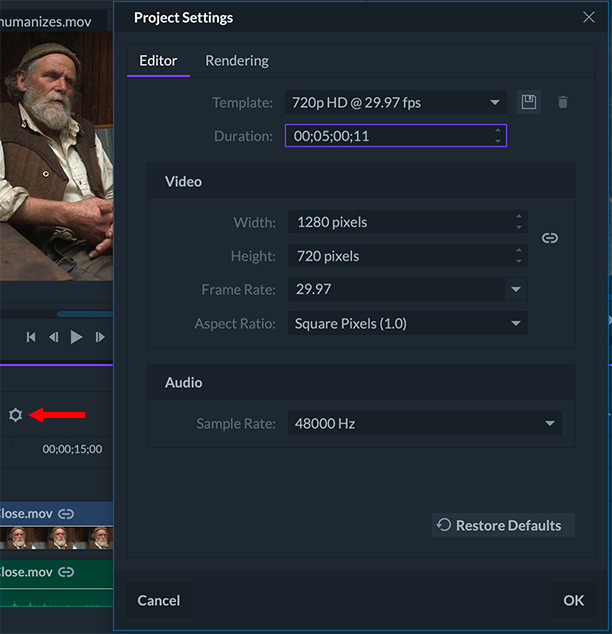
Project settings can be modified at any time by clicking the gear icon in the timeline.
Surprisingly, FilmoraPro allows changing the frame rate of a project even when clips are in the timeline. No other NLE that I know of supports this feature. HOWEVER, changing frame rates will also modify the duration of your clips and project.
Unlike other high-end video editing packages, Filmora Pro defaults to a five minute timeline. This, too, can be changed in preferences. I’m not sure why Filmora needs to define the duration of the timeline before editing starts.
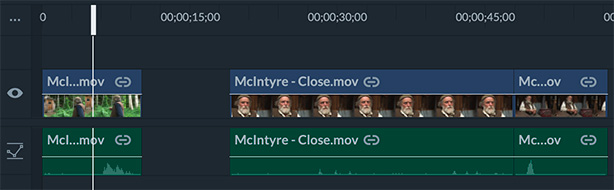
Moving clips behaves similar to Premiere. You can drag clips and leave gaps. (Yes, I know, FCP X also supports gaps, but its a different behavior.) However, to move a group of clips, you can’t select the gap, but, rather the clips you want to move, then drag them where you want. There also does not seem to be a keyboard shortcut to select all clips to the right, or left, of the playhead.
To remove a gap between two clips, Control-click the gap and choose Ripple Delete Gap. There’s no keyboard shortcut that does this either.
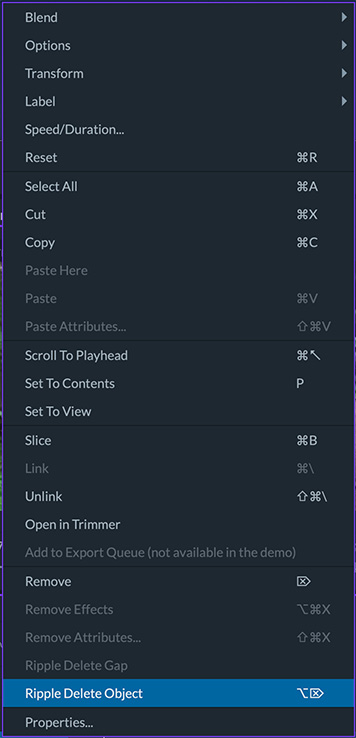
NOTE: The Control key is your friend. FilmoraPro is loaded with options in contextual menus.
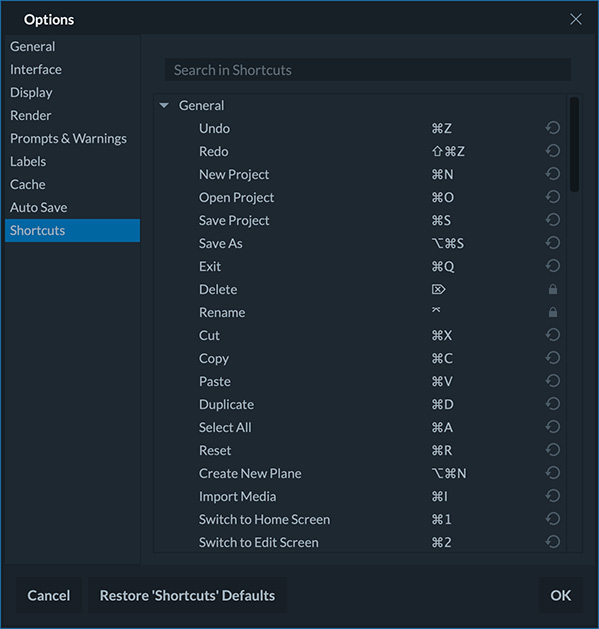
Preference settings are extensive, as well as the ability to find and modify keyboard shortcuts, any of which can be changed or reset at any time. However, compared to Premiere or Final Cut, there are not as many keyboard shortcuts to choose from. For example, you can zoom into or out of the timeline, but not scale it to fit in the timeline window.
Audio can be disconnected from the video and slipped, however, there is no indication that audio and video are now out of sync. Nor is there an easy way to get audio back in sync except for dragging.
NOTE: FilmoraPro does support double-system sound, with automatic replacement of the camera audio with the separately recorded audio file.
And, yes, the timeline scrolls during playback, unlike, say, Final Cut Pro X.
By default, FilmoraPro supports up to 30 layers of video, which you can expand in Preferences. However, there’s no track “targeting,” which means that keyboard shortcuts always edit to the base track. To add clips to a higher track requires dragging.
PROBLEMS WITH TRIMMING
Trimming adjusts where two clips touch. This includes:
Here, FilmoraPro comes up short.
Slipping video is very nicely done. Using the Slip tool, the Viewer displays the end of the preceding shot, the start of the following shot and allows you to change the In and Out of the slipped clip by watching the images in the middle.
NOTE: One could argue whether slide edits are still necessary in the age of multi-track timelines. However, FilmoraPro does not support slide edits.
Ripple trims are more of a problem. Filmora can ripple trim to make a clip shorter, but not longer. In other software, ripple trims work in both directions, provided the clip has sufficient handles.
Also, and somewhat worse, when you ripple trim a clip, the trimmed area is left as a gap. Downstream clips are not pulled up along with the trim.
Press the Option key to perform split edits. However, like a ripple trim, while you can create a split edit that makes a clip shorter, you can’t create a split that makes a clip longer. As well, creating a split edit leaves a gap. These, too, need to be fixed.
The other surprising omission is that FilmoraPro does not support roll trims. This trim allows you to change both the In and Out at the edit point at the same time. It is the trim I use the most in any edit.
NOTE: Irene Yang’s comments below indicate that FilmoraPro does support roll trims. I have not yet found out how to do so.
Finally, there’s no way to select an edit point, which means that there’s no quick way to apply a dissolve between two selected clips.
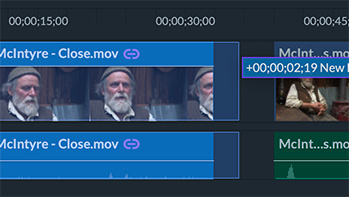
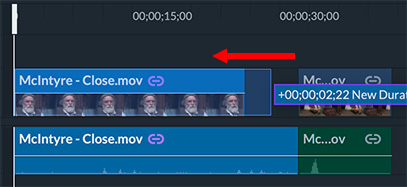
TRANSITIONS
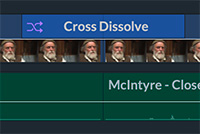
Dissolves, and other transitions, are applied by dragging them from the Effects panel and dropping them on top of the appropriate clips.
Transition durations are set by dragging the edges of the transition.
To replace a transition, drag the new version on top of the old. To delete a transition, highlight it and select it.
EFFECTS
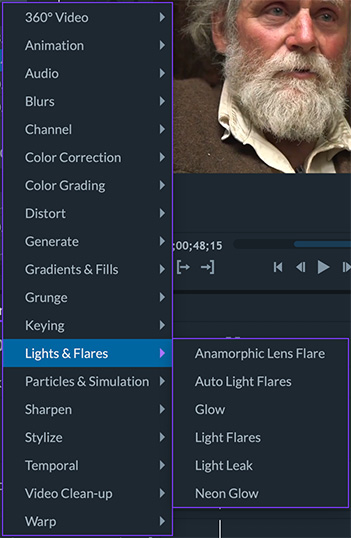
Effects are where FilmoraPro excels. There are hundreds to choose from. To apply an effect, drag it from the Effects panel and drop it on a clip.
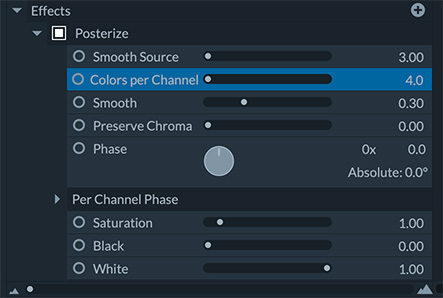
To adjust an effect, select the clip in the timeline, then adjust the effect in the Controls panel. To delete an effect, delete it in the Effects panel. Effects can be copied and pasted between clips.
Effects like chroma-keying and clip speed remapping – but not still frames – are also supported, though the speed controls may not be what you expect.
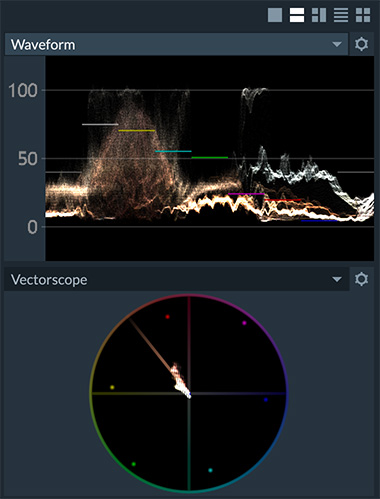
The video scopes include a Waveform Monitor, Vectorscope, Parade and Histogram, though I wish Wondershare would change the default setting from the Parade scope to the Waveform monitor, which is both easier to read and more useful.
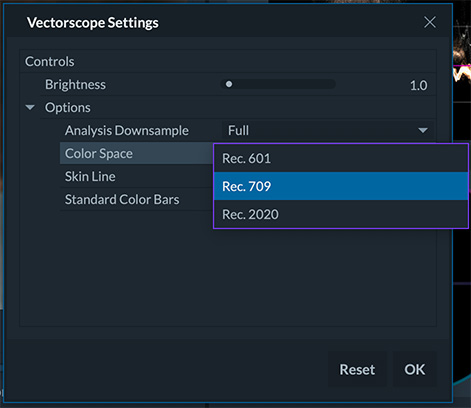
Also, for some reason, the Vectorscope defaults to Rec. 2020 color space, which is an HDR spec that makes no sense for the market FilmoraPro is targeting.
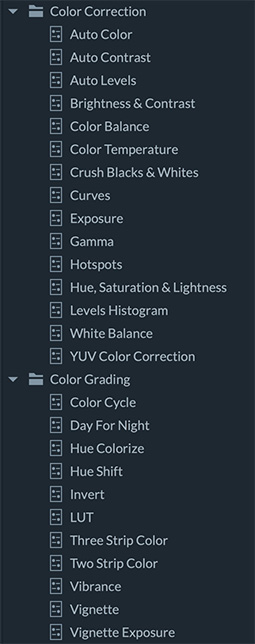
There are LOTS of color effects (color wheels are the YUV Color Correction effect). However, the interface is inconsistent. For example, two of the color wheels place saturation controls on the right with levels on the left, while the third color wheel flips them with saturation on the left and levels on the right.
EXPORTING

Exporting revealed another strange thing. The folks at Wondershare graciously sent me a license so I could review their software, but in order to export, I need to be logged into my account on their website. This is strange in that this would prevent exporting unless you had access to the Internet and were logged in – an unnecessary complication, it seems to me.
The good news is that, once you are connected to your account, FilmoraPro supports most popular codecs, along with all popular social media platforms.
AN INTERVIEW WITH WONDERSHARE
This review started when Irene Yang, VP of Product Marketing at Wondershare, asked if I was interested in looking at their software. During my review, I sent her some questions to answer some “behind-the-scenes” questions. Here’s our conversation.
Larry: What are the key differences between Filmora9 and FilmoraPro?
Irene: Both Filmora9 and FilmoraPro are full-featured video editors with integrated titling, color correction, compositing, and effects. FilmoraPro goes beyond the user-friendly presets available in Filmora9 by letting users animate with keyframes, customize effects with many adjustable parameters, create animatable mask shapes for rotoscoping or motion graphics, and perform more fine tuning of their audio.
Larry: Who do you see as the market for FilmoraPro?
Irene: FilmoraPro is for editors and storytellers such as enthusiasts making polished personal projects, YouTubers who want their videos to really stand out, and professionals crafting videos for clients. We are providing sophisticated industry tools that are still easy to use and at excellent value.
Larry: What tasks are ideally suited for FilmoraPro?
Irene: FilmoraPro has many strengths. Drag and drop editing is easy for everyone, while hotkeys and advanced edit tools such as slip, slide, and roll provide efficiencies for power users.
Color correction is tremendously important and FilmoraPro makes it easy from auto correction for simplicity, to curves and color wheels for precision, and scopes for accuracy.
There is a large library of high quality effects included in FilmoraPro that quickly takes a standard project to an exceptionally creative finish.
And FilmoraPro really excels in motion graphics. You can easily add text or graphics, set keyframes, edit motion curves, and enable motion blur all in an easy-to-relate video editing interface.
Larry: What are your goals for FilmoraPro – where are you taking the development of the product?
Irene: We want to continue to develop the convergence of video editing, effects, and color tools, with a simplified interface and workflow. We plan to keep working to improve feature sets and workflows for editing and motion graphics.
Larry: What features in FilmoraPro are you most excited about?
Irene: We’re really happy with the masking tools that were added recently. You can quickly add multiple rectangular, elliptical and freehand shapes, use blend modes, combine them in a variety of ways. Use them to refine your green screen composites, define regions of your footage for color correction and effects, and design some really imaginative transitions and motion graphics.
Larry: What is a cool feature in FilmoraPro that you think people don’t know?
Irene: I’ll mention a couple: Regarding workflow and UI, FilmoraPro works really well spread over multiple monitors. The UI panels can be floated and placed however the user prefers to work.
Larry adds: I was not able to get this feature to work on my iMac.
Irene continues: For effects, there is a fractal noise effect with many presets from clouds to star fields to textures. You can animate the seed value of the fractal to generate really cool videos that are great for backgrounds.
Larry: In conclusion, why should someone consider buying FilmoraPro?
Irene: FilmoraPro lets you really push your creativity. It’s a full toolkit to make anyone’s projects technically better and creatively outstanding, packaged with a clean, simple UI, and priced very competitively.
SUMMARY
FilmoraPro from Wondershare is a competent video editor, with a focus on editors who need more than the basics, with an emphasis on effects and social media. While I don’t think it is ready for professional-grade work, it is more than adequate for people who are looking for an easy way to make their videos look better.
I think Irene’s comment is exactly correct: FilmoraPro is designed for “enthusiasts making polished personal projects.”
As everyone’s needs are different, I encourage you to give their free trial a try.

2,000 Video Training Titles
Edit smarter with Larry Jordan. Available in our store.
Access over 2,000 on-demand video editing courses. Become a member of our Video Training Library today!
Subscribe to Larry's FREE weekly newsletter and
save 10%
on your first purchase.
19 Responses to First Look: FilmoraPro, from Wondershare
Hi,
Thanks for writing a great,informative review, I found it very helpful, this looks a great program. One question I cannot get an aswer on (filmora’s help is very limited regarding settings).
Can you change the default screen colour/menu colours from the charcoal grey (as seen in your screenshots) to a white background?.
I can’t be the only person who has problems with the default colour scheme due to eyesight .hope you can advise!.
Thanks for all your great work.
Andy:
Good question, but I can’t help.
I no longer have the program installed on my system. My only advice is to contact Wondershare support. I will also forward your question to my contacts there.
Larry
Why didn’t you just “edit” a video with this information?
David:
Because I’ve found that people will read these reviews more than watch them.
Larry
Larry..Having been an Avid Editor (now retired) on many Hollywood TV Movies and Episodic Series I have and really like Filmora 9.5
Having said that, I cannot figure out what the Red Slider with the scissors icon on the Playhead is for…? Help
Leon:
Smile… Your guess is as good as mine. This is an application that I have looked at once – long enough to write about it, but I haven’t used it since.
Larry
Leon, the red “node”(? my term) with scissors can be used to put a CUT into a scene…
So, slide the red node over a point in the video… “click” on the red node with scissors and BAM the video is cut/spit on that spot. It is a super shortcut. HOWEVER – it does move with the playhead and can get in the way sometimes. Hope this helps- and I hope I made sense.
Steve:
Thanks for the tip!
Larry
Great article. Really informative and helpful. Thanks for sharing it with us. Appreciate it.
On their own website, there are a lot of negative comments with regards to customer service. It appears there is none.
So,evidently problems occur with respect to cancelling subscriptions and getting refunds for people that decide to cancel after a trial period. And technical help is not offered.
As you mention certain default features are not representive of their market which leads me to be suspicious of this company.
Marcel:
Thanks for your comments.
Poor customer service is NEVER a good sign. Thanks for the caution.
Larry
Hello Larry,
Thank you for the detailed review, one thing that bugged me so far about the pro are the effects, it comes with very limited amount of them, and not sure there is a way to get more, it doesn’t look like filmora pro is supported on their filmstock website where they provide resources. How can that be fixed ?
Ibra:
I’m not sure it can be “fixed.” I suggest contacting the support team at Wondershare to see what additional effects are available.
Larry
1. In FilmoraPro, is the part of your program that you copy from the computer screen removed?
2. When I installed FilmoraPro, it stopped working after a few steps. Deleting it several times and reinstalling it will not help. What causes this? Is the quality deteriorating?
Bat:
Thanks for writing. However I don’t understand your first question, would you try rephrasing it?
And, as for the program not working, that should not happen. I would contact the support folks at Wondershare and have them resolve the problem.
Larry
So many years later and very few updates. I am kind of worried that they are stopping work on the Pro version. Do your insiders have any insight?
Brian:
Nope, no insights.
Larry
[…] Wondershare Filmora was first launched in 2015 as a video editing software for beginners. It was designed to be easy to use, with a user-friendly interface that made it accessible to anyone who wanted to create and edit videos. The software quickly gained popularity among novice video editors due to its ease of use and affordability. […]
I have tried many video editing software. Indeed, FilmoraPro and Unifab are the best I have used so far.I enjoy enlarge video from low resolution and fine-tune my video parameters.