
![]() Final Cut Pro X allows you to animate elements by changing their position on screen during playback
Final Cut Pro X allows you to animate elements by changing their position on screen during playback
But, what if you want to move an element within the frame AND make it travel on a curve? This tutorial shows you how.
NOTE: This technique works for any video clip or Photoshop still image. I’m using a Generator because they are trickier to scale and position than any other clip.
FIRST, YOU NEED SOMETHING TO MOVE
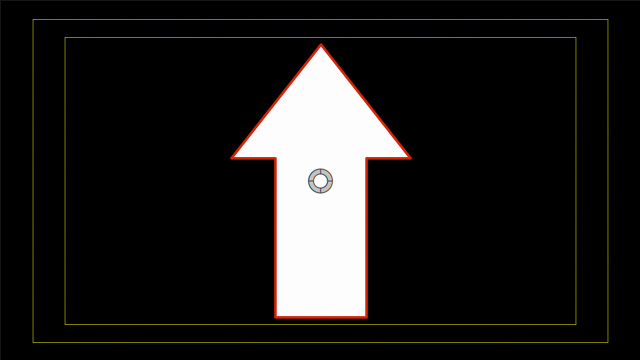
FCP X has a series of Generators > Elements that you can add to a project; such as a circle, square, arrow, heart and so on. They can have a variety of colors, edges and/or drop shadows.
But! You need to be careful in scaling and positioning them, otherwise the element disappears as you move it toward the edge of the frame.
Here, for instance, I added Generators > Elements > Shapes to the Timeline. I then:
Then, and most importantly, I do NOT move it using either the white circle in the Viewer or the Center settings at the bottom of the Published Parameters window. Once this shape is scaled, moving it in the Generators Inspector will cause the element to disappear before it reaches the edge of the frame.
Why? Because these two settings change the FRAME the element is contained in, not the element itself.

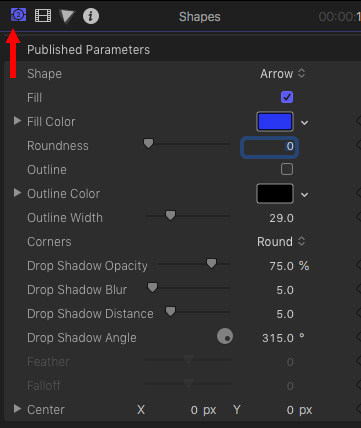
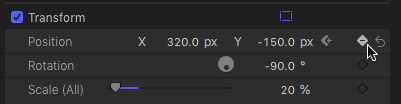
Instead, in Inspector > Video, change Transform > Scale so the arrow is the size you need. Rotate it to point in the direction you need by modifying Rotation. Then, adjust its starting position by modifying Position. This moves the element, not the frame it contains.
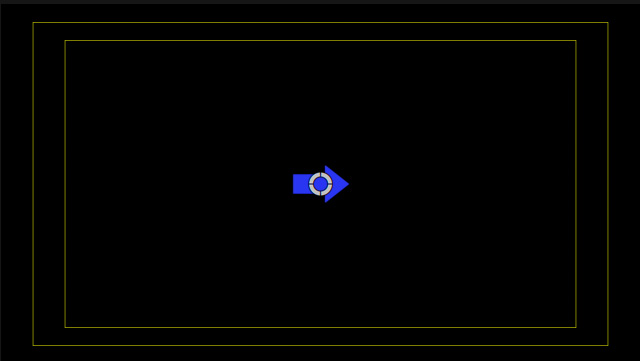
Here’s the result so far.
ANIMATE A STRAIGHT-LINE MOTION

Here are the steps to create keyframes to animate the motion of an object. Your numbers will be different, depending upon where you want to position the object.
NOTE: Keyframes are not scary. They are simply locations in a clip where a setting changes. We always work with keyframes in pairs – a starting keyframe and an ending keyframe. A single keyframe can contain multiple parameter settings; for example, position, scale and rotation.
NOTE: You can also change as many other parameters as you want. I often mess with scale and rotation in these moves, however, in this tutorial, I am focusing exclusively on movement.

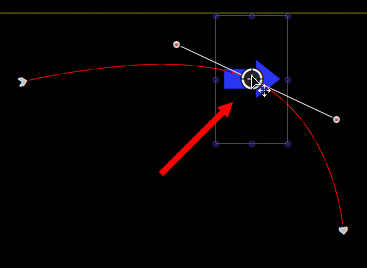
Once you have at least two keyframes set, click the gray box to the right of Transform. The box turns blue and the “motion path” for that object is displayed in the Viewer.
NOTE: Remember, never touch the white circle above the object. That just messes things up.
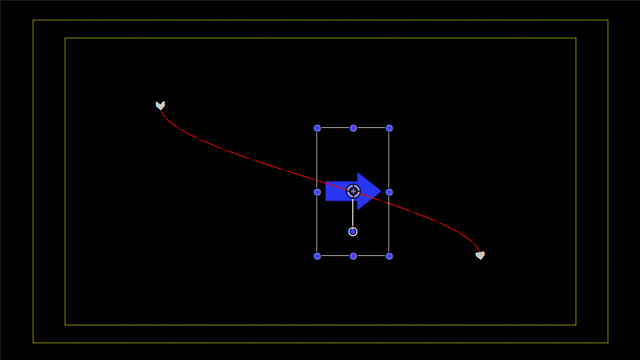
Here’s what our path looks like so far. The slight curves are caused by FCP X automatically enabling Ease In / Ease Out (acceleration / deceleration) at each keyframe.
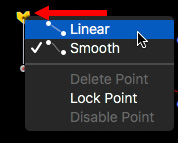
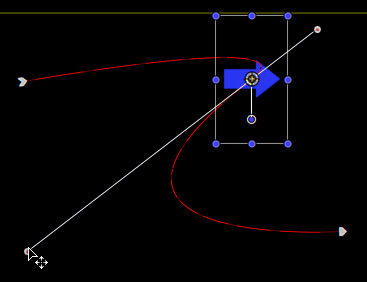
To convert a keyframe between a straight-line and a curve, control-click (right-click) it and choose:
NOTE: You can also use this menu to delete a motion path keyframe, lock it so it can’t be moved, or disable it so that it there, but not active.
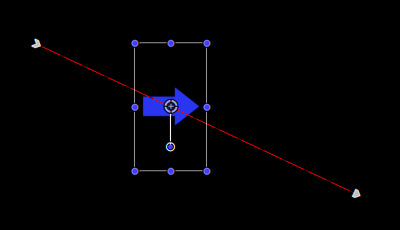
Here’s the motion path with both keyframes set to Linear.
GIVE YOUR MOTION A CURVE
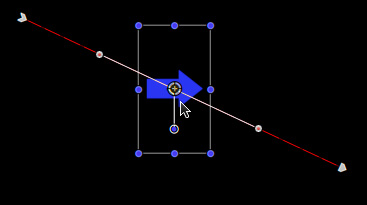
To add a curve to the motion path, position the playhead in the clip in the timeline where you want the curve to occur. Make sure the motion path is still visible (the blue box to the right of Position is still blue), then click the element to select it.
Drag the element to create the curve you want.
Drag one of the white Beziér control handles to change the shape of the curve.
NOTE: Watch what happens when you press Shift, Option, or Shift + Option while dragging. Shift constrains movement, while Option allows you to drag only one side.
The best thing to do here is drag to change the shape of the curve, then play the clip to see what you’ve done. Seeing what happens is far easier than writing about it.
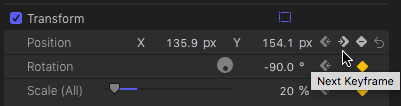
To move between keyframes, use the left / right arrows next to the parameter to precisely jump between keyframes. This is MUCH better than dragging the playhead and hoping to land on the frame that contains a keyframe.
SUMMARY
There is no limit to the number of keyframes you can add to a clip. Nor is there a limit to the number of parameters you can change for each keyframe.
The key is to display the motion path so you can make changes. Once you find that gray/blue button, there’s no limit to what you can create.
Have fun!

2,000 Video Training Titles
Edit smarter with Larry Jordan. Available in our store.
Access over 2,000 on-demand video editing courses. Become a member of our Video Training Library today!
Subscribe to Larry's FREE weekly newsletter and
save 10%
on your first purchase.
7 Responses to FCP X: Throw Your Animation a Curve
tried this using fcp x 10.3.4. all was well except i did not see the white Beziér control handles. is this a setting of version dependent?
Thanks again for a great tutorial.
ok clicked again and they showed up! Thanks again.
Jay:
Glad you found them. The Bezier control handles have been in since, at least, FCP X 10.1.
Larry
Can I add a curve to crop keyframe animation? or any other animation from when I click on “show video animation on the timeline”
Wade:
I just experimented with this quickly and it does not look like it.
Larry
Oh my goodness, thank you so much! I was going crazy trying to figure this out! I typed in my question to google and of course your tutorial showed up! Why I didn’t go here to look in the first place I’ll never know!
Thank you as always for giving me a place to find the answer!
Sandee:
Smile… why not indeed? Glad I could help.
Larry