
![]() Recently, I got an email from a reader asking how to change Project Properties in Final Cut Pro X. It isn’t hard, but there are a couple of hidden steps.
Recently, I got an email from a reader asking how to change Project Properties in Final Cut Pro X. It isn’t hard, but there are a couple of hidden steps.
Most of the time, when you create a project, the settings are fine; especially when you let your Project auto-configure itself based upon the first clip you edit into it.
However, every so often, you edit the wrong type clip in first and the Project configures incorrectly, or you want to change the image size, or the render format. Here’s how.
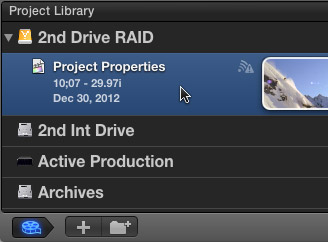
Select the Project you want to change in the Project Library.
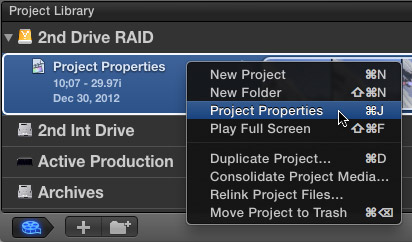
Then, either right-click the name of the project, type Command+J, or choose File > Project Properties.
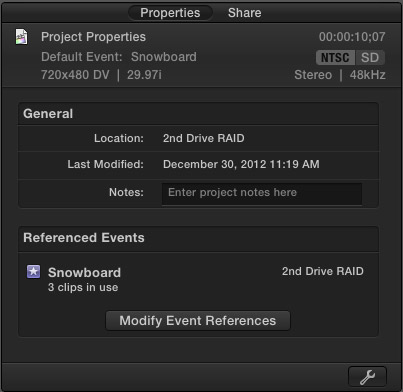
This opens the Properties tab in the Inspector.
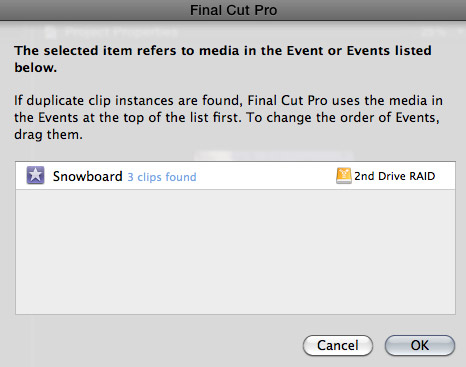
Clicking the Modify Event References button allows you view which Events are storing the media used in your Project. If you are using multiple Events, you can change their priority by dragging them up or down.
NOTE: Personally, I’ve never used this feature. However, it is nice to know it is here.
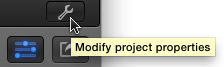
Click the Wrench icon in the lower right corner to open the Project Properties panel.
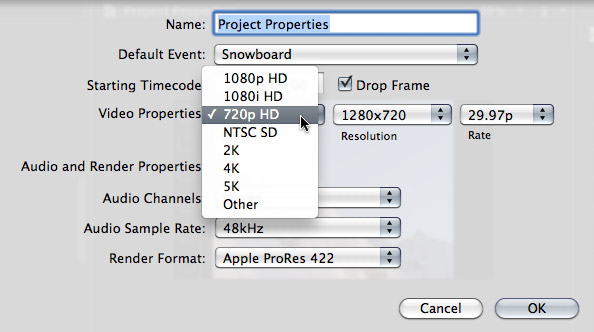
Here, you can change many of the settings of your project; including starting timecode and image size. However, once you have media edited into your Project, you are not able to change frame rate.
If you need to change the frame rate, the easiest thing to do is create a new Project, then copy the clips from the old Project and paste them into the new one.
NOTE: The best time to change project properties is when there are no clips edited into the sequence. When a sequence is empty, any property can be changed.
When you are happy with your revised settings, click OK.
Done.

2,000 Video Training Titles
Edit smarter with Larry Jordan. Available in our store.
Access over 2,000 on-demand video editing courses. Become a member of our Video Training Library today!
Subscribe to Larry's FREE weekly newsletter and
save 10%
on your first purchase.
51 Responses to FCP X: Change Project Settings
← Older Comments-
 Zareh says:
December 24, 2020 at 4:53 am
-
 Larry Jordan says:
December 24, 2020 at 8:23 am
-
 Zareh says:
December 26, 2020 at 12:13 am
-
 Larry says:
December 26, 2020 at 9:47 am
-
 Larry Jordan says:
December 26, 2020 at 11:50 am
-
 Zareh says:
December 28, 2020 at 4:58 am
-
 Larry says:
December 28, 2020 at 8:25 am
-
 Zareh says:
December 28, 2020 at 10:14 am
← Older CommentsHi Larry!
Hope this finds you well.
I want to begin a large project in FCPX that mixes footage shot in PAL SD 25p anamorphic (on a Panasonic DVX 100) and footage shot in NTSC 720p 24pn (Panasonic HPX 170P).
What recommendations might you have in setting up the timeline/workflow?
Thank you, as always.
Zareh
Zareh:
This is a good question, but it is the wrong question. FIRST, you need to decide what video format you need to deliver? HD / 4K? HD / HDR? 24 / 25 / 30 fps. You have a lot of decisions to make on your deliverables before you start massaging your source media.
Assuming it is some form of HD, you next need to decide how to treat the low resolution of SD media – simply enlarging it will make it look blurry. Take a look at how “Good Night and Good Luck” – the movie – handled SD kinescopes of Senator McCarthy in a modern feature film. It was brilliant.
Finally, once you know what you need to deliver, and how to address the low-res of SD, you can then decide about frame rates.
Larry
Thanks Larry!
Indeed, choices, choices, choices…
Choice 1: Since the majority of the media is SD (anamorphic), to create a project based on the SD settings (PAL, SD, 25fps) and down-converting (is that the term?) the remaining NTSC 720p 24fps material to blend in with the older footage.
Choice 2: The opposite. Create a project based on the HD media and convert the majority SD material inside the timeline to conform.
Choice 3: Creating a project in 1080p and converting ALL of the footage – SD and 720p – in the timeline.
Ultimately, the deliverable would be 1080p. The completed work could always be converted to ever higher resolutions (with ever diminishing returns) via Convertor, no?
I looked at “Good Night and Good Luck” – thanks for the tip – and indeed it’s beautifully done. But how? In the past I’ve followed your post “Compressor 4: Convert SD to HD” – I presume the steps haven’t substantially changed – but blurriness always seemed par for the course. In terms of workflow, with so much raw material in SD it seems like needless waste of time and space to convert all of it in compressor BEFORE editing, as I don’t know what footage will end up in the finished project.
Sorry for the long post. With an archive of two decades worth of low res material, navigating the ever shifting sands of the HD landscape – technically and aesthetically – has been the bane of my existence. Your sage advice, as ever, is deeply appreciated.
Zareh
Zareh:
You are missing the larger point of “Good Night & Good Luck.” Even though there was TONS of SD footage in the movie, at NO TIME did any of those clips get displayed full screen. They were always shot in a monitor or some other reduced-size space.
Nothing you can do will make SD footage look good when enlarged 700% to fill a 1080p frame. Instead, look for ways to mask it into a smaller frame within the larger frame.
Finally, match the frame rates of your SD clips to match the frame rate of your master project. You only want to change the frame rate once – make SURE that the frame rate of your project matches the frame rate you need to deliver. And, if you are going to the web, frame rates don’t matter.
Larry
Zareh:
You MAY have another option. Read this tip:
https://www.theinsidetips.com/?p=6425
Then, view the link it refers to.
Larry
Thank you Larry for your replies, and Happy Holidays by the way. I’ve been exploring Topaz and downloaded the test drive. Though it crashes on preview, I’ll keep trying.
In the spirit of Columbo, “just one more thing”: I noticed that the material I shot in 25p with my DVX-100 PAL shows as 25i in final cut. In the clip settings there is an option under ‘field dominance override’ for progressive. Should I just select this, or might there be another issue to address?
These tapes were initially digitized for a project in FCP7 which was translated to FCPX using ‘sendtox’.
Zareh:
Virtually all PAL footage is interlaced (“i”). The easiest way to convert it to progressive, which we need for the web, is to set the project to Progressive, as you indicate.
Do a test and export the video. If it looks good, you should be OK.
If it looks bad, reset the project to interlaced (the source files are NOT changed), then remove interlacing after the project is complete using Compressor.
Either way, a few tests will show you what looks the best.
Larry
Larry,
Thanks so much for this. I’m really grateful to you for your generous help and time.
Take care,
Zareh