
![]()
[ To see how Compressor works, check out this step-by-step video training. ]
Recently, I received a variety of emails from folks having grayscale or color problems when compressing files using Compressor 4 and H.264. Their images were looking dark, or washed out.
If you are looking for ways to improve your images when they get compressed, this article can help. However, this is an intermediate article. If you are new to Compressor, or compression, this will seem a bit daunting; however, the results should be worth the work. (With video compression, every compression project is different and there is no one perfect compression setting. That would be too easy!)
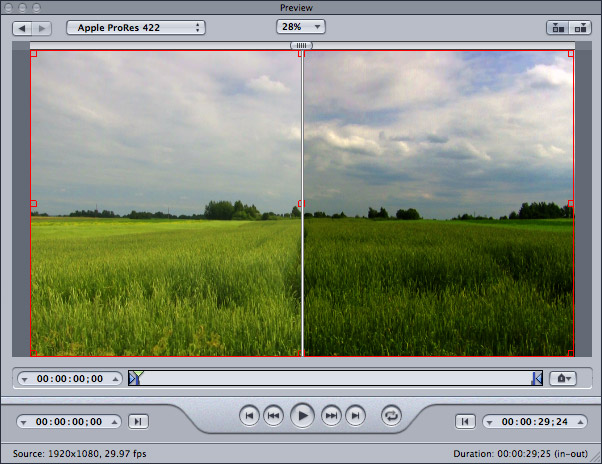
This image is a mock-up, but it illustrates the problem. The Before image, on the left, is lighter than the After image, on the right.
THE PROBLEM
The problem, in some cases, is caused by the H.264 codec that Apple ships with Compressor. I have found, in my own work, that this codec tends to wash out colors and modify the gamma (gray scale) values of an image.
I’ve noticed this problem in both Compressor 3.x and 4.x. Sometimes, these changes are not visible enough to care about. Other times they are.
OPTIONAL SOLUTIONS
There are several options to fix this. First, is to use other software for video compression. Alternatives are:
In addition to these, there are many others to choose from. However, if you are working with Final Cut, the benefits of using Compressor often outweigh the image problems. In which case, we need to find a fix.
CHANGE FILTER SETTINGS
If I know I need to use the H.264 codec for compression, I will always add two filters to compensate for the image changes.

In the Filters section of the Inspector, I will add the Color Correct Midtones filter, then boost the Red, Green, and Blue channels by 3.0. What this does is increase color saturation without adding any color casts.
While we can also alter color settings for highlights and shadows, the “sweet spot” for color correction is the midtones. For this reason, I only add this one filter to adjust for color.
NOTE: While there is a long technical explanation behind this, think about a grapefruit. The shape of the grapefruit represents your color space. White is at the north pole, black is at the south pole. Saturation is determined by the amount of horizontal distance from the center of the grapefruit to the edge. Clearly, you have more room to move in the middle (Midtones) than you do at the poles (highlights and shadows).
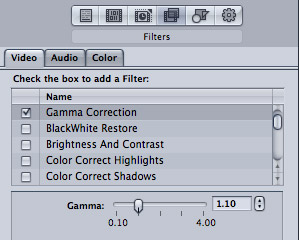
Next, I add Gamma Correction. This adjusts the gray-scale value of the midtones. Here, I’ll add a setting between 1.05 and 1.10. To me, this adds a bit of richness to the image during compression.
These settings generally work fine and I use them in many of my projects.
PLAN B
However, another way to solve this issue is to change the codec from H.264 to X.264. X.264 is the open source version of H.264. They are fully compatible and interchangeable.
I’ve found that the X.264 codec delivers great looking images, at equal or greater compression speed, to H.264, without needing to add compensating filters. In some cases, you may see slightly improved file size.
Best of all, it’s free.
INSTALL THE CODEC
To get started, you need to download and install the X.264 codec. Be sure to download version 1.2.27 or later. There are many earlier X.264 versions which won’t work with later versions of the Mac OS. You can find this in a variety of places, here’s one: http://www.macupdate.com/app/mac/24173/x264encoder
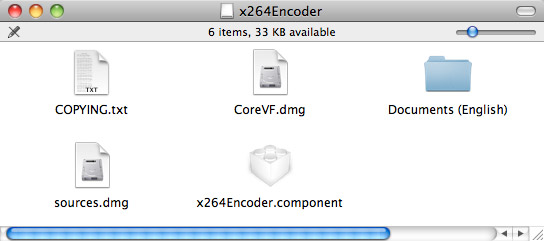
Once the DMG file downloads, double-click it to uncompress the components. The x264Encoder.component is what we need to install, but, before you do, open the Documents (English) folder.
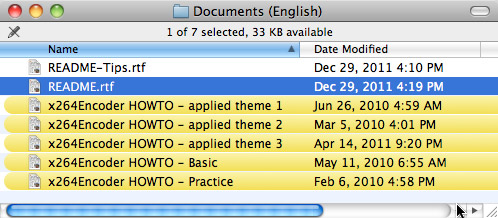
This files – especially the README.rtf – will tell you a lot about how to really optimize this filter. (Don’t panic if this starts to get really complicated. You don’t need to know all of this to get started.)
To install, open your boot drive (generally called Macintosh HD) then open the Library folder.
NOTE: This is NOT the Library folder in your Home directory.
Open the Library folder, then scroll down until you find the QuickTime folder.
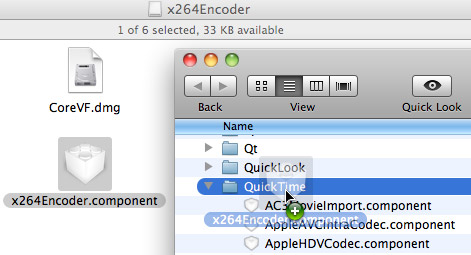
Then, drag the x264Encoder.component file into the QuickTime folder.
NOTE: Be careful to put this into the QuickTime folder. Dropping it by accident into either the Qt or QuickLook folders is gonna cause problems.
Once the component is installed, close the folders. You don’t need to restart your system for this to work.
NOTE: You must install this Encoder before starting Compressor.
USING THE CODEC
Installation is a one-time effort. After that, we can turn our attention to Compressor. Start by opening Compressor. (These instructions work for either Compressor 3.x or 4.x.)
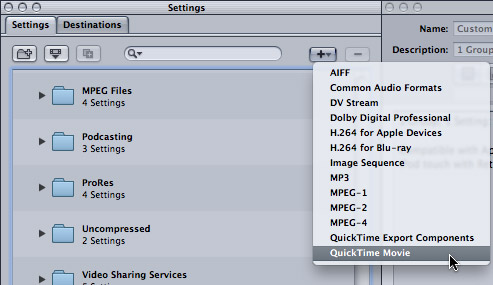
Next, create a new QuickTime compression setting by clicking the Plus key. I won’t go through all the settings, as I’ve written dozens of articles about Compressor – you can find them here: Click here
Select QuickTime Movie, because this allows us to change the codec.
NOTE: Once you’ve created a QuickTime movie, you can use QuickTime Player 7 to export it into an MP4 movie, without recompressing the file. I use this technique for many of my training movies.
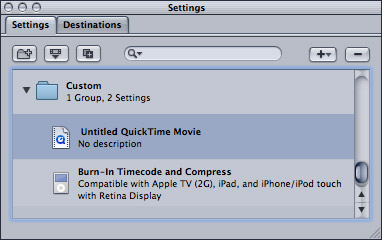
Select the new Setting in the Settings tab – it will be called Untitled QuickTime Movie – to open it into the Inspector. Click the Encoder icon (second from left, just below the Description field).
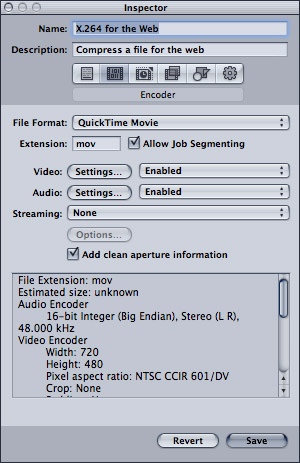
Give the file a name and description.
NOTE: X.264 and H.264 should only be used when creating files for the web. If you plan to edit the resulting file, convert it to ProRes instead. AVCHD files compressed into H.264 for editing will look just awful.
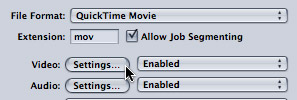
Click the Settings button next to Video to open the Compression Settings window.
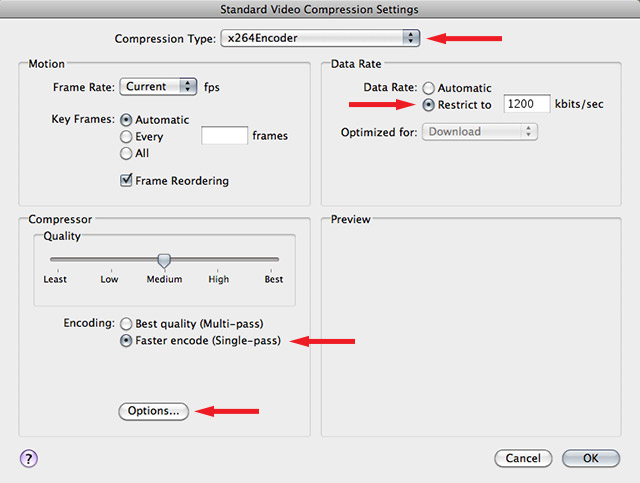
At the top, set the Compression Type to x264Encoder.
If you set Data Rate to Automatic, the Quality slider can be used. If you set the Data Rate to Restrict to, you need to then enter a number for the data rate and ignore the Quality slider. I always set a data rate, and here, I’m using 1200 kbps.
The developer of this codec provides the following compression suggestions:
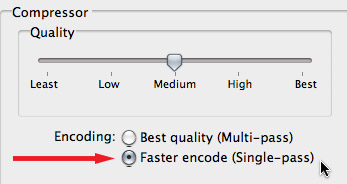
Click the Encoding radio buttons to switch between Multi-pass and Single-pass.
Click the Options button, below the Compressor Quality setting, to display a HOST of other options. Frankly, this whole screen scares me. Don’t touch nothing here!
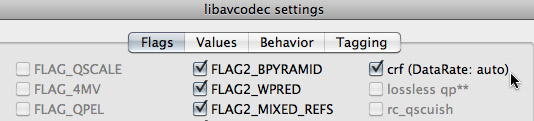
Except, to turn on CRF, click the Flags tab and check the CRF checkbox. Look around if you like, but don’t change anything else. Click OK when you are sufficiently impressed.
Then, in the encoding window, click OK.
NOTE: I compressed the same video with CRF on and off and didn’t notice any difference. In both cases, I compressed 720p HD video using a 1200 kbps rate.
Here’s the final result. The Source is on top and the Compressed version is on the bottom. (I encoded it as single-pass, CRF turned on.) In this screen shot, both images are reduced to about 25% of normal size.
Try this yourself. Start by not changing the CRF. See if you like the results. Then, turn CRF on and see if anything improves. Great compression is a matter of making small changes and watching the results. Now, you have another tool you can use to improve your work.

2,000 Video Training Titles
Edit smarter with Larry Jordan. Available in our store.
Access over 2,000 on-demand video editing courses. Become a member of our Video Training Library today!
Subscribe to Larry's FREE weekly newsletter and
save 10%
on your first purchase.
42 Responses to Compressor: X.264 to Improve Video
← Older Comments Newer Comments →-
 Lorne Ould says:
February 2, 2016 at 10:59 pm
-
 Larry says:
February 3, 2016 at 9:15 pm
-
 Lorne Ould says:
February 12, 2016 at 2:28 pm
-
 Larry Jordan says:
February 12, 2016 at 3:27 pm
-
 Lorne Ould says:
April 16, 2016 at 8:32 pm
-
 Larry Jordan says:
April 16, 2016 at 9:25 pm
-
 Lorne Ould says:
April 18, 2016 at 11:40 pm
-
 Larry Jordan says:
April 19, 2016 at 7:32 am
-
 Lorne Ould says:
April 20, 2016 at 5:44 pm
-
 Larry Jordan says:
April 21, 2016 at 9:56 am
-
 Lorne Ould says:
April 29, 2016 at 11:06 am
-
 Larry says:
May 2, 2016 at 5:36 am
-
 Lorne says:
April 29, 2016 at 11:41 am
-
 Larry says:
May 2, 2016 at 5:37 am
-
 Lorne Ould says:
December 23, 2016 at 6:48 pm
-
 Larry Jordan says:
December 23, 2016 at 7:38 pm
-
 Kurt says:
February 10, 2019 at 11:15 am
-
 Larry says:
February 10, 2019 at 11:24 am
-
 Kurt says:
February 10, 2019 at 12:34 pm
-
 Kurt says:
February 10, 2019 at 12:45 pm
← Older Comments Newer Comments →Hello,
I am working on large screen projects, and I do see many small files that provide great full screen quality.
Do You recommend the x264 codec for this application ?
Some Features can be as much as 50 GB on a Blu Ray though some files can be as small as 2 GB and still look very decent,
Please Advise,
Lorne.
Lorne:
X.264 is perfectly fine, though if the data rate is too low, you’ll see compression artifacts. If you are interested in highest projection image quality, I’d recommend ProRes 422, though the file sizes are very big, the image quality is outstanding; especially for projection.
Larry
Hi Larry,
I have a client that requires MP4 output(1920 x 1080),
I am using quick time conversion, etc. rate as high as 15000kbps, and I can still see some minor artifacts during fades, any comment is welcome,
Kindest,
Lorne.
Lorne:
Some of these artifacts may be unavoidable, that just the nature of compression.
Areas that show artifacts the most are dissolve and gradients – MP4 uses 8-bit video which does not handle these well, especially if they are very slow. Also, the math used to create MP4 tends to create stair-stepping and blocky artifacts.
A compressed video will never perfectly match the source file – however, as you discovered, setting a higher bit rate will help. Try 20,000 kbps and see if that helps.
Larry
Hi Larry,
I am moving to a super fast i7 with all the peripherals,
Can I run FCP 6 and reduce render time with the new speed ?, or is FCP X an integral part of the system and operation.
Best,
Lorne.
Yes and no.
Yes you can take advantage of the faster processor. But FCP 6 does not access more than one core, nor more than 4GB of RAM, nor the GPU.
Larry
Hi Larry,
I am testing the new FCPX, I am a novice with this platform, I have source video HDV 1080i 1440 x 1080, I cannot find the correct tab, file, etc. to adjust the timeline to be 1920 x 1080, square pixels for the export ?
Please Advise,kindest,
Lorne.
Lorne:
If your project is set to 1920 x 1080, then the changes have already been made.
All you need to do is export.
Larry
Hi Larry,
Just viewed your keying tutorial in FCPX, the question I have is related to foreground using a blue screen.
The person is wearing a very light blue shirt, when using FCP 6, this would not have been an issue, as the color of the back ground is far darker than the shirt.
The back ground and foreground are professionally lit.
in FCPX the auto key turns the shirt beige, what is the cause, I do like the look but not for my corporate usage.
I simply need to key the blue without any filter on the foreground.
Kindest,
Lorne.
Lorne:
It is NEVER a good idea to use the same color in the foreground as you are using in the background. What you are seeing is a partial key of your talents shirt.
Using the Color Selection tools in FCP X chroma keyed, you need to restrict the blue color you are selecting so that it excludes the color of the shirt. Worst case, you will need to create a mask that excludes the shirt from the key.
Larry
Hi Larry, Just enjoyed your keynote on FCPX, there is banding on your glasses, what would be causing that ?
Lorne.
Lorne:
Banding is caused by a bit depth that is too shallow to support a gradient range of colors. In other words, its a compression issue.
(And I’m glad you liked the keynote.)
Larry
Hi Larry, have you ever used Pixel film studios software ?
I am looking in to FCPX LUT Cinematic Look Up Tables Volume 3, for generating a film look (24 FPS), etc. any recommendations ?
Lorne.
Lorne:
I haven’t used their software, so I don’t have an opinion.
Larry
Hi Larry,
Hope you are well.
I sent u an email, no response.
I am looking for a High Efficiency video compressor for a very large project that I want to retain the quality at small file size,
Best for u and the family during the holidays,
Lorne.
Lorne:
I’m sorry you didn’t get my response, because I replied to you.
You can not reduce file size AND retain all the image quality. There is no codec on the planet that will do this. (However, you can compress the data in the file using ZIP compression – this will reduce file size but make the file unplayable until it is unzipped. Zipping is a good choice when you are archiving.)
When dealing with large projects, you want to find compression software that will automate the compression process either Droplets or Watch Folders so that you can configure your settings once, then let the automation take over.
The smaller the bit rate, the smaller the file BUT the more image quality you lose. Therefore, you need to test your compression settings to find the sweet spot where the files are small “enough” yet retain “enough” image quality so that they still look good.
Most compression software works by throwing away color data and combining similar gray scale regions. This makes the file much smaller, but can introduce banding and remove color subtlety in gradients.
Larry
Hi Larry, do you know if x265Encoder.component exists like the x264?
I’d like to install this into compressor as well. I had no real luck searching around online for it.
Thanks
Kurt:
Even if it exists, it’s going to be REALLY slow. The only efficient way to create H.265 is using hardware acceleration, and that uses the H.265 codec. The difference between software and hardware encoding is that hardware is about 6x faster.
Larry
Hi Larry, thanks for the quick reply.
What I have been doing is using handbrake to do the encoding rather than compressor because of speed. Playing around with the various encoder options is giving me much better speed vs quality than I can get with compressor. I am not positive, but I think handbrake is using x265. I did see some rumblings on line about CUDA using h265 for encoding but I havent really looked into it. I have an Nvidia gtx 680 on a desktop macPro (2010) 3.33 6 core and 32 gig Ram if it matters.
I forgot to mention.. I did try messing around with other various converters using what I believe is h265 and not x265, and all of them have low CPU usage while encoding. Handbrake however gets the CPU cooking upwards of 100%.. I have to bring the CPU usage back a bit if I want to do anything else on the system… So maybe Hanbrake and x265 are running via hardware? I am not sure how to tell, other than seeing the CPU max out. Thanks again..